Setting Up the Creative Suite with the Same Color Management Settings
| On a typical day, I'll work in Photoshop, Illustrator, and InDesign at one point or another. Many times, I'm saving files from one program and opening them in another. One of the things that always bugged me was color management settings throughout all of the programs. I had to go in and manually set each one of them. If I didn't, I'd risk the colors looking different in each program. When CS2 came out, I was very relieved that they consolidated color management throughout the Suite into one place. Synchronizing Color Management SettingsStep OneOpen Adobe Bridge. Choose Edit>Creative Suite Color Settings or press Command-Shift-K (PC: Control-Shift-K) to open the Suite Color Settings dialog. By default, the Creative Suite color settings are synchronized as displayed in this dialog.
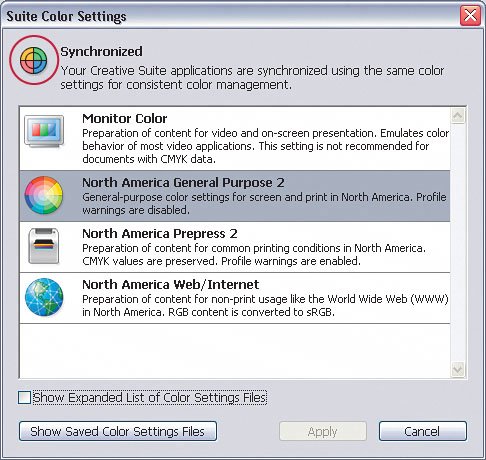
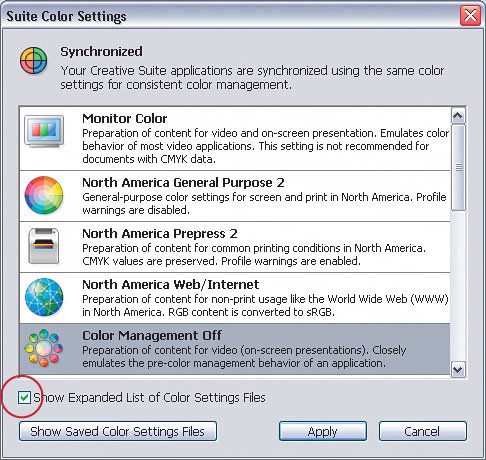
Step TwoTo see more color setting profiles, turn on the Show Expanded List of Color Settings Files checkbox at the bottom of the dialog. To change your color settings for all Creative Suite applications, just click the setting you want in the list, and then click the Apply button. Step ThreeThe Creative Suite applications are now synchronized using the color setting you specified. You can always check your settings by choosing Edit>Creative Suite Color Settings in Bridge or by choosing Bridge Center in the Favorites palette. You'll see the current synchronization state at the bottom of the window. 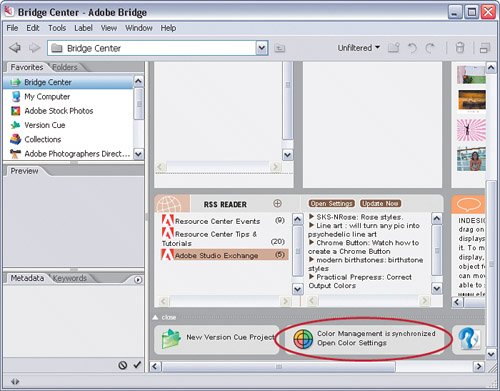
Specifying a Specific Color Management Setting for One ProgramStep OneIn Photoshop, choose Edit>Color Settings or press Command-Shift-K (PC: Control-Shift-K). This opens the Color Settings dialog. The first thing you'll see is the same icon you saw in Bridge's Suite Color Settings dialog letting you know that the color settings are synchronized.  Step TwoChange the Settings option to something different than it is now. In my example, I'm changing it from North America General Purpose 2 to North America Prepress 2. 
Step ThreeAs soon as you do this, the icon at the top will change to let you know that the color settings are no longer synchronized for consistent color. 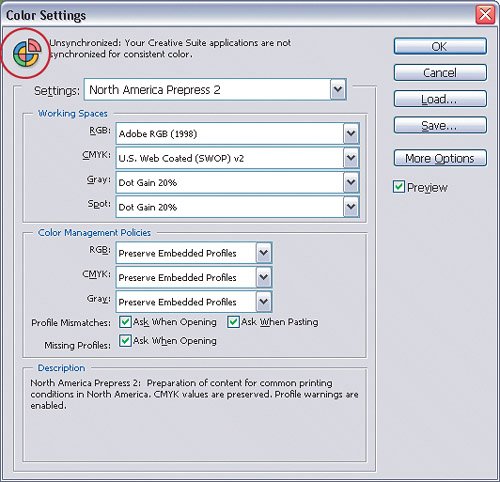 Step FourTo resynchronize the color settings in the Creative Suite, either go through Photoshop's Color Settings dialog and change the color setting to the setting the rest of the Creative Suite uses or see the previous Synchronizing Color Management Settings tutorial. 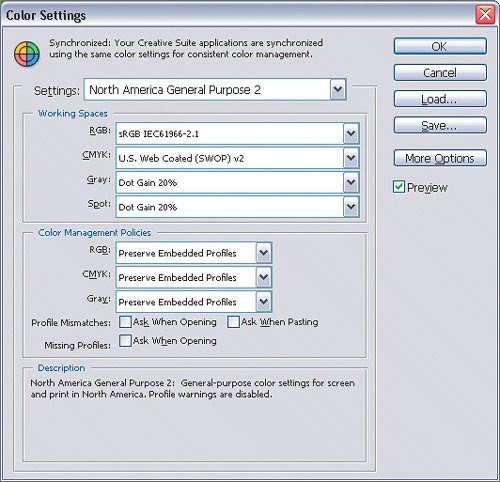
|


EAN: 2147483647
Pages: 113