Getting Your Portfolio on the Web (and Customizing It)
Getting Your Portfolio on the Web (and Customizing It!)At Photoshop World Boston in September 2005, I taught a class called Getting Your Portfolio on the Web. It was all about getting photos on the Web and concentrated heavily on the Web Photo Gallery. I was amazed to see how many people knew the Web Photo Gallery was there but still had questions as to what really was going on. The first part of this tutorial involves creating the Web Photo Gallery. Luckily, there's not much to it since Photoshop does most of the hard work for you. Step OneIn Bridge, select the photos that you want to add to the Web Photo Gallery. Then choose Tools>Photoshop>Web Photo Gallery. This launches you into the Web Photo Gallery automation in Photoshop and opens the dialog that walks you through the process of creating the gallery. ©MATT KLOSKOWSKI Step TwoThe first choice in the Web Photo Gallery dialog is one of the most important and has actually been improved in CS2. The Styles setting affects how your Web gallery is going to look. In addition to HTML templates, Adobe has actually added Flash-based Web galleries in CS2. For this example, let's just choose Horizontal Neutral from the Styles pop-up menu. You can also add an email address so visitors to the gallery can contact you. 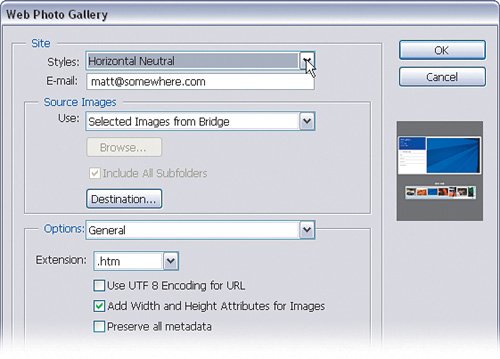
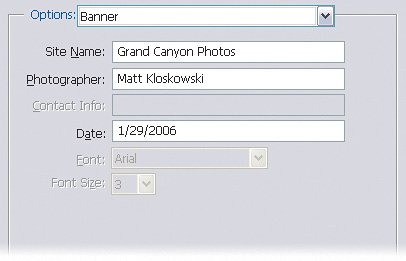
Step ThreeIn the Source Images section, you can change the Use choice but since we launched from Bridge, we've already picked the images we want. Click the Destination button to tell Photoshop where you want to save your gallery. I usually just create a new folder on the Desktop to hold the webpage. 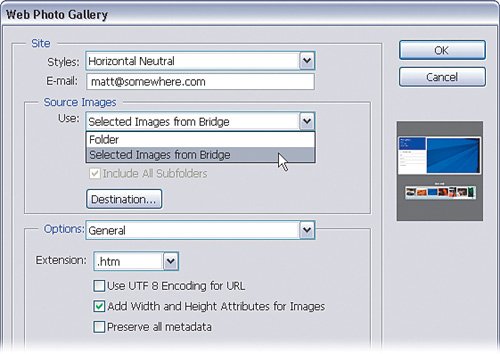 Step FourIn the Options section, you can do as much or as little as you want to change the gallery options. If you want to leave them alone, then go right ahead. For this example, though, choose Banner from the Options pop-up menu, enter a Site Name, and then enter your name as the Photographer (the Date field will automatically populate with the current date). Step FiveThat's it. Click OK to run the automation and build your Web gallery. Photoshop will do its thing for a moment. It will resize each selected photo to build a thumbnail and large image and then place them into the Web template. When it's done, you'll see the webpage launch in a browser. Keep in mind that the webpage is not live yet. You'll need to take the contents of the folder that you created and upload it to your website hosting company. 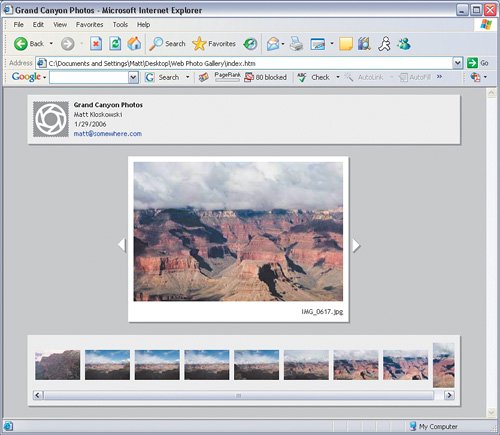 ©MATT KLOSKOWSKI
|


EAN: 2147483647
Pages: 113