Saving Specific Settings in Camera Raw
| Sometimes I use Camera Raw to create black-and-white photos. Since this conversion has a few steps (such as setting the Saturation to 0), it's a good candidate to save the settings to reapply to other photos. Here's the problem: By just using the Save Settings option, Camera Raw saves everything (exposure, contrast, etc.) and that's not good since each photo's ideal settings may be different. I only want to save a few settings. That's where Save Settings Subset comes in handy. It lets me just save a subset of the settings I want and leave the rest alone. Step OneOpen a photo in Camera Raw that you'd like to convert to black and white. In the Adjust tab, the first thing you'll need to do is click-and-drag the Saturation slider all the way to the left and drop it down to -100. 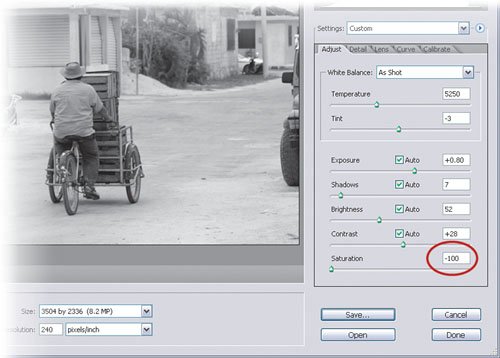 Step TwoNext, you may also want to adjust the Contrast or Brightness, as well as any other settings under the Adjust tab, for this specific photo. However, those settings will most likely differ for each black-and-white conversion while the Saturation change is likely one that will always be the same. 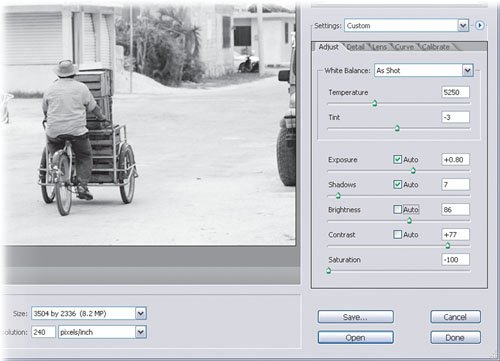
Step ThreeNow, go under the Calibrate tab. Here you can adjust the Red, Green, and Blue channels to really enhance the black-and-white effect. Again, these settings may change for each photo but you'll probably develop a few favorites here, so why not save them as well? 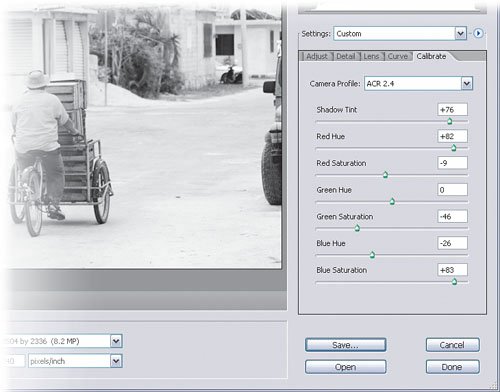 The ProblemIf you click the small, right-facing triangle next to the Settings pop-up menu, you'll see two Save Settings options on the resulting flyout menuone for Save Settings and another for Save Settings Subset. If I were to choose the Save Settings option, Camera Raw would save all of the settings, not just the Saturation and those under the Calibrate tab. That would be fine if every photo looked the same, but they don't. It's likely that each photo you take will require different Exposure, Contrast, and Brightness settings, so we probably don't want to save those. Here's what to do to avoid that. 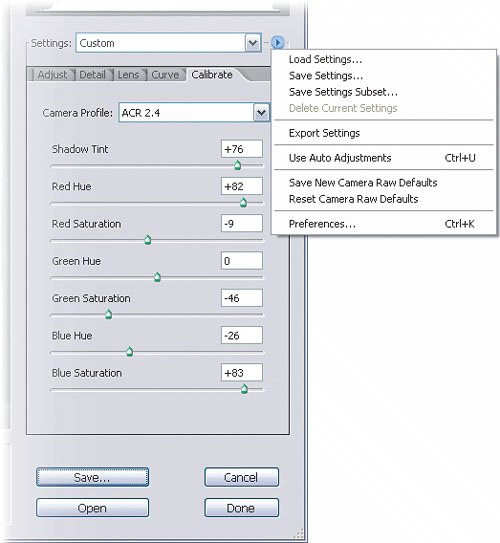
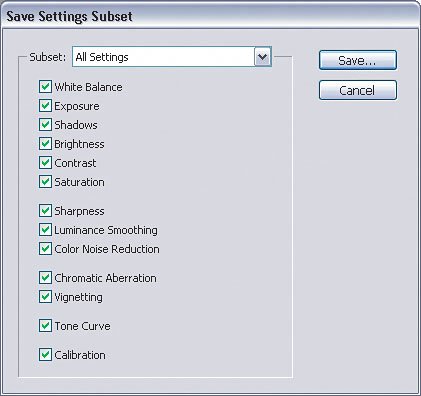
Step FourChoose Save Settings Subset from the flyout menu that appears when you click that small triangle. You'll see the dialog on the left appear. Step FiveSince you don't want to save anything else besides Saturation and Calibration settings, uncheck everything except the Saturation and Calibration options. Click Save to save these settings. Name it something descriptive like "Black and White Conversion" because this saved setting is going to show up in your Settings menu when you're done and you want to be able to find it quickly later on. Click the Save button when you're done. 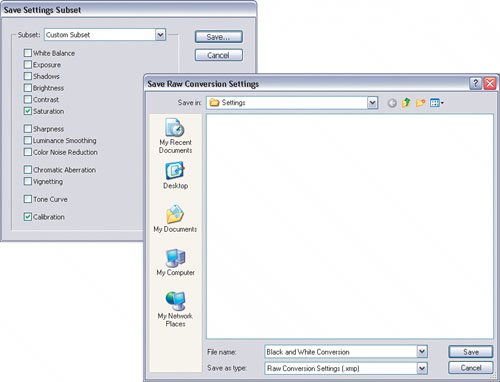 Step SixTo use this custom setting, just open another photo in Camera Raw. Click on the Settings pop-up menu, select the black-and-white custom setting subset you just created, and your black-and-white Saturation and Calibration settings will automatically be applied. 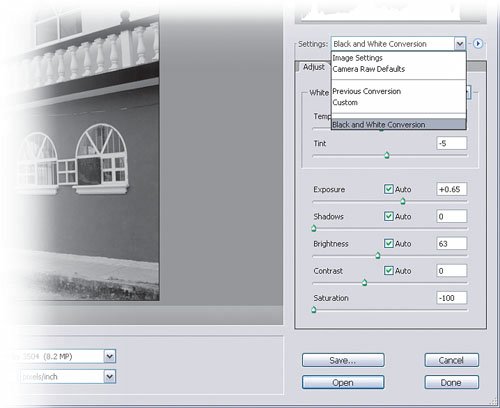
|
EAN: 2147483647
Pages: 113