Creating a Smart Picture Package
| I have to tell you that one of my favorite things to demo in front of people is Photoshop CS2's new Smart Object feature. Imagine this: I create a custom picture package in Photoshop. I go on to insert multiple copies of a photo at different sizes in a document. Then I talk about changing the custom package to use another photo and how I need to go in and replace all of the photos manually. After that, I show how to do the same thing with Smart Objects with basically two clicks. The "ooooh" and "ahhhh" reactions that I get are priceless. What is a Smart Object and Why Use Them?I actually received this exact question from someone and I think it's a great place to start. Smart Objects allow you to non-destructively scale, transform, rotate, and warp any raster or vector graphic in Photoshop. The best part about them is the fact that Photoshop preserves the editability of the Smart Object layer no matter what, even for high-resolution vector graphics from Adobe Illustrator. The results of enlarging an image that wasn't a Smart Object The same image enlarged as a Smart Object
Step OneChoose File>New or press Command-N (PC: Control-N) to create a new blank document. From the Preset pop-up menu, choose 8x10 and then click OK. Turn on the grid by pressing Command-' (PC: Control-'), and turn on snapping by choosing View>Snap. Choose File>Place and navigate to a photo you want to add to the document. Click the Place button and your image will appear in the document. Press-and-hold the Shift key and adjust the bounding box around the photo to scale it down. Click-and-drag the photo toward the top-right corner and press the Return (PC: Enter) key to confirm the placed image. You can tell it was placed as a Smart Object because you'll see a small icon in the bottom-right corner of the layer thumbnail in the Layers palette. 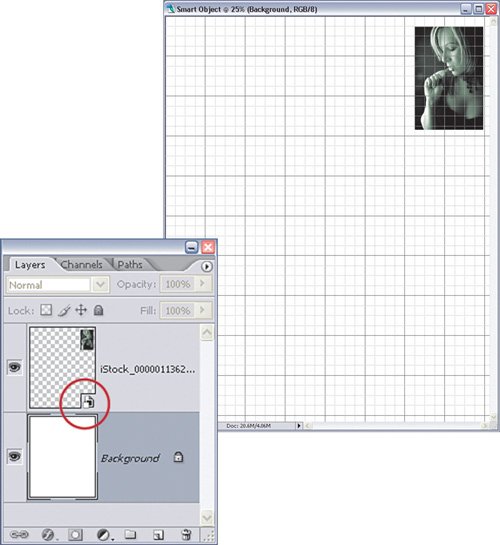 ©ISTOCKPHOTO/EVA SERRABASSA Step TwoDuplicate that layer two times by pressing Command-J (PC: Control-J). Then, click on the first layer copy and use the Move tool (V) to place it below the original along the right side of the document. Repeat this with the second layer copy. 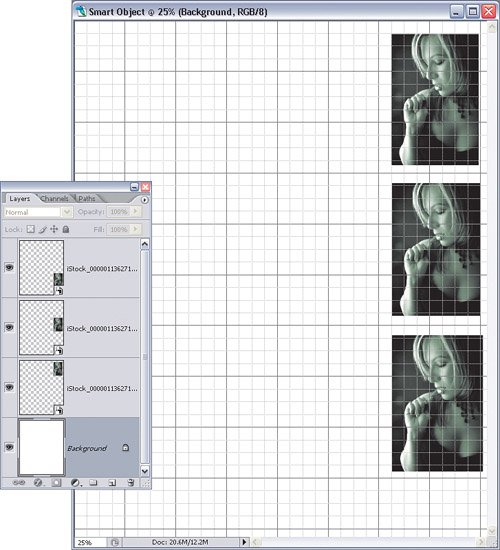
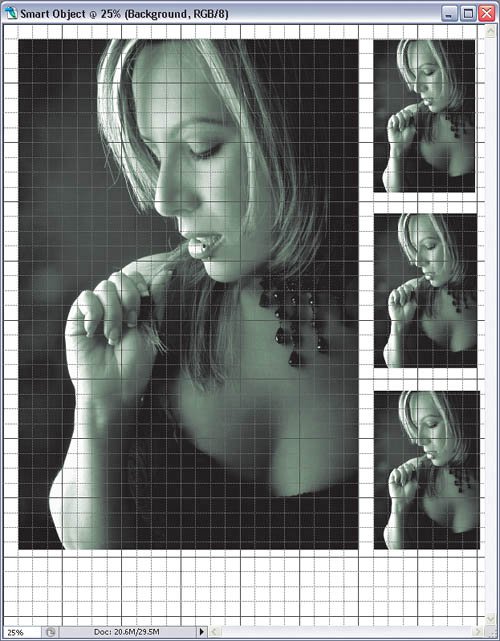
Step ThreeDuplicate the layer a third time. This time, press Command-T (PC: Control-T) to go into Free Transform mode. Press-and-hold the Shift key while you click-and-drag a corner point to make this copy larger. Place it on the left side of the layout and press Return (PC: Enter). Notice how the quality of the photo is retained, even though we resized it. If this weren't a Smart Object, increasing the size of the photo would cause it to lose quality. Step FourThat's not it, though. Resizing and transforming Smart Objects without losing quality is cool enough, but there's another little trick you can do. Let's say you want to change the photo and create another custom picture package. Try this: First, press Command-' (PC: Control-') to turn off the grid. Click on one of the Smart Object layers and choose Layer>Smart Objects>Replace Contents. This will open the Place dialog again. Just go find another photo and click Place. Magically (okay, maybe not) all of the photos will be replaced with the new photo and you'll automatically have another custom picture package.  ©ISTOCKPHOTO/EVA SERRABASSA
|


EAN: 2147483647
Pages: 113