Replacing Only One Smart Object
| In the previous tutorial, you saw how you can easily replace a Smart Object. However, what happens if you don't want to replace all of the Smart Objects? Maybe you only want to change some or one of them. Sometimes Smart Objects are too smart for their own good, but there are ways to work around them and get the results you want. Step OneFollow Steps One through Three in the previous tutorial to create a custom picture package. You should wind up with a document with four Smart Objects in it, each of the same photo. 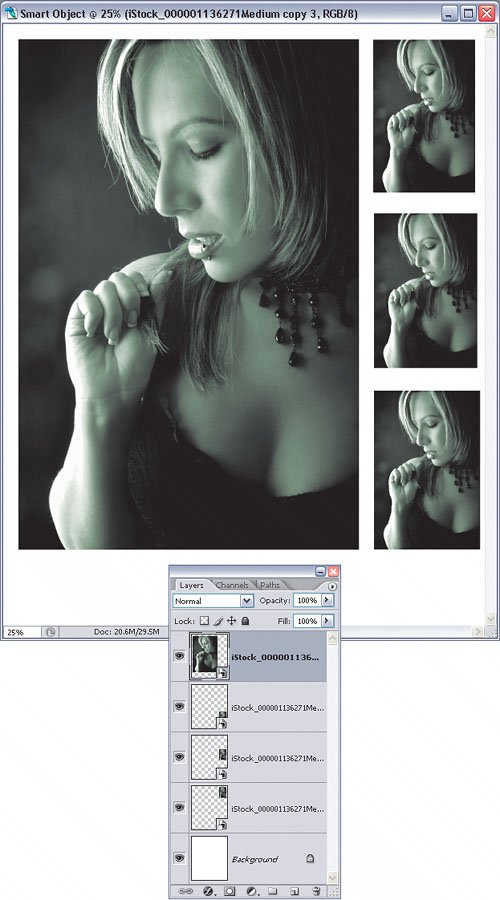
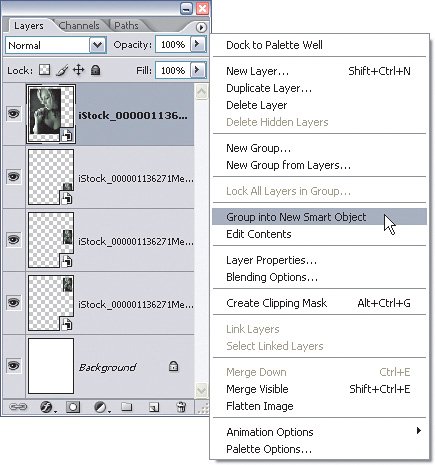
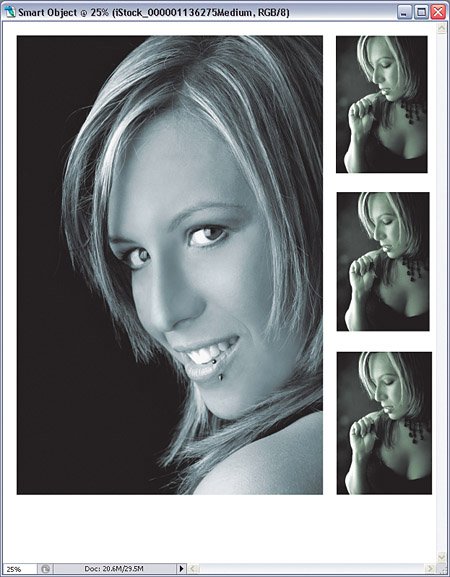
Step TwoNow, let's say you want to replace only one of the photos (the large one, in this example) but leave the other ones as is. Click once on the layer with the large photo to target it. Choose Group into New Smart Object from the Layers palette's flyout menu. You won't see anything change here, but you've essentially broken the link between this Smart Object and the others that you created it from. Step ThreeNow, on the same layer, choose Layer>Smart Objects>Replace Contents. Navigate to another photo in the Place dialog and click the Place button. This time, only the large photo on the left is changed and the other three photos on the right remain the same. This happens because in Step Two we grouped this layer into a new Smart Object, making it an independent Smart Object, not just a duplicate of the original. ©ISTOCKPHOTO/EVA SERRABASSA
|


EAN: 2147483647
Pages: 113
- Chapter I e-Search: A Conceptual Framework of Online Consumer Behavior
- Chapter VIII Personalization Systems and Their Deployment as Web Site Interface Design Decisions
- Chapter X Converting Browsers to Buyers: Key Considerations in Designing Business-to-Consumer Web Sites
- Chapter XI User Satisfaction with Web Portals: An Empirical Study
- Chapter XVIII Web Systems Design, Litigation, and Online Consumer Behavior