6. Capture Digital Video Using USB  BEFORE YOU BEGIN BEFORE YOU BEGIN
4 About Video Capture 7 Control Your DV Camcorder During Capture
 SEE ALSO SEE ALSO
9 Capture Video or Audio Only 10 Capture to the Timeline or Media Panel 11 View Captured Clips 12 About Troubleshooting Capture Problems
Several models in a newer class of DV camcorders are capable of transferring digital video to your computer by way of the recently developed USB Video Class 1.0, an extremely fast delivery system for streaming data over a USB 2.0 connection. A powerful new feature of Premiere Elements 2.0 is its capability to connect to these camcorders and then capture their video files at least as effectively as it can capture over FireWire. It's important to note, however, that the Premiere Elements USB capture system is designed to work only with this still relatively rare class of camcorder. Other USB-connected devices, including MicroMV and DVD camcorders, digital still cameras, picture phones, or other non-DV media should load their files using Premiere Elements's Media Downloader. (See 14 Add Media with the Adobe Media Downloader.)  NOTE NOTE
Your Windows XP operating system must include Service Pack 2 in order to interface with a USB Video Class device.
6. Capture Digital Video Using USB 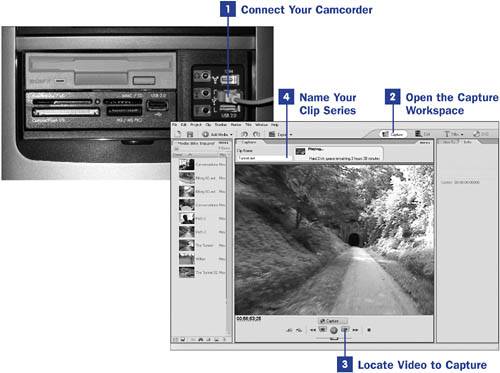 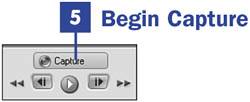
1. | Connect Your Camcorder
Although the risk of a surge damaging your equipment is low, it's best to turn off your camcorder when you connect the cable between your camcorder and your computer. After the two devices are connected, turn on your camcorder and put it in VTR mode. Windows registers the connection, usually with a sound effect. A connection icon also appears in the lower-right corner of your Windows taskbar.
TIPS Windows might not be able to recognize a connected camcorder unless it is also connected with an AC adaptor to a power source. Premiere Elements should recognize your USB Video Class 1.0 camcorder after a connection has been made. However, if Premiere Elements does not recognize your camcorder, click the More button in the upper-right corner of the Capture Monitor panel, select Device Control and, from the Devices drop-down list, select USB Video Class 1.0. It might also be helpful to click on the Options button on this screen and specify the driver for your model of camcorder. (See 12 About Troubleshooting Capture Problems.) | 2. | Open the Capture Workspace
Often, simply connecting your camcorder automatically opens the Capture workspace. Otherwise, click the Capture button in the upper-right corner of any Premiere Elements workspace to open it.
NOTE No preview image appears in the Monitor panel until you play your first clip of video. After playback has begun, the clip continues to be displayed, even while in the pause mode. When you stop the camcorder, the Monitor again displays black. | 3. | Locate Video to Capture
By using the playback and shuttle controls at the bottom center of the Capture workspace to operate your camcorder (see 7 Control Your DV Camcorder During Capture), locate a scene on your videotape that you want to capture to your computer. Pause your video where you want to begin capture.
TIP Ideally, capturing video and outputting video back to your camcorder is a simple process. However, occasionally it doesn't go as smoothly as it should. If you're having problems, such as dropped frames or interruptions, or you simply can't get Premiere Elements to connect to your camcorder, see 12 About Troubleshooting Capture Problems. | 4. | Name Your Clip Series
In the Clip Name window at the upper-left of the Monitor panel, drag to select the name (which defaults to the name of your video project) and then type the name you'd like to give this clip.
As your footage is captured, your clips are automatically named with the name you supply here as well as a sequential number, as in My Movie 01, My Movie 02, and so on.
| 5. | Begin Capture
Click the Capture button just above the playback controls while your video is paused; capture begins as your playback is displayed in the Monitor panel.
It's also possible to begin capture by simply clicking the Capture button while your video is playing. However, the capture process takes a second or two to start up, and you might miss a key moment. To ensure that your capture begins where you want it to begin, it's best to always start your capture from the video's paused state.
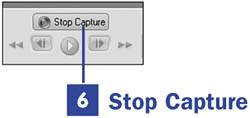
| 6. | Stop Capture
Click the Stop Capture button when you want your capture to stop. Your camcorder goes to pause mode and your clip or clips are automatically added to the Media panel. To review your captured clips, see 11 View Captured Clips. For custom captures, see 9 Capture Video or Audio Only and 10 Capture to the Timeline or Media Panel.
|
|