Deploying Web Services
| Web Services are ASP.NET applications that run on the Web. The application is represented by a DLLthe Web Serviceand the .asmx file that plays the role of the base URL for consumer applications. The following summarized steps describe what you need to do to deploy a Web Service.
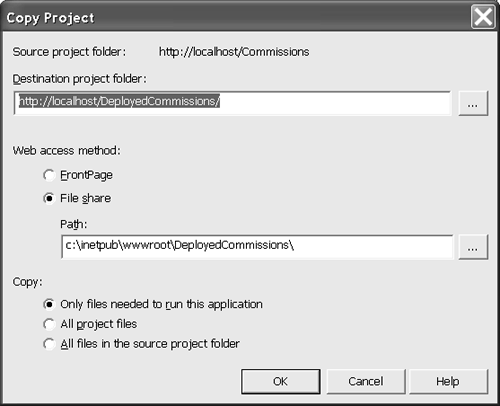
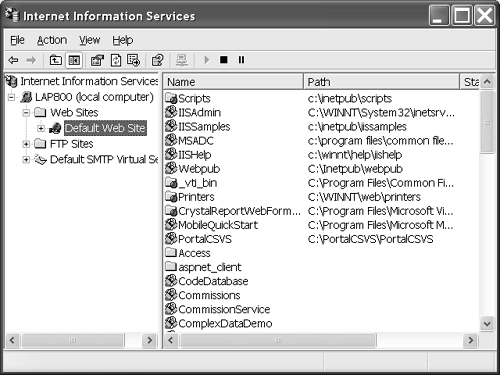
Much of what you can do with ASP.NET Web Forms applications you can do with Web Services applications. (As you will see in this chapter, this applies to security too.) As a benefit you can deploy a Web Service using the ProjectCopy Project menu item in Visual Studio .NET. To copy a Web Service application, select the Web Service project from the Solution Explorer and select ProjectCopy Project. This step displays the Copy Project dialog (Figure 13.7). Click OK to accept the default values of the Copy Project dialog. Figure 13.7. The Copy Project dialog, used to deploy ASP.NET Web Forms and Web Services applications. It will be helpful to understand the technical steps for deploying Web Services in case you find yourself in the position of deploying a Web Service without Visual Studio .NET. This information will be especially helpful if you have to troubleshoot a botched deployment. Creating a Web Application DirectoryThe steps in this section describe how to create a Web application directory for the Internet Information Server (IIS). The easiest way to create an application directory is to select the Web site in the Microsoft Management Console with IIS. Follow the numbered steps below to create the Web application directory. (Note: These instructions are for Windows 2000. You will have to make slight adjustments for other versions of Windows, but the steps are very similar.)
After completing the last step, you have a Web application directory that is recognized by the Web server. It is worth noting that the physical file folder does not have to reside in the Web server's root folder. The Web-sharing mechanism takes care of mapping a shared name to a physical file path. Copying Essential FilesFor your Web Service to run you will need to copy the .asmx file to the Web application directory. Additionally, you will need to add a bin directory to the Web application directory and copy the DLL application to the bin folder. For our example application the DLL is named commissions.dll . When you are finished with the basic necessary configuration, you will have files and folders that approximate the following structure: C:\inetpub\wwwroot\commissions C:\inetpub\wwwroot\commissions\service1.asmx C:\inetpub\wwwroot\commissions\bin C:\inetpub\wwwroot\commissions\bin\commissions.dll Creating the .disco FileASP.NET Web Services applications support dynamic discovery. If you enter the Web Service base URL (which includes the .asmx file) and the ?disco query, the Web Service will return discovery information. This information can be used by UDDI (as demonstrated by the Add Web Reference dialog) to discover Web Service applications. For example, if we wanted the discovery information for the commissions.dll , we could enter the following command. http://localhost/commissions/service1.asmx?disco This command will return the same DISCO text that is created when you add a Web reference to a client project. If you want to create and deploy a physical .disco file for your Web Services application, you can run the ?disco query or run the command-line disco.exe utility. You can save the output from the disco.exe utility to a .disco file. Modify the host name in the .disco file and copy that file to the Web application directory you made for your Web Service. Listing 13.5 shows the .disco file created when I imported the Commissions Web Service. This file can be changed and deployed with the Web Service. Listing 13.5 The .disco File for the Commissions Web Service<?xml version="1.0" encoding="utf-8"?> <discovery xmlns:xsd="http://www.w3.org/2001/XMLSchema" xmlns:xsi="http://www.w3.org/2001/XMLSchema-instance" xmlns="http://schemas.xmlsoap.org/disco/"> <contractRef ref="http:// localhost /Commissions/Service1.asmx?wsdl" docRef="http:// localhost /Commissions/Service1.asmx" xmlns="http://schemas.xmlsoap.org/disco/scl/" /> <soap address="http:// localhost /Commissions/Service1.asmx" xmlns:q1="http://tempuri.org/" binding="q1:Service1Soap" xmlns="http://schemas.xmlsoap.org/disco/soap/" /> </discovery> The discovery document was created by the disco.exe utility. You could write it from scratch if you are a glutton for punishment , but there is no reason to do so. Modify the .dicso file shown in Listing 13.5. Change the text set in bold to the name of the host server, and copy the .disco file to the Web application folder. In our example, the Web Service file is named service1.asmx , and we would name this file service1.disco and place it in the C:\inetpub\wwwroot\commissions folder. Adding a Web.config FileAs with every ASP.NET application, you can use the Web.config file to configure such options as whether or not debugging is enabled, the authentication and authorization information, and how the session is managed. For example, the default behavior is to use Windows authentication. However, this is suitable only for intranet applications. If you are deploying your Web Service for the Internet, you will likely want some kind of authentication. This topic is related to security, so I will defer further discussion of the Web.config file for the next section. In the meantime, if you want to deploy a Web.config file, you can copy the one created by default with your Web Service to the Web application directory you created earlier in the chapter. |
EAN: 2147483647
Pages: 215

