Loading Movies or Images
| < Day Day Up > |
| The MovieClipLoader lets one Flash movie play another. Effectively, the second movie plays on top of the first. It's easiest to understand, though, if you think of one movie as the host and the other movie (the one that's loaded on top of the host) as the submovie. Think of a big entertainment system a wall of stereo and TV equipment. The movie you put into your VCR can play on only the TV screen. Think of the TV as the host Flash movie, and the video you put into your VCR is loaded on top of it. One reason to do this is because you might have several submovies that only play one at a time. You might want to give the user the choice as to which submovie to play. All you need to do is trigger the MovieClipLoader when the user clicks a button. It's sort of like a jukebox, where each record or CD is a separate submovie. The reason the MovieClipLoader is beneficial is that only the submovies the user requests have to download. Let's look at some of the technical issues with the MovieClipLoader; then you can try it. First, only .swf files can execute the MovieClipLoader's loadClip action. Therefore, not only will you have to use Test Movie to see the results, but if you plan to load movies they need to first be exported as .swf files (in the case of loading image files, you simply need to have those JPGs, GIFs, or PNGs available). Second, when you use the MovieClipLoader, you must specify into what target to load the movie. Movies are loaded into one of two basic targets: a clip instance or a level number. If you load a movie into a clip, the clip is replaced with the movie that's loaded. If you load a movie into a level, anything that happens to be in that level currently is replaced by the movie.
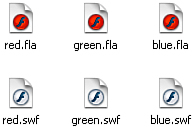
Finally, remember when I said that when you load a movie, it gets loaded "on top"? That's not entirely true. When you load a movie into a clip, the loaded movie actually replaces the clip, so the loaded movie resides in the same level where the clip was. That is, if the clip was in front of something or behind something, the loaded movie will be, too. In the case of loading a movie into a level, the loaded movie will be in front of everything else that happens to be assigned lower-level numbers and behind items assigned higher-level numbers. The _root Stage is always _level0. Therefore, if you load a movie into _level1, it will be on top. However, if you load another movie into _level2, it will be on top of everything else the first loaded movie (_level1) will be sandwiched between the Stage and the new l loaded movie. In the next task you'll see that there's actually a way to avoid levels and load movies into actual clips. Try It Yourself: Load a Movie In this task you'll use the MovieClipLoader to selectively let the user download just the segments he or she is interested in. Here are the steps to follow:
You can tweak l the task you just completed to display images. In addition to loading .swf files, Flash Player 8 can load images in the following formats: .jpg (both regular and progressive encoded JPGs), .gif, and .png. Flash 7 supports only.jpg and .swf. The .gif format has been used very widely, and .png is great because it supports alpha channels meaning portions of the loaded image overlay (and see through to) objects underneath. Anyway, to load images just change the first parameter in the loadClip() method. For example, in step 8, change "red.swf" to read "someimage.png". You'll need an image (named "someimage.png") in the same folder, of course. Before we look at more advanced variations, I want to point out that you can use the MovieClipLoader to load into levels instead of clip instances. Change the second parameter in the loadClip() method (step 7 previously) to read: "_level1" (or "_level2", "_level3", and so on). One advantage of loading into levels instead of clip instances is that you don't need to first create a clip, place it onstage, and give it an instance name. Personally, I still prefer to load into clip instances. I just think it's more intuitive because you can visually position the instance on stage or set any other property (such as rotation or alpha). Levels require that you keep track of which level is being used for which loaded image. That is, at any one time you can load only one object (image or .swf) into a single level, or clip instance, for that matter). Also, you should be aware that loading into _level0 replaces your whole movie. Normally, you'll want to load into level 1 or higher (or, better yet, into clip instances you've placed onstage). |
| < Day Day Up > |
EAN: 2147483647
Pages: 235
