| Q1: | When making masks, why we do we always seem to paint the person we're masking in black? |
| A1: | You won't alwayssome photos will work better by making the mask of the person (or object) you're trying to mask white, and the background black (like when you're trying to mask a lighter object on a darker background). So, it just depends on the photo. When you're looking for the Contrast channel, if the object you want to mask has white edges already, then the decision has already been made for youfill the rest of the object with white, and make the background black. In the image shown here, the subject has blond hair and she's posed on a darker background, so when we make our mask (from a copy of the Red channel in this case), it's easier to paint her hair in white, and then make the background black. 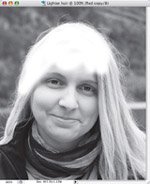 ©ISTOCKPHOTO/ULRIKE HAMMERICH |
| Q2: | When I'm using Levels to darken the edges, what happens if I move the sliders too close together? |
| A2: | Two things: (1) you'll start losing fine detail around the edges and if you're trying to mask hair, you're going to lose some of the very hair strands you're trying to select; and (2) your edges will get harsh and somewhat jaggy. That's why, when using Levels to darken the edges, you really have to keep an eye on the edges of your image as you drag your sliders toward the center. |
| Q3: | If I have large areas of black (or white) to fill in, do I have to take the time to paint them in? |
| A3: | You can save a lot of time by using a two-prong approach: Use the Brush tool to paint near the edges of your object, but for everything else use the Lasso or Marquee tools, select as much of the area as you can, then fill your selection with either white or black (whichever you need). |
| Q4: | Why do I usually have to invert the mask before I load it as a selection? |
| A4: | You only have to do that if your mask has a white background and black object or subject (and often when making masks, that's the case). We invert before loading because if you load it as is, it selects the backgroundnot the object (or subject)because black conceals and white reveals. Look at the capture below, where we loaded the Alpha 1 as a selectionsee how the background is selected, and not the woman? So, before we load our Alpha channel as a selection, we need our subject in white, and our background in blackthat's why we invert first. 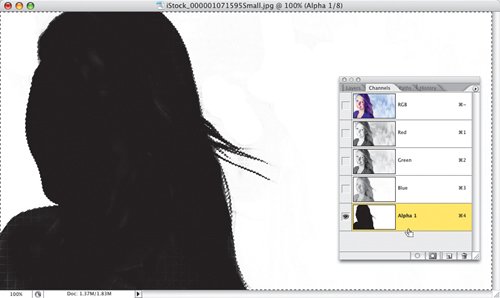 ©ISTOCKPHOTO/AMANDA ROHDE |
| Q5: | What's the difference between Calculations and the Apply Image command? |
| A5: | Calculations lets you combine two separate channels to create an entirely new channel. Apply Image takes one channel and applies it to an already existing channelno new channel is created. |
| Q6: | How come when I view my RGB Composite and my Alpha channel at the same time, everything has a red tint over it (and can I change the tint color)? |
| A6: | It's because by default Photoshop displays the channel in the tint color of a traditional rubylith (that's the red masking material we used to cut with an X-Acto knife to make masks back in "the old days"). You can change the default tint color, and opacity, from the Channels palette's flyout menu by choosing Channel Options. |
| |
| Q7: | What's the fastest way to save your selection as an Alpha channel? |
| A7: | If you have the Channels palette open, click on the Save Selection as Channel icon at the bottom. If not, just Control-click (PC: Right-click) within your selected area and choose Save Selection from the contextual menu that appears. |
| Q8: | How do you turn a path into an Alpha channel? |
| A8: | Go to the Paths palette and click on the Load Path as a Selection icon at the bottom of the palette, then go under the Select menu and choose Save Selection. That's itfrom path to channel. 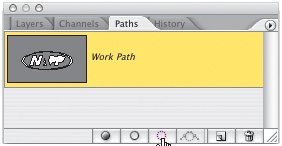 |
| Q9: | What's "the ol' Quick Mask and Feather trick"? |
| A9: | Ahhhh, I knew that eventually you'd ask that. It's based on the fact that when you add a feather to a selection, you don't really know what the results of the feather will be (how soft the edges will actually be) until you make a deletion, and by then it's too lateif you don't like it, you have to start over. So, the trick is this: Make your selection, then instead of going to Feather, click the Quick Mask icon first, then you can see your selection (as a mask). Now you can apply a Gaussian Blur and see, right there, exactly how soft the edges of your selection will be when you return to Standard mode. Pretty tricky, eh? 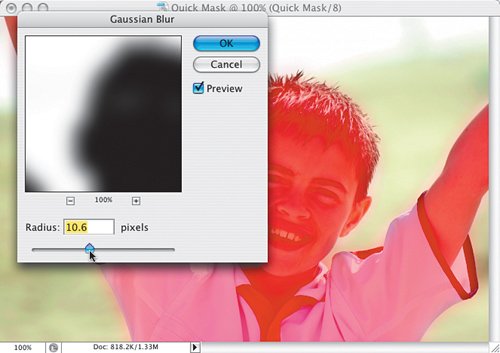 ©ISTOCKPHOTO/DUNCAN WALKER |