| HOW TO GET THE SAME KIND OF BLENDING YOU'D NORMALLY GET WITH LAYERS, BUT WITH CHANNELS If you're used to working with layers and layer blend modes, you're probably used to quickly making your layers much darker by using Multiply mode, and making your layers much lighter using Screen mode. (They're some of the oldest tricks in the book, right?) And because of that you probably wish that at the top of the Channels palette there was a channel blend mode pop-up menu, so you could do the same thing with channels. For example, if you were trying to make a mask from a Contrast channel, and you needed your subject to be darker, you could just go to the top of the Channels palette and choose Multiply. Ahhh, if it were only that easy. Well, believe it or not, you can get the same blending effect with channels, and it's almost as easy as blend modes (in fact, it uses the same blend modes). So, how do you get this pop-up menu? You use Apply Image. Think of it as "layer blend modes for channels," and you're about to see how easy it is to use them to make your masking jobs easier. Step 1. | AS AN EXAMPLE, OPEN A GRAYSCALE VERSION OF AN IMAGE, DUPLICATE THE LAYER, SET MODE TO MULTIPLY
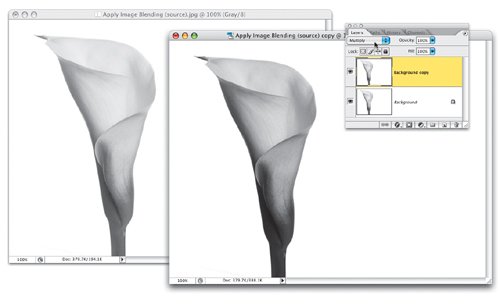
First, we'll start with a look at how layers handle blend modes, so we can compare the two methods. In the example shown here, we have two versions of the same image. The image on the left is the original grayscale image, and in the image on the right, we've simply duplicated the layer and changed the blend mode to Multiply. See how much darker this Multiply layer made the image (the bottom of the lily is even turning black)? Now, let's see how to do the same exact thing, but with channels.
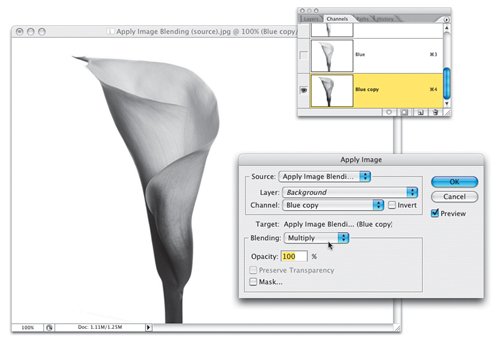
 ©ISTOCKPHOTO/ALAIN COUILLAUD | | | Step 2. | OPEN A COLOR IMAGE, DUPLICATE CONTRAST CHANNEL, OPEN APPLY IMAGE, SET THE BLEND TO MULTIPLY
Open a color image (we have a color version of the lily for you to download). First find the Contrast channel, then duplicate that channel (in this case, it was the Blue channel, so duplicate that channel). Now, we'd like this duplicate to be darker so we can make a channel mask from it. To do that, go under the Image menu and choose Apply Image (this is the tool that lets us get the same blending effect that we got in the first step using layers). When the dialog appears, choose the channel you want to multiply (in this case, it's the Blue copy), then choose your Blending mode (Multiply) from the pop-up menu. See how the channel now looks just like the Multiply layer?
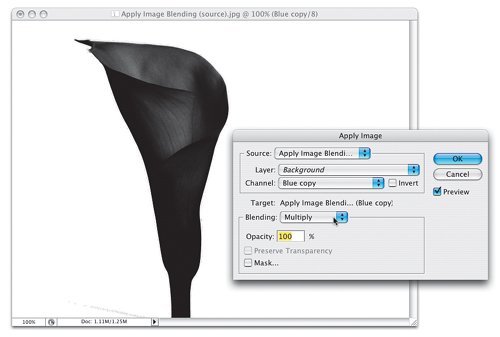
 | Step 3. | HERE'S THE IMAGE AFTER APPLYING MULTIPLY THREE TIMES IN A ROWTHE MASK IS ALMOST DONE!
Now, click OK. If your channel still needs to be darker, just go back to Apply Image again, and use Multiply mode again (here's the lily after I used Apply Image, set to Multiply mode, three times in a row). As you can see, the mask is almost completeit would take just a few paint strokes in black on the channel to finish things off. Now, what do you do if you need to make something lighter? In Apply Image, instead of choosing Multiply you'd choose Screen (just like you would using layers). That's itnow you know the trick for getting layer blend modes to use on your channelsit's done by using Apply Image.
 |
|