| YOU'RE ABOUT TO LEARN HOW THE PROS MAKE THOSE IMPOSSIBLE SELECTIONS. THAT'S RIGHT, USING CHANNELS, BABY! If you've ever looked at an object in a photo and thought, "How in the world am I going to get a selection of just that?" then this is the chapter for you. In your Photoshop career, you've probably run across dozens of situations like that (trying to select someone with windblown hair, or trying to select the soft petals of a flower), where isolating that object seems all but impossible. Yet, somebody's doing it. Someone knows how to make those incredibly tricky selections, and I'll tell you this: (1) They're doing it using channels, and (2) That someone is about to be you. The trick really is to look at your photo and find one of the existing color channels that has the potential to be a starting place for a mask. The key phrase there is "starting place." If you can use one of those channels as a decent starting place to build a mask, then the rest is pretty easy (and luckily, most photos have just such a channel). So, why do we want to make masks in the first place? For two reasons: (1) You want to adjust just one part of your photo, separately from the rest, or more likely (2) You want to remove an object from one photo and seamlessly composite it with another photo (or put a different background behind it), so it looks totally realistic. Step 1. | OPEN THE PHOTO THAT HAS AN OBJECT YOU WANT TO REMOVE FROM ITS BACKGROUND
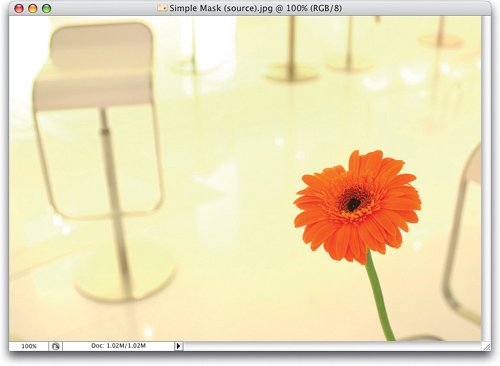
All right, we'll start you off with an easy mask, just so you get the idea of masking, how to work with the tools, etc. Then, once you've got this down, we'll take it up a notch. Fair enough? Good. Our easy masking project starts with a flower on a light background (looks like that's a hair salon in the background). Now, what we're going to do is find which channel has the most contrast between the flower and the salon floor behind it. We'll use a duplicate of that channel to build a mask, so that we can remove the flower from the photo and add a different background.
 ©ISTOCKPHOTO/TINA RENCELJ | | | Step 2. | LOOK FOR THE CHANNEL WITH THE MOST CONTRAST
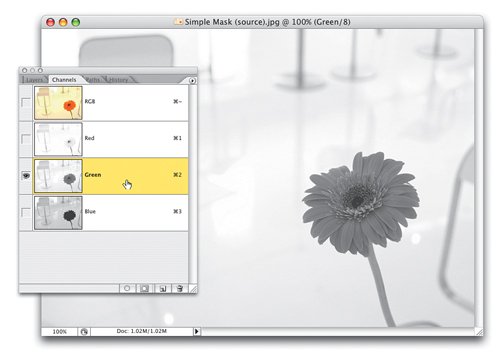
Remember, our goal is to find the channel with the most contrast (difference) between the flower and the background. If you look in the Channels palette, you'll quickly see if this is really going to be as easy to mask as I said it was. When you click on the Red channel, it will look very light (just take a look at the thumbnail in the Channels palette shown hereit's so light you don't even have to click itit's obviously not the Red channel). Now, click on the Green channel (as shown here). Look how much contrast there is between the flower and background. This is almost a mask waiting to happen, but there's one more channel to check.
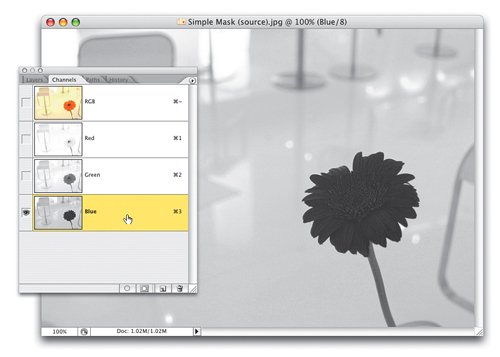
 | Step 3. | IN THIS PHOTO, THE BLUE CHANNEL CONTAINS THE MOST CONTRAST
Click on the Blue channel. Yes folks, we have a winner. This channel is even darker, and has even more contrast than the Green channel (for all its faults, the Blue channel is often the choice as your building block for masks because it's usually the darkest of the three channels. Unless, of course, you're looking at a photo of the sky at high noon). So now that we've chosen the channel with the most contrast (referred to as the Contrast channel in the rest of the book, since we'll be looking for the Contrast channel quite a bit), our goal is to make this flower and stem solid black, and the background solid white. However, if we do that to the Blue channel, we'll destroy our color image. So...
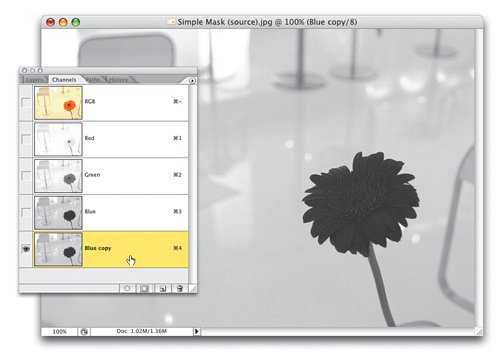
 | | | Step 4. | DUPLICATE THE BLUE CHANNELYOU'LL USE IT AS THE BASIS OF YOUR MASK
Rather than destroying our Blue channel, we simply make a duplicate of it by dragging it to the Create New Channel icon at the bottom of the Channels palette. This duplicate channel will have the word "copy" after its name (as shown here), so you'll know it's safe to "mess with it." That's why we made a copy in the first place, so we can mess with it. If we were to adjust the actual Blue channel, it would change your original image. However, if you duplicate a channel, and work on that duplicate, it doesn't affect the original photo at allthe original stays perfectly intact.
 | Step 5. | USE LEVELS TO DARKEN THIS DUPLICATE CHANNEL AND TURN YOUR OBJECT TO BLACK
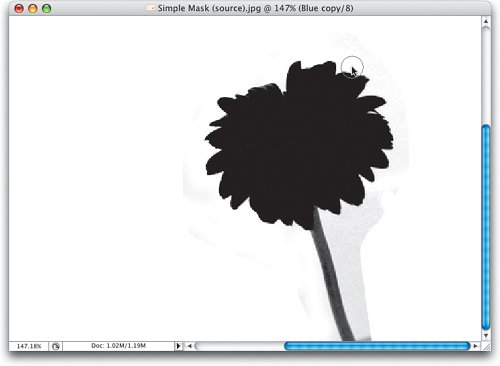
Now, our first step is to make the flower in this duplicate channel solid black. The flower is almost black already, but you can still see some detail in the flower itself, so we'll need to darken it until it's solid black. We do that by using either Curves or Levels (whichever you're more comfortable with). In this case, since we're doing such a simple mask, we'll use Levels, so press Command-L (PC: Control-L) to bring up Levels. Then drag the Shadow slider (the top-left slider) to the right until the flower becomes so dark it's black (as shown here). The stalk is still a little gray, but the flower itself should now be black. Don't click OK quite yet.
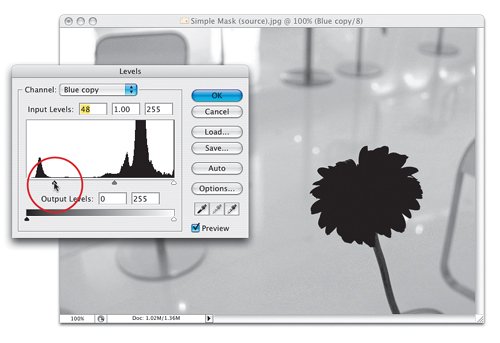 | | | Step 6. | CLICK THE HIGHLIGHT EYEDROPPER IN THE BACKGROUND TO CREATE MORE CONTRAST
So, the flower is black, right? Channel masks need to be solid black and solid white (and later you'll see there are times where you need some gray, but not for this mask), so now let's work on the other partmaking the background solid white. We have a trick that helps, and that's to click on the Highlight eyedropper (the one filled with white, on the right below the Options button in the Levels dialog) and then click it once on the background area surrounding the flower. This sets the background as your highlight, which makes it almost white (as you can see in the capture, where I clicked the Highlight eyedropper just to the left of the flower). Now click OK.
 | Step 7. | PUT A LOOSE SELECTION AROUND THE FLOWER USING THE LASSO TOOL
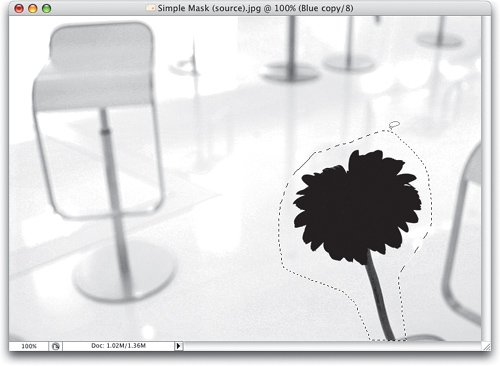
Of course, clicking that eyedropper didn't do the whole job, but it sure helped us get a lot closer. You can still see chairs in the background, some gray shadows, and all that has to go away. For a perfect mask, we need a solid black flower against a solid white background, so the rest of that background will have to be erased. Here's a timesaving shortcuttake the Lasso tool (L) and draw a loose selection around your flower (as shown here). Don't get too close to the edgesmake it a very loose selection.
 | | | Step 8. | INVERSE YOUR SELECTION, THEN HIT DELETE TO ERASE THE REST OF THE BACKGROUND
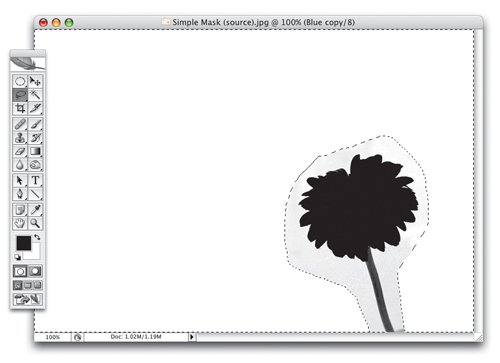
Press Command-Shift-I (PC: Control-Shift-I) to Inverse your selection, so that everything but the flower is selected. Now the flower is protected, and the entire background is selected. Press X to set your Foreground and Background colors to black and white, respectively, then just hit the Delete (PC: Backspace) key on your keyboard, and the background (the chairs, the gray shadows, etc.) will all be filled with white (as shown here). You can now Deselect by pressing Command-D (PC: Control-D). We're getting darn close to our goal of having a black flower on a white background. But we're not quite there yetnotice the gray area still around the flower? That's gotta go, too.
 | Step 9. | GET THE BRUSH TOOL, CHANGE THE BLEND MODE TO OVERLAY, AND PAINT THE GRAY AWAY
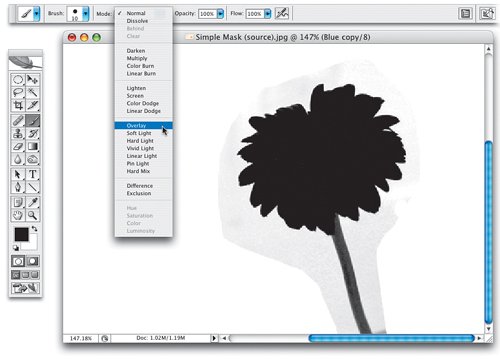
Luckily, there are a couple of tricks for getting rid of that gray area surrounding your flower without having to be the world's most accurate painter. My favorite is to get the Brush tool (B), press X to set your Foreground color to white, and then up in the Options Bar, change the blend mode of the Brush tool to Overlay (as shown here). This mode enables you to paint right up to the edges of the flower, and as you paint, the gray areas will turn white, but it ignores the black areas. You won't erase or paint over the black flower, so you don't have to be so careful and preciseyou can let the brush overlap the petals on the flower, without worrying about accidentally painting away the flower.
 | | | Step 10. | YOU CAN PAINT RIGHT UP TO THE EDGE, IN OVERLAY MODE, WITHOUT ERASING MUCH BLACK
Here's the Brush tool (set to Overlay mode) in action. As you paint around the flower, the gray disappears, but the black stays in place. This is called "cleaning up the mask" and it's something you'll wind up doing quite a bit. This first mask was a pretty darn easy one to make, and it doesn't require much cleanup, but as we move further into this chapter, you'll wind up spending more time cleaning up both the background and the interior (the black part) of your mask, as well.
 | Step 11. | BRING UP LEVELS, CLICK THE SHADOW EYEDROPPER ON THE GRAY STALK TO TURN IT BLACK
I'm not certain that you'll be able to see this in the screen capture shown here, but the stalk of the flower is still not solid black (it's actually shades of gray. You can have gray in masks, but gray areas create smooth edges. That's great when you want it, but in this case, we want a solid edge, not a soft feathered one). So, a quick way to make the stalk solid black is to bring up Levels again, but this time get the Shadow eyedropper (the one on the left, filled with black), click it once directly on the lightest gray area of the stalk, and it will then turn solid black (as shown here). Click OK. Well, you're almost done, as you've now got a good maska solid black shape on a solid white background.
 | | | Step 12. | INVERT YOUR MASK, THEN LOAD IT AS A SELECTION
The whole reason we created this mask was to make a perfectly clean selection of our flower, so we could delete the old background, and replace it with a different background image. The problem is, when you load a channel as a selection that has a black shape on a white background, it gives us the inverse of what we wantit selects everything but the flower. So, we'll need to Invert the channel by pressing Command-I (PC: Control-I). This gives you a black background with the flower knocked out in white (as shown). Now you can click on the Load Channel as Selection button at the bottom of the palette (as shown here).
 | Step 13. | GO TO THE COMPOSITE CHANNEL, THEN PUT THE SELECTED FLOWER ON ITS OWN LAYER
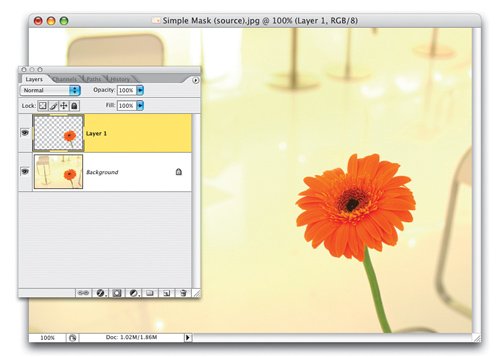
Clicking that button loads the selection around the flower (you can see the selection around the flower shape in the previous step's capture). Now that the selection is in place, press Command-~ (PC: Control-~) to see the full-color image (your selection will still be in place around your flower). To put your flower, and just the flower itself, up on its own separate layer, press Command-J (PC: Control-J). Now, the flower will appear by itself on Layer 1.
 | | | Step 14. | DELETE THE BACKGROUND LAYER
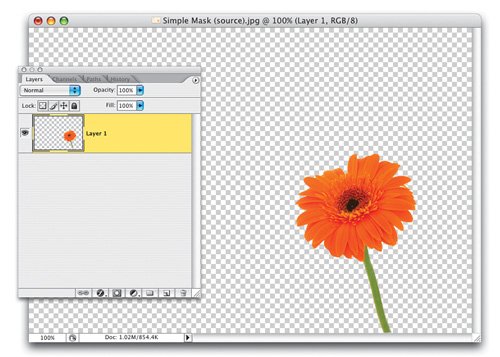
In the Layers palette, drag the Background layer into the Trash, and now you'll see what your mask createda perfect selection around the flower, which sits by itself on a transparent background. Next, open the photo you want to use as your new background. You have two choices: (1) You can get the Move tool (V) and drag this flower layer onto your new background image, or (2) You can drag the new background image into this flower document, then move it behind the flower layer (in the Layers palette).
 | Step 15. | OPEN A NEW BACKGROUND PHOTO, DRAG IT INTO YOUR FLOWER DOCUMENT, AND DRAG IT BEHIND
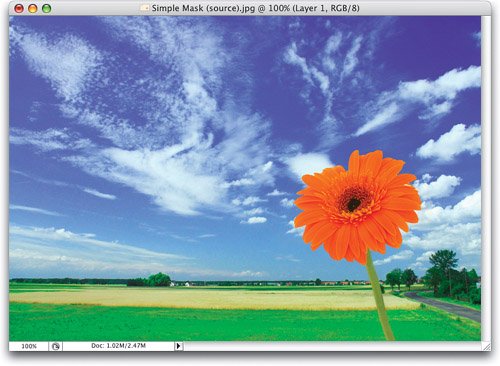
Here, I dragged the background image into the flower document, and then in the Layers palette, I dragged it below the flower layer. So, why did I choose to do it this way? Because in the flower document, I still have my mask, and I still have 20 undos (that's in the History palette). So, if I need to do more cleaning to my mask and then reload the channel, or if I just need to undo something, I still can. If I went the other way, and dragged the flower onto the background, I have no mask, and only one undo. Okay, you did it. You created your first mask from a channel. See, that was easy. Ahhh, if only they were all that easy.
 ©ISTOCKPHOTO/MICHAL KOZIARSKI |
|