Cloning Away Unwanted Objects
|
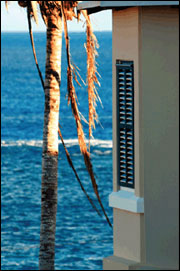
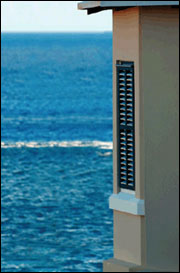
| The Clone Stamp tool has been the tool of choice for removing distracting or other unwanted objects in photos for years now. Although the Healing Brush and Patch tool in many ways offer a better and more realistic alternative, there are certain situations where the Clone Stamp tool is still the best tool for the job. Here's an example of how this workhorse removes unwanted objects: Step OneA photo of a palm tree on a tropical island near a shutter window is usually not a bad thing. But then when you see that palm, it's usually not as ratty-looking as the one shown here. In fact, it looks so ratty (and the light is so unflattering on it), I think it would look better if it weren't there at all (and what luckthis is a chapter about removing unwanted objects). So our project, in short, is to cut down that palm tree. Digitally. 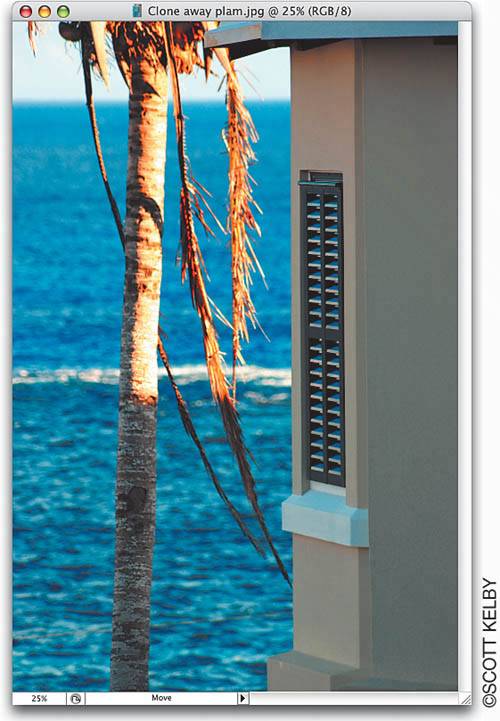 Step TwoPress S to get the Clone Stamp tool. In the Options Bar, click on the thumbnail to the right of the word "Brush" and choose a medium, soft-edged brush in the Picker. Now, Option-click (PC: Alt-click) in an area of ocean just to the left of the palm. This is called "sampling." You just sampled some ocean, and in the next step, you're going to clone that ocean area over the part of the palm tree to the immediate right. (By the way, when you sample, that little "target" cursor appears, letting you know you're sampling.) 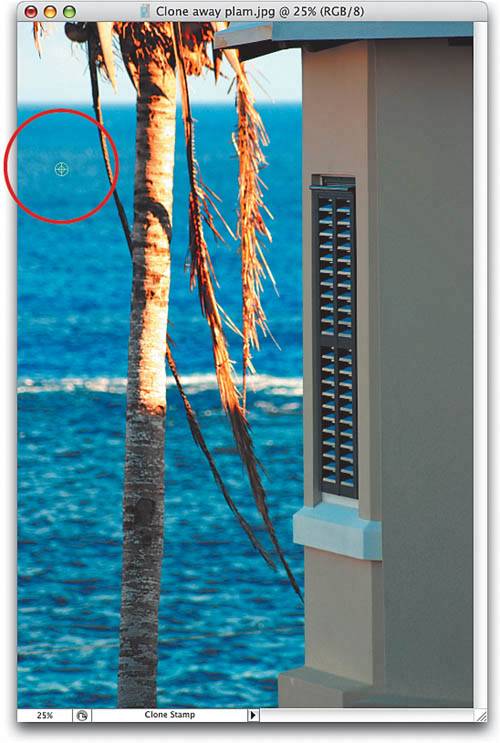 Step ThreeNow move directly to your right and begin painting with the Clone Stamp tool. As you paint over the palm frond on the left side of the tree, the ocean you sampled is cloned right over it, so it looks like the palm has disappeared. Paint a little in this area to get a feel for how the Clone Stamp works (at least, if it's your first time cloning; if it's not, then you know what to dostart cloning over that palm). 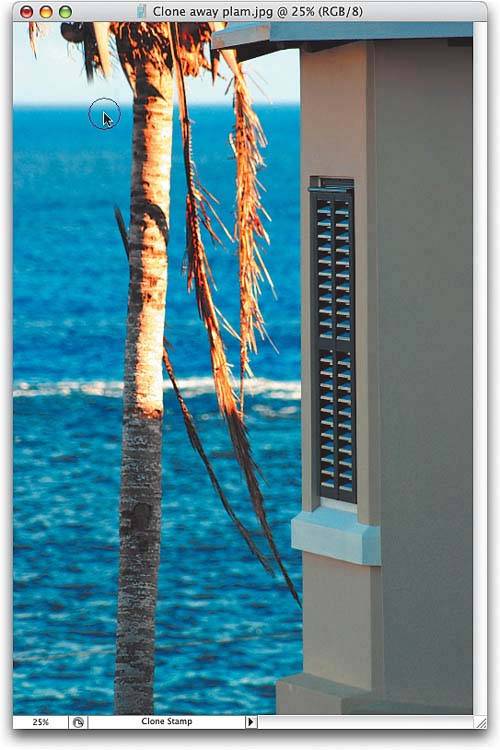 Step FourThe key technique to remember here is to sample just to the left of the palm (sampling in the sky and ocean), then move straight over to the palm. Now, in the captures shown here, the little "plus-sign" cursor (the area where you sampled) is just to the immediate left of the target cursor (where you're painting now). By keeping them side-by-side like that, you're making sure you don't pick up patterns or colors from other parts of the photo that would make your cloning look obvious. In the next step, I'll intentionally sample from the middle-left side of the photo, and then move to the top and start painting. Then, you'll see how obvious it looks when you don't sample near the area you're trying to cover. 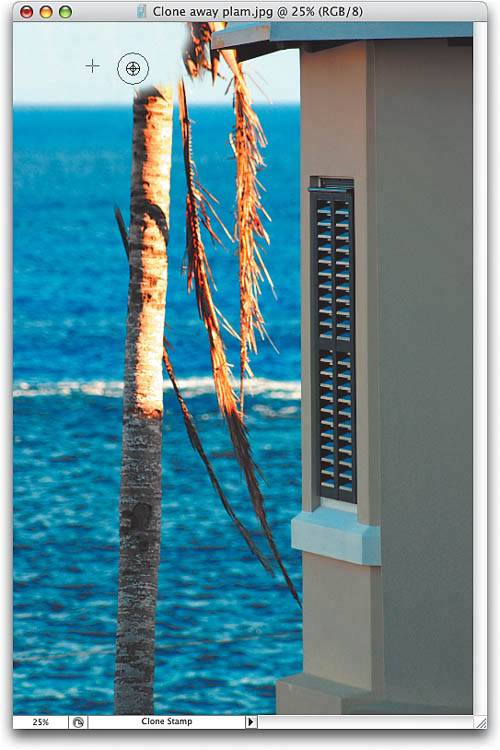 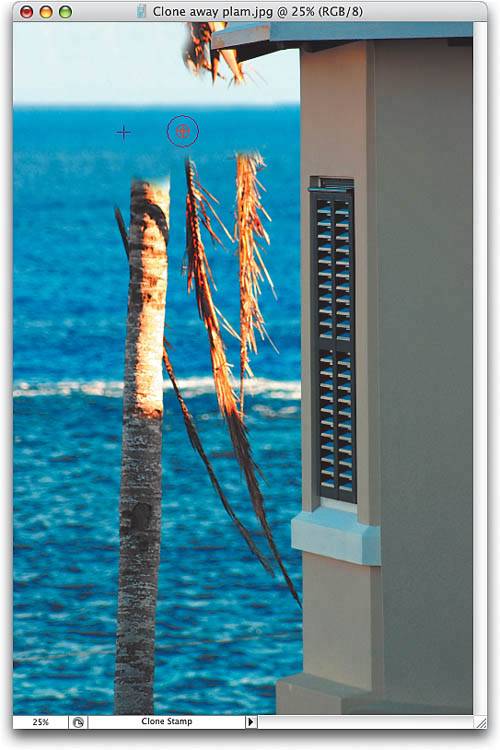 Tip There's a trick to cloning that horizon line and keeping it straight. See the next tutorial called "Removing Things in a Straight Line." Step FiveLook at the plus-sign cursor (near the middle left of the palm). That's where I sampled, but instead of moving directly to the right to clone a nearby area, I moved my brush to the top (just under the horizon on the right of the palm) and started painting. Look how much darker (and obvious) the cloning looks. That's why you have to paint very close to where you sample. If not, it's a dead giveaway. 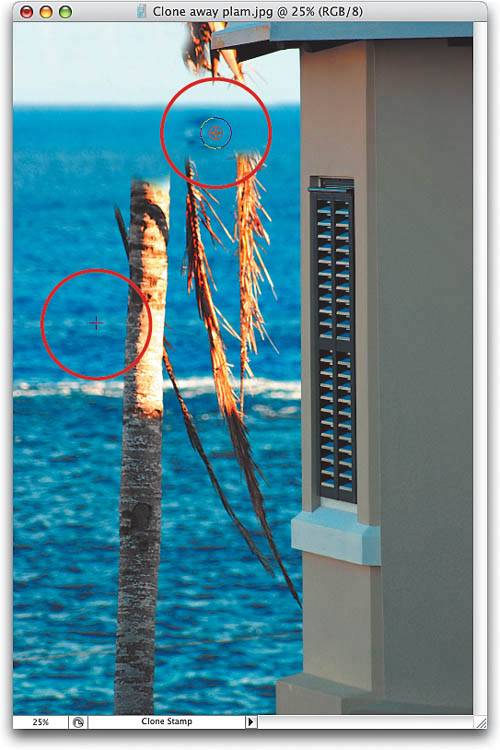 Tip Sample often (by Option/Alt-clicking) in different but nearby areas so that your cloning appears random, therefore avoiding repeating patterns in the waves, for example. Step SixUse this same technique of sampling to the left of the palm, painting over the trunk and palm fronds to the right of where you sampled, until the trunk and fronds are gone, except the tricky part at the top where the fronds meet the roof. 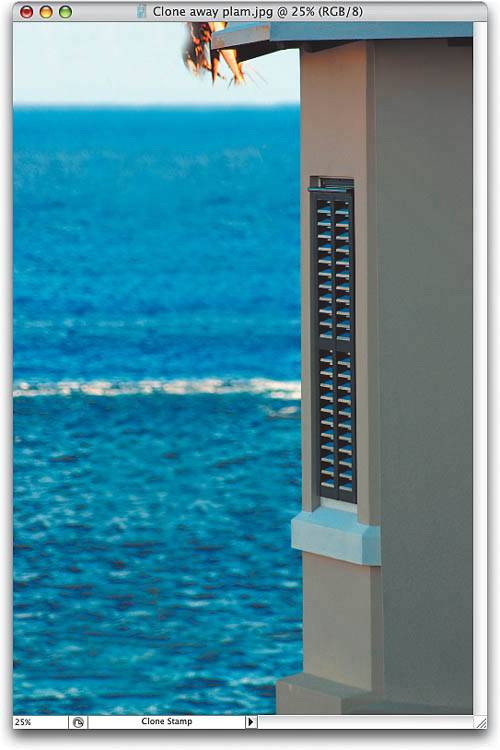 Step SevenTo keep from cloning over the roof, you'll need to put a selection (a barrier) around the remaining palm fronds in the sky area. Since you can only paint inside the selected area, you don't have to worry about cloning away the roof. First, press Z to get the Zoom tool and zoom into the palm and roof area. Now press Shift-L until you have the Polygonal Lasso tool. Click along the straight edges of the roof to draw a straight-lined selection (like the one shown here) that traces around the roof edge, around the palm fronds, and returns to where you first clicked on the roof. 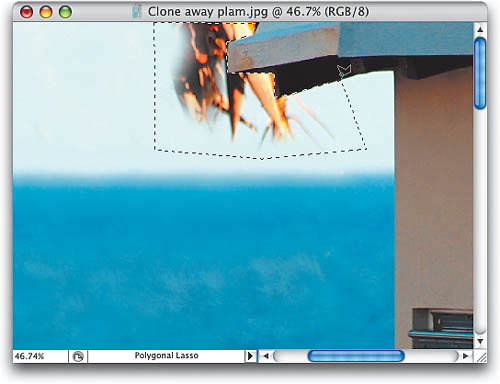 Step EightNow, get the Clone Stamp tool again, sample the sky to the left of your selection, move over to the right inside your selection, and start cloning away the fronds. You can clone right up to the edge of the roof without worry, because you can't paint "outside the lines" thanks to that selection you created in the previous step. Note: The sample point will be outside the selected area, and that's fineyou can sample from anywhere. 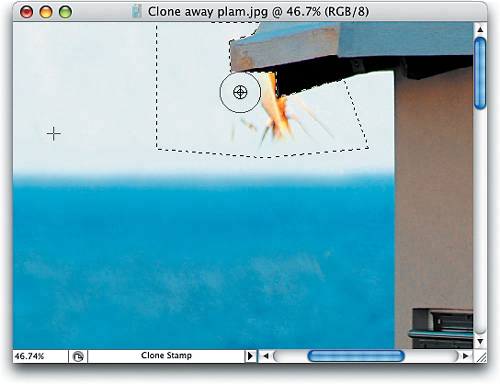 Step NineKeep painting (cloning) until the rest of the palm fronds around the roof are gone. Then, you can deselect by pressing Command-D (PC: Control-D). Now, after all that, I hope you like the image better without the palm, as it took less than five minutes to remove it. If not, just go under the File menu, choose Revert, and that butt-ugly palm will come crashing back into your photo, ruining an otherwise uninspired image. 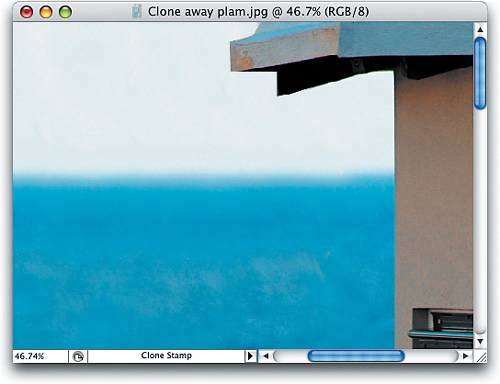 Before After |
|
EAN: N/A
Pages: 187