Scott s High-Contrast Black-and-White Technique
|
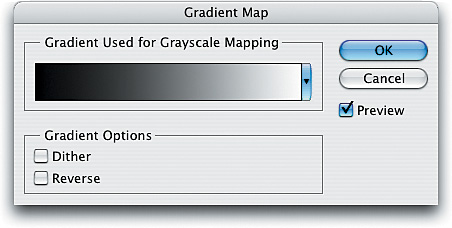
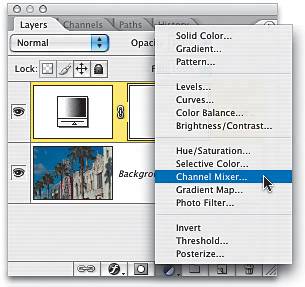
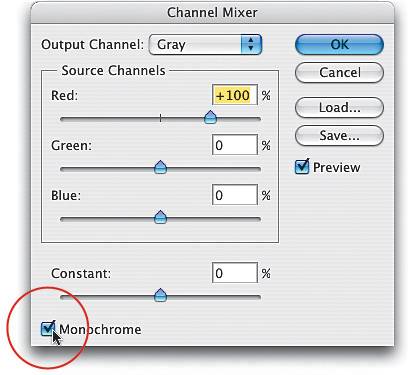
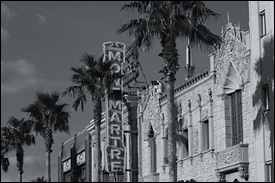
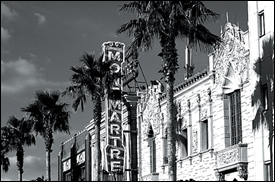
Some of the best techniques unfold when you least expect it, and this technique is a perfect example. I was working on a completely different technique when I stumbled upon this. It's about the easiest, fastest, most reliable way to create stunning high-contrast black-and-white images that have incredible depth. Plus, at the end I show you how you can get three different variations to choose from with just a few clicks each. Not bad, eh matey? Step OneOpen the color photo you want to convert into a high-contrast black-and-white image. Press the letter D to set your Foreground color to black, and then from the Create New Adjustment Layer pop-up menu at the bottom of the Layers palette, choose Gradient Map. 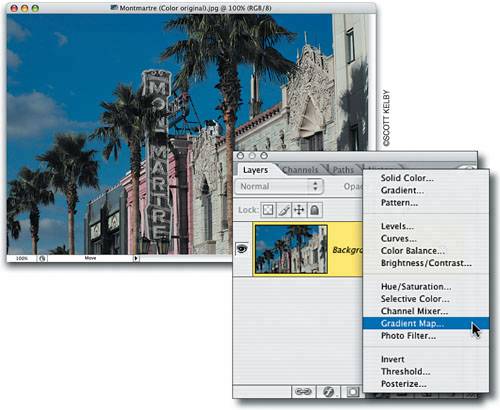 Step TwoWhen the Gradient Map dialog appears, it shows the Foreground to Background gradient by default (and because you chose black and white as your Foreground/Background colors, the gradient will be black and white). You don't have to do anything here, just click OK to apply this gradient map to your photo. Step ThreeBelieve it or not, just the simple act of applying this black-to-white gradient map will usually give you a much better grayscale conversion than the standard method of choosing Grayscale from the Image menu's Mode submenu. But there's one drawbackif it doesn't look great, there's nothing you can do to the gradient map because there's really nothing to adjust. So, in the next step, we add the ability to adjust our black-and-white conversion. 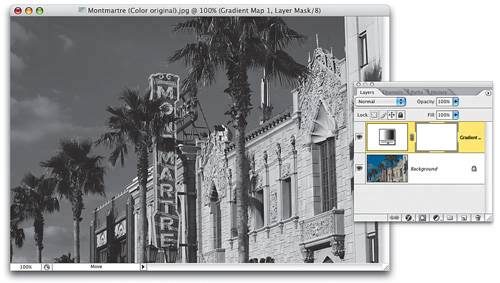 Step FourGo to the Layers palette, and from the Create New Adjustment Layer pop-up menu, choose Channel Mixer. As you learned earlier in this chapter, you can use Channel Mixer to adjust the individual color channels of an image to create a better grayscale. Well, we're going to use it to adjust our image that's already grayscale, giving it the extreme contrast it so richly deserves. Step FiveClick on the Monochrome checkbox in the bottom left-hand corner of the dialog (otherwise, when you move the sliders, you'll get color tints instead of grayscale tweaks). Step SixHere's where the fun begins. The technique starts with two predetermined steps: (1) Lower the Constant slider (at the bottom) to -8 to darken the entire photo, and (2) lower the Red channel to around 75% (I do this on every image). Now, you're going to increase the Green and Blue channels to create the extreme contrast. How much do you move them? For this image, I moved the Green to 26% and the Blue to 34%, but I came up with those numbers using a tried-and-true method, which I will disclose (for the first time ever) in the next step. 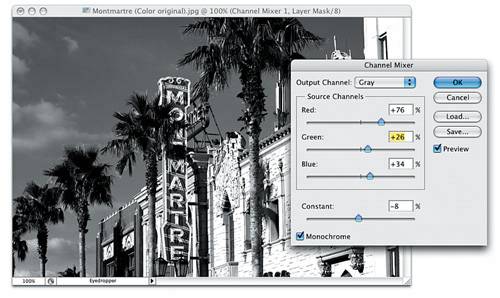 Step SevenI started dragging the Green slider to the right, and I kept dragging it as long as the photo continued to look better. As soon as it started to look bad, I stopped. Then, I did the exact same thing with the Blue slider. It sounds silly, but think about ithow can that not work? If it makes the photo look betterkeep doing it. If it stops looking better, stop. Once I clicked OK, I went to the Layers palette's flyout menu and chose Flatten Image (don't do this just yet if you want to try out the other methods). Then I went to the Filter menu, under Sharpen, and I added an Unsharp Mask filter with the settings: Amount 85%, Radius 1 pixel, and Threshold 4 levels. 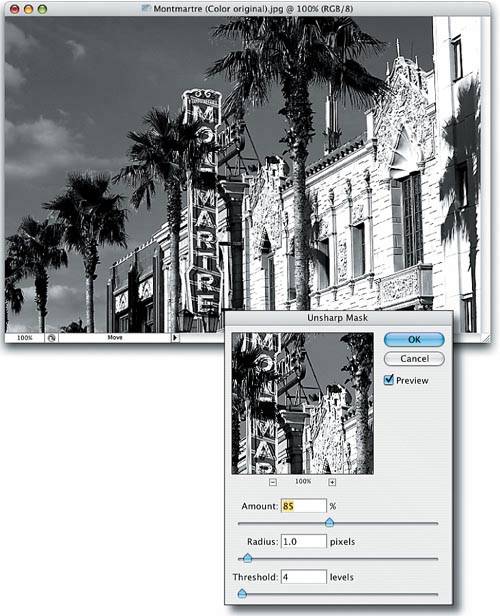 Alternate Version OneI mentioned that I would give you two alternate versions you can achieve with just one click, so in total you can choose from three different high-contrast versions (because three choices are better than one, right?). For this version, go to the Layers palette and drag the Channel Mixer adjustment layer below the Gradient Map adjustment layer. Now take a look at the photo. It's a slightly different version. Do you like it better or not (it's totally up to you)?  Alternate Version TwoHere's another great version to try: Click on the Background layer in the Layers palette, then go under the Image menu, under Adjustments, and choose Desaturate. This removes the color from the Background layer. Now, just choose the black-and-white version you like best from those three, and then make that one your high-contrast black-and-white conversion. 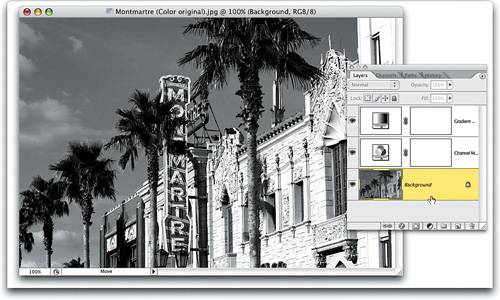 Regular grayscale conversion Scott's high-contrast black-and-white conversion |

|
EAN: N/A
Pages: 187