Configuring Your Camera for the Right Color Space
|
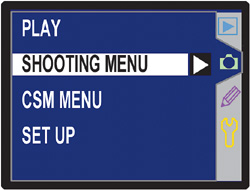
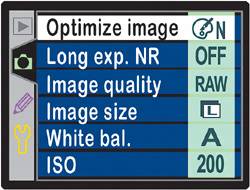
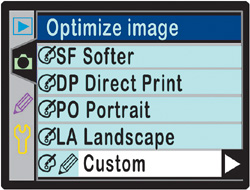
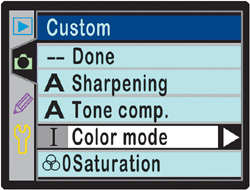
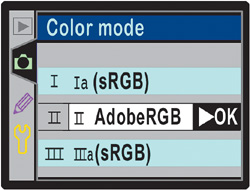
| Although there are entire books written on the subject of color management in Photoshop, in this chapter we're going to focus on just one thinggetting what comes out of your color inkjet printer to match what you see onscreen. That's what it's all about, and if you follow the steps in this chapter, you'll get prints that match your screen. Now, I'm not going into the theory of color management, or CMYK soft proofing, or printing to multiple network printers, etc. It's just you, your computer, and your color inkjet printer. That, my friends, we can do. Setting Your Camera to the Right Color SpaceOne of the key themes of proper color management is consistency. If you want to get consistent color from your camera, to Photoshop, to your printer, you'll want everybody speaking the same language, right? That's why I'm recommending, right from the start, that if your camera is set to shoot either JPEG or RAW+JPEG, you may be able to change your camera's color space from the default sRGB, which is an ideal space for images designed to be viewed on the Web, to Adobe RGB (1998), which is an ideal space for photographers whose final prints will come from a color inkjet printer. Now, if you only shoot in RAW, you can skip this because you'll assign the color space in Photoshop's Camera Raw dialog, but if you shoot in JPEG, you'll need to do it now. As an example of what I mean, here's how to set up a Nikon D70 to tag your photos with the Adobe RGB (1998) color profile. Step OneOn the back of the camera, on the left side, press the Menu button to bring up the user menus in the LCD window. Nikon D70 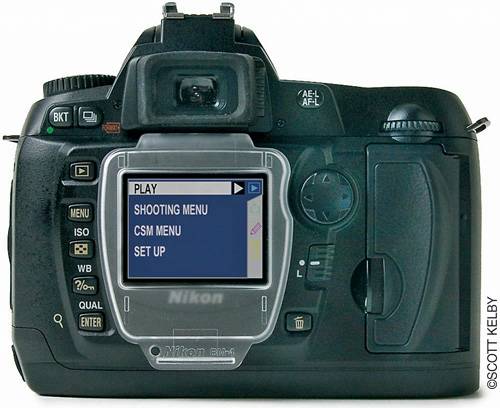 Step TwoScroll down to the Shooting Menu and press the right arrow button on the back of the camera. Step ThreeWhen the Shooting Menu options appear, choose Optimize Image and press the right arrow button again. Step FourIn the Optimize Image menu, scroll down to Custom and press the right arrow button again. Step FiveWhen the Custom menu appears, scroll down to Color Mode and press the right arrow button again. (Note: The "I" symbol before the words "Color Mode" tells you the current setting is sRGB.) Step SixWhen the Color Mode menu appears, scroll down to II: Adobe RGB, then press the right arrow button again to choose OK. Step SevenWhen you press the right arrow button, it returns to the Custom screen, but now there's a "II" before Color Mode, indicating you're now using Adobe RGB (1998). Setting Up Other CamerasI'm showing the setup here for a Nikon D70; however, I've put together these same steps for a number of other popular cameras, including the Nikon D2x (which is the camera I'm currently shooting with), the Nikon D100, and the setup for some of the most popular Canon digital cameras as well. These step-by-step tutorials are found on this book's companion website at www.scottkelbybooks.com/cs2digitalphotographers. If you have a digital camera that's not covered on my site, it's time to dig up your manual and find out how to "make the switch" to Adobe RGB (1998) or visit the manufacturer's website. |

|
EAN: N/A
Pages: 187