Smart Resizing with Smart Objects
|
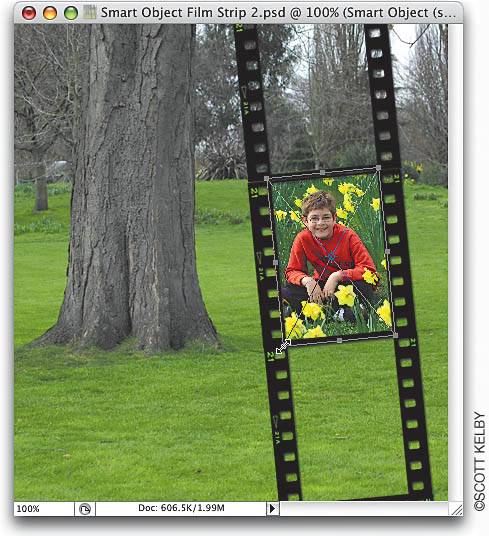
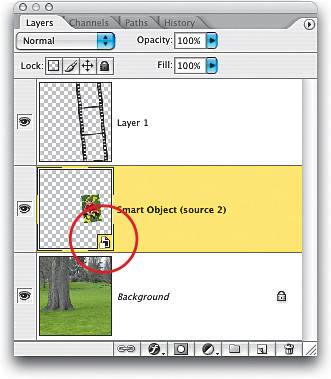
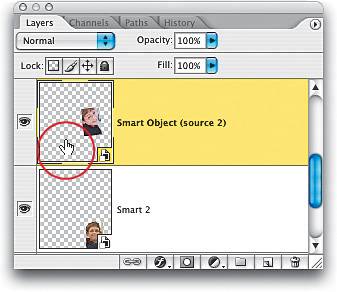
| Each time you resize an image in Photoshop, you lose some quality. For example, if you make a photo larger, your image quality takes a pretty big hit. If you scale the photo down, you don't lose as much, but you still lose some. However, in CS2 Adobe introduced Smart Objects, which enable you to place a photo into an open document, resize it at will, and not lose any quality (as long as you don't resize larger than the original image). It does this by embedding the original photo into your layered document, so when you resize, it calls upon the original high-res photo to create the exact size you want. Step OneTo create a Smart Object layer, you have to have a document already open (so you'll generally use this technique when you're combining multiple photos in the same document). Or, to create a Smart Object, all you have to do is go under the File menu and choose Place (you can place a regular photo, a RAW photo, or even a vector file, such as an Adobe Illustrator EPS file). 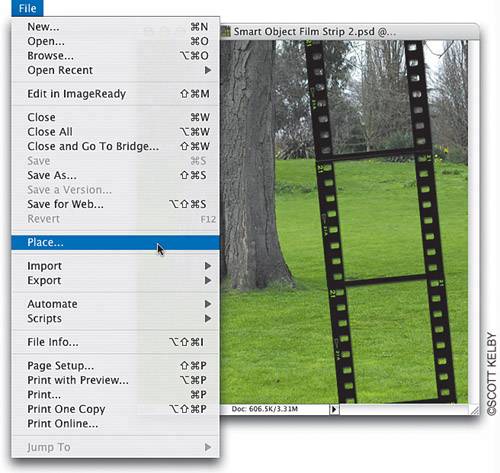 Step TwoWhen the placed Smart Object image appears in your document, it appears with a bounding box around it so you can rotate and resize the image. Hold the Shift key, grab a corner point, and resize the photo to fit within the filmstrip frame, rotate it, and then press Return (PC: Enter) to complete your resizing, which creates the Smart Object layer. Step ThreeIf you look in the Layers palette, you'll see your Smart Object layer. You'll know it's a Smart Object layer because a tiny page icon will appear in the bottom-right corner of the layer's thumbnail. Step FourNow, we're going to change our mind and take that small-sized photo we just placed into our layout and rotate it back so it's straight again. Then, we're going to increase the size until it's large enough to use as our background. Press Command-T (PC: Control-T) to bring up Free Transform. Rotate your image, and then hold the Shift key, grab one of the top corner points, and drag upward to increase the size of your placed photo. When you press Return (PC: Enter), Photoshop CS2 calls on your original image (which is actually embedded into your document), so your upsizing happens without losing quality. Remember: If you make a Smart Object larger than the original image's actual size, you will lose quality. 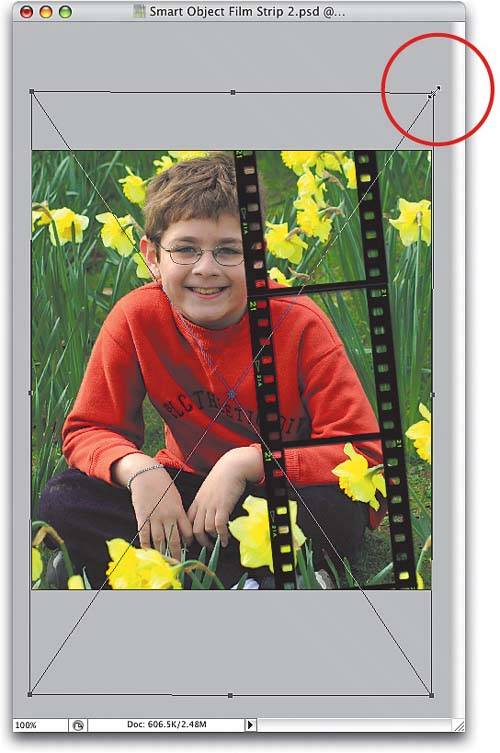 Step FiveThe example shown here gives you some idea of how incredibly cool Smart Objects are. The first photo was added using the Place command, then I used Free Transform to scale it up to fit within the background, which worked perfectly as a Smart Object. The second photo was a high-res image that was dragged-and-dropped into the background (rather than using the Place command). Then, I used Free Transform to scale it up to fit within the entire background, which pretty much destroyed the photo. Sizing up as a Smart Object Sizing up as a regular image Step SixAnother incredibly handy thing about Smart Object layers is that you can easily swap photosreplacing a new photo for one you already have in placeand still have them fully scalable. First, in the Layers palette, Control-click (PC: Right-click) on your Smart Object layer's name (in this example, we're going to replace the center photo with a different headshot). When the contextual menu appears, choose Replace Contents. 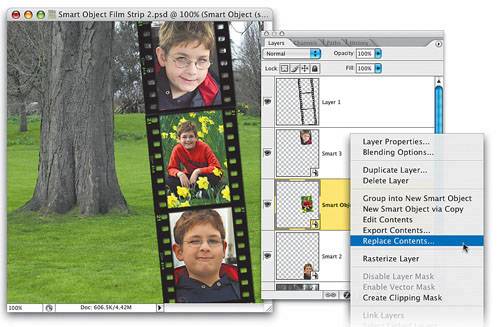 Step SevenThis brings up the standard Place dialog. Navigate your way to the photo you want to insert to replace your existing Smart Object, and then click the Place button. When you do, the image you just chose will replace your original Smart Object photo, and it will appear in the same size and position. Since it too is a Smart Object, you'll be able to size it up (to the full original size of the high-res file, but no larger) without loss of quality. 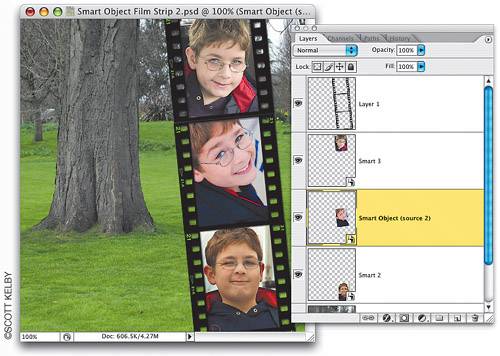 Step EightYou can also place RAW images as Smart Objects. The advantage (besides the whole resizing thing) is that you can edit your Smart Object layer by going back to Camera Raw to create entirely new versions of your RAW photo. Here's how: Go under the File menu and choose Place. Locate your RAW photo and open it in Camera Raw so you can process the photo. When you click Open, it appears within your document as a Smart Layer. To re-edit (reprocess) this file from the RAW original, just double-click on the Smart Object's thumbnail. Step NineWhen the Camera Raw dialog appears, you can reprocess the original RAW data. When you click OK, a new image is processed (at the size you want), and your Smart Object layer is updated with this newly reprocessed image. Note: After you've resized a photo, you can see the scaling percentage by looking at the Width and Height in the Options Bar when you have Free Transform active. 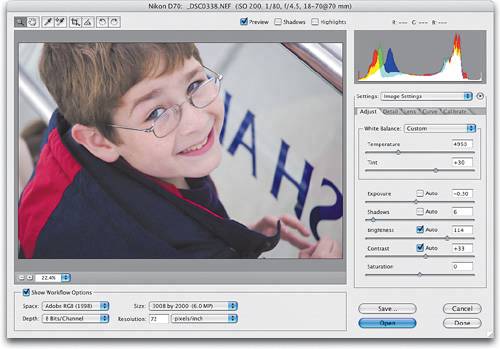 Step TenIf your photo is not a RAW image, you can still edit it separatelyand have your edits update in your main documentby double-clicking on the Smart Object layer's thumbnail to open the original (embedded) document in Photoshop so you can make your edits. To have your changes appear in the Smart Object layer, you have to choose Save (from the File menu) when you're done editing the original image. Step ElevenIf you're completely done resizing, and you want to perform some regular edits (like cropping), you'll need to convert your layer from a Smart Object layer into a regular layer (which will reduce your file size considerably, as a full version of your original photo is embedded into your working file), so just go under the Layer menu, under Smart Objects, and choose Convert to Layer. 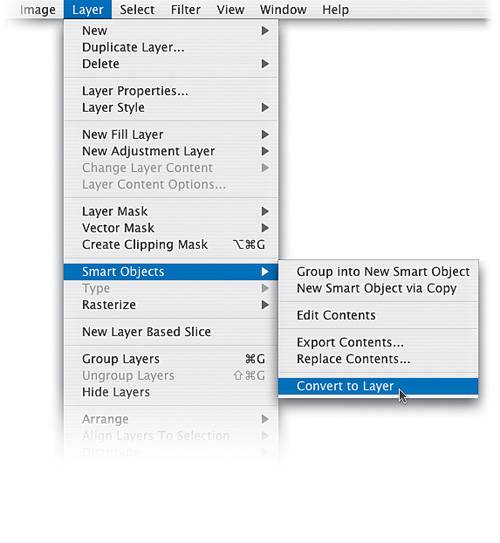 |

|
EAN: N/A
Pages: 187