Resizing Digital Camera Photos
|
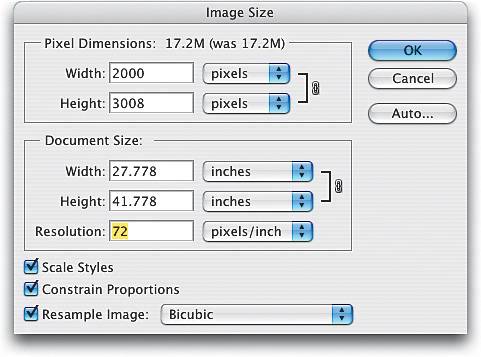
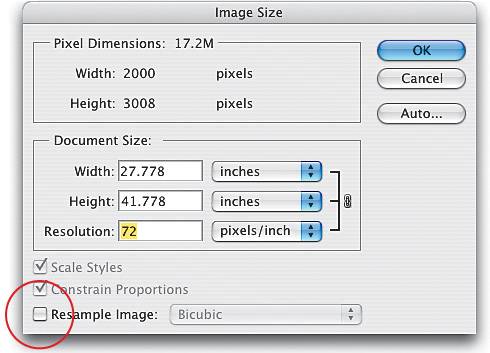
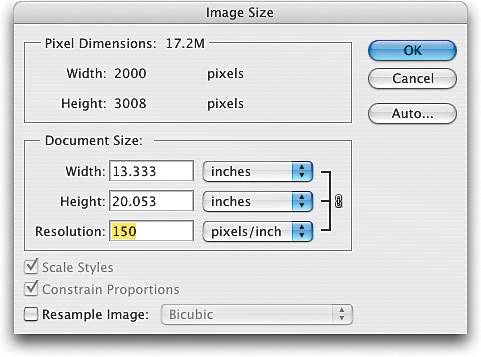
| If you're used to resizing scans, you'll find that resizing images from digital cameras is a bit different, primarily because scanners create high-res scans (usually 300 ppi or more), but the default settings for many digital cameras produce an image that is large in physical dimensions, but lower in pixels-per-inch (usually 72 ppi). The trick is to decrease the physical size of your digital camera image (and increase its resolution) without losing any of its quality. Here's the trick: Step OneOpen the digital camera image that you want to resize. Press Command-R (PC: Control-R) to make Photoshop's rulers visible. As you can see from the rulers, the photo is nearly 28" wide by nearly 42" high. 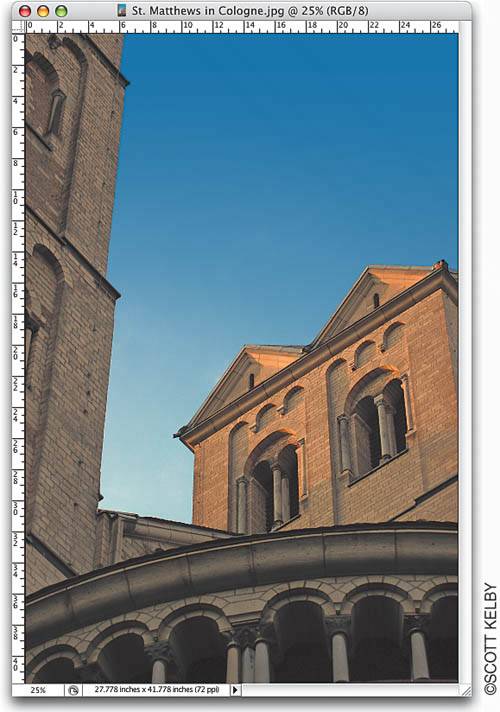 Step TwoGo under the Image menu and choose Image Size (or press Command-Option-I [PC: Control-Alt-I]) to bring up the Image Size dialog. Under the Document Size section, the Resolution setting is 72 ppi. A resolution of 72 ppi is considered "low resolution" and is ideal for photos that will only be viewed onscreen (such as Web graphics, slide shows, and so on), but it's too low to get high-quality results from a color inkjet printer, color laser printer, or for use on a printing press. Step ThreeIf we plan to output this photo to any printing device, it's pretty clear that we'll need to increase the resolution to get good results. I wish we could just type in the resolution we'd like it to be in the Resolution field (such as 200 or 300 ppi), but unfortunately, this "resampling" makes our low-res photo appear soft (blurry) and pixelated. That's why we need to turn off the Resample Image checkbox (it's on by default). That way, when we type in a Resolution setting that we need, Photoshop automatically adjusts the Width and Height of the image down in the exact same proportion. As your Width and Height come down (with Resample Image turned off), your Resolution goes up. Best of all, there's absolutely no loss of quality. Pretty cool! Step FourHere I've turned off Resample Image and I entered 150 in the Resolution field for output to a color inkjet printer. (I know, you probably think you need a lot more resolution, but you usually don't.) This resized my image to about 13x20", so with a little bit of cropping I can easily output a 13x19" print (which happens to be the maximum output size for my Epson 2200perfect!). Step FiveHere's the Image Size dialog for our source photo, and this time I've increased the Resolution setting to 212 ppi for output to a printing press. (Again, you don't need nearly as much resolution as you'd think.) As you can see, the Width of my image is no longer 28"it's now just over 9". The Height is no longer 42"now it's just over 14". Step SixWhen you click OK, you won't see the image window change at allit will appear at the exact same size onscreenbut look at the rulers. You can see that it's now about 9" wide by about 14" high. Resizing using this technique does three big things: (1) It gets your physical dimensions down to size (the photo now fits easily on an 11x17" sheet); (2) it increases the resolution enough so you can output this image on a printing press; and (3) you haven't softened, blurred, or pixelated the image in any waythe quality remains the sameall because you turned off Resample Image. Note: Do not turn off Resample Image for images that you scan on a scannerthey start as high-res images in the first place. Turning Resample Image off is only for photos taken with a digital camera. 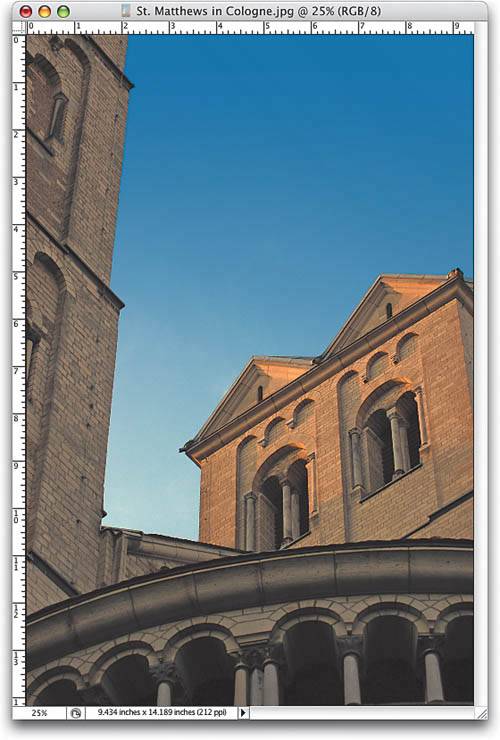 |

|
EAN: N/A
Pages: 187