Creating Your Own Custom Picture Package Layouts
|
As cool as Picture Package is, I don't think there's a Photoshop user alive who hasn't used it and thought, "This is cool, I just wish there was a layout that had...." In other words, although most of the popular layout choices are already there as presets, the one you really want isn't there, because that's just the way life works. Although technically you could edit the text file that controlled these presets back in Photoshop 7, it was a tricky, tedious task. Not so in Photoshop CS2, thanks to a clever visual layout editor. Step OneOpen a photo (it doesn't matter which one; you're just using it as a placeholder to build your template), and then go under the File menu, under Automate, and choose Picture Package. (Note: You can also access Picture Package from directly within the Adobe Bridge by choosing Tools and going under the Photoshop submenu.) When the Picture Package dialog opens, click on the Edit Layout button (located in the bottom-right corner of the Layout section).  Step TwoWhen the Picture Package Edit Layout dialog opens, go to the Layout section in the top-left corner and give your new custom layout a name (this name will later appear in the pop-up menu of preset layouts within the Picture Package dialog). Choose your page size and your desired ruler units from this Layout section. 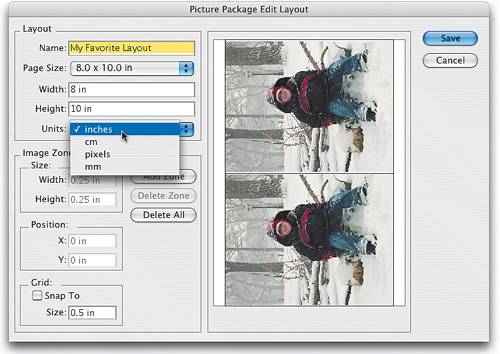 Step ThreeYou'll probably find it easier to create your custom layout if you start from scratch (unless the layout you're creating is very similar to an existing layout, in which case, choose that layout before you enter the Edit Layout mode). To start from scratch, click the Delete All button to remove all the existing photo thumbnails from the preview window. (Note: Adobe calls these areas "Zones," so we might as well get used to calling them that too so we sound cool at Photoshop parties.) 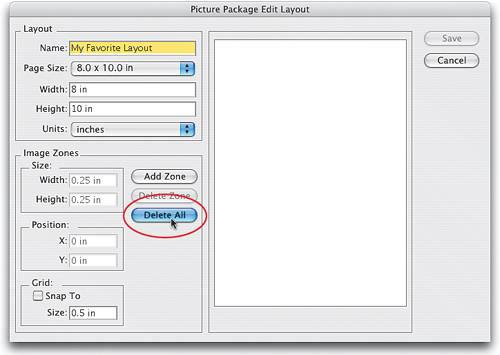 Step FourClick the Add Zone button to add your first Zone. A bounding box appears around your photo, so you can resize your Zone by dragging the adjustment handles that appear on the corners and sides of the bounding box. To move the Zone around within the preview area, just click-and-drag inside the bounding box. 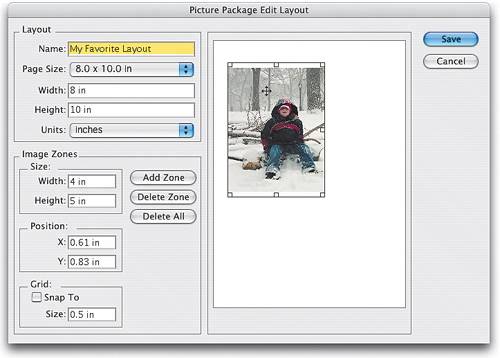 Step FiveSince the idea behind Picture Package is "multiple copies of the same image on one page," it's easy to create duplicate Zones. Just Option-click (PC: Alt-click) within a Zone's bounding box and a contextual menu appears, where you can choose to duplicate the Zone, delete the current Zone, or create a duplicate of a Zone in one of the preset sizes. Choosing one of these sizes from the contextual menu doesn't affect the current Zone; it makes a duplicate in the size you choose.  Tip If you've been looking in the dialog for a button called "Make Horizontal" or "Flip on Side," forget itthose are too descriptive, and if Adobe named buttons like that, you'd easily figure it out, and then where would we be? Instead, when you want to change the orientation of a photo from portrait to landscape, just click on a corner point and drag the box until it's wider than it is tall (or vice versa for landscape-to-portrait images). When you do this, the Layout Editor will automatically flip your photo on its side. It sounds clunky, but try it once and you'll see it's really not. 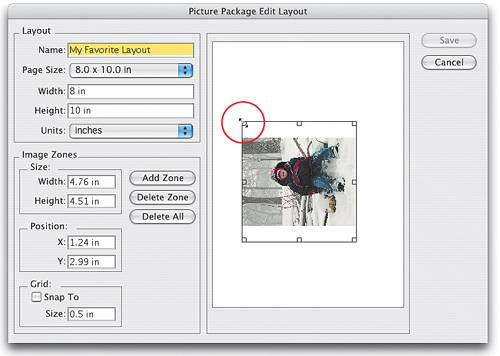 Another Tip Another thing you might find helpful when creating your layout is to turn on a placement grid. You do this at the bottom of the Image Zones section of the dialog (in the bottom-left corner) by turning on the Snap To option. This also makes your Zones snap to the grid, which makes precise positioning much easier. 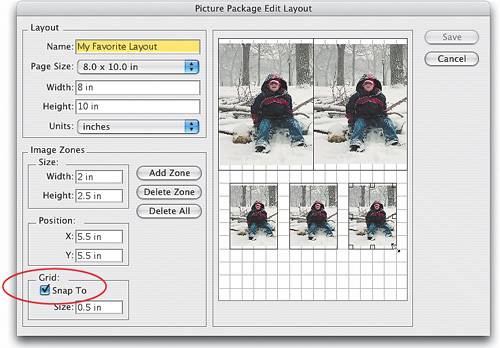 Step SixWhen you click OK, a standard Save-style dialog will appear, asking you to name your new layout. (This is just the name of the file on your hard drive, not the name that will appear in the Layout pop-up menu within Picture Package, so just give it a name that you'll recognize if you decide to delete this layout one day.) Click Save, and your newly named layout will now appear in the Layout pop-up menu of the Picture Package dialog, where you can access it anytime from here on out.  |

|
EAN: N/A
Pages: 187