Color Correcting Digital Camera Images
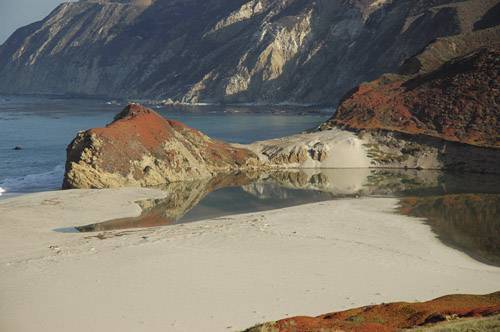
| As far as digital technology has come, there's still one thing that digital cameras won't dogive you perfect color every time. In fact, if they gave us perfect color 50% of the time, that would be incredible, but unfortunately, every digital camera (and every scanner that captures traditional photos) sneaks some kind of color cast into your image. Generally, it's a red cast, but depending on the camera it could be blue. Either way, you can be pretty sure there's a cast. (Figure it this wayif there wasn't, the term "color correction" wouldn't be used.) Here's how to get your color in line: Step One©SCOTT KELBY  Open the digital camera photo you want to color correct. (The photo shown here doesn't look too bad, but as we go through the correction process, you'll see that, like most photos, it really needed a correction.) Step Two
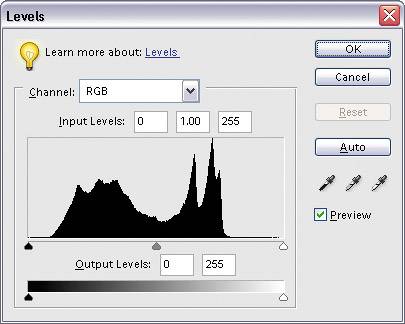
Go under the Enhance menu, under Adjust Lighting, and choose Levels (or press Control-L). The dialog may look intimidating at first, but the technique you're going to learn here requires no previous knowledge of Levels, and it's so easy, you'll be correcting photos using Levels immediately. Step Three
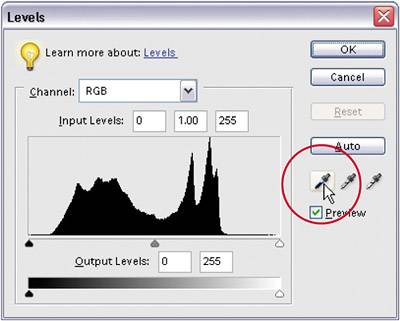
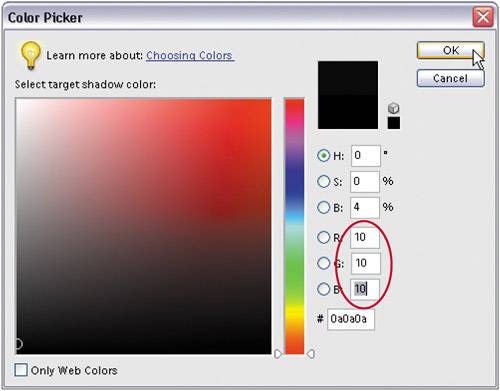
First, we need to set some preferences in the Levels dialog so we'll get the results we're after when we start correcting. We'll start by setting a target color for our shadow areas. To set this preference, in the Levels dialog, double-click on the black Eyedropper tool (it's on the lower right-hand side of the dialog, the first Eyedropper from the left). A Color Picker will appear asking you to "Select Target Shadow Color." This is where we'll enter values that, when applied, will help remove any color casts your camera introduced in the shadow areas of your photo. Step Four
We're going to enter values in the R, G, and B (red, green, and blue) fields of this dialog. For R, enter 10 For G, enter 10 For B, enter 10 TIP To move from field to field, just press the Tab key. Then click OK. Because these figures are evenly balanced (neutral), they help ensure that your shadow areas won't have too much of one color (which is exactly what causes a color casttoo much of one color). Step Five
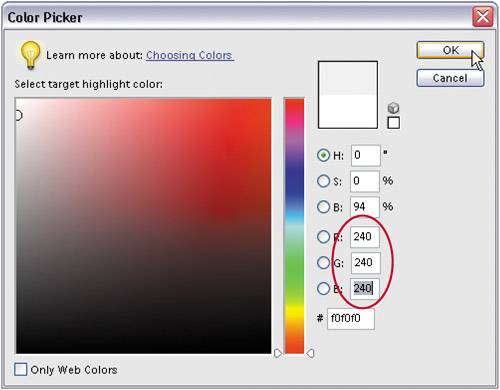
Now we'll set a preference to make our highlight areas neutral. Double-click on the highlight Eyedropper (the third of the three Eyedroppers in the Levels dialog). The Color Picker will appear asking you to "Select Target Highlight Color." Click in the R field, and then enter these values: For R, enter 240 For G, enter 240 For B, enter 240 Then click OK to set those values as your highlight target. Step Six
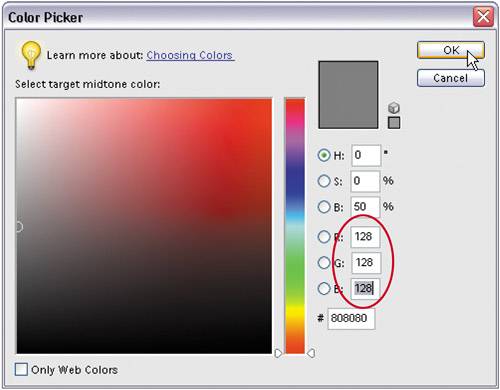
Finally, set your midtone preference. You know the drilldouble-click on the midtones Eyedropper (the middle of the three Eyedroppers) so you can "Select Target Midtone Color." Enter these values in the R, G, and B fields (if they're not already there by default): For R, enter 128 For G, enter 128 For B, enter 128 Then click OK to set those values as your midtone target. Step Seven
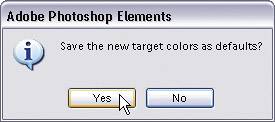
Okay, you've entered your preferences (target colors), so go ahead and click OK in the Levels dialog (without making any changes to your image). You'll get an alert dialog asking you if you want to "Save the new target colors as defaults." Click Yes, and from that point on, you won't have to enter these values each time you correct a photo, because they'll already be entered for youthey're now the default settings. Step Eight
You're going to use these Eyedropper tools that reside in the Levels dialog to do most of your correction work. Your job is to determine where the shadow, midtone, and highlight areas are, and click the right Eyedropper in the right place (you'll learn how to do that in just a moment). So remember your jobfind the shadow, midtone, and highlight areas and click the right Eyedropper in the right spot. Sounds easy, right? It is. You start by opening Levels and setting the shadows first, so you'll need to find an area in your photo that's supposed to be black. If you can't find something that's supposed to be the color black, then it gets a bit trickierin the absence of something black, you have to determine which area in the image is the darkest. If you're not sure where the darkest part of the photo is, you can use the following trick to have Elements tell you exactly where it is.
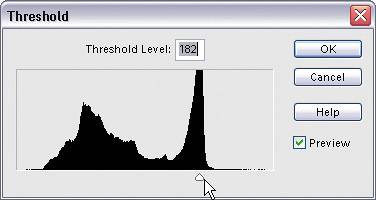
Step NineGo to the top of the Layers palette and click on the half-black/half-white circle icon to bring up the Create Adjustment Layer pop-up menu. When the menu appears, choose Threshold, which brings up a dialog with a histogram and a slider under it. Step Ten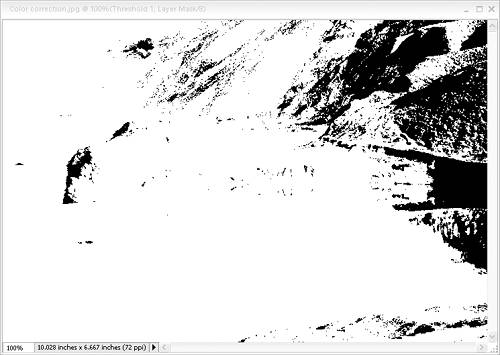
When the Threshold dialog appears, drag the Threshold Level slider under the histogram all the way to the left. Your photo will turn completely white. Slowly drag the slider back to the right, and as you do, you'll start to see some of your photo reappear. The first area that appears is the darkest part of your image. That's itthat's Elements telling you exactly where the darkest part of the image is. Now that you know where your shadow area is, make a mental note of its location, but don't click OK yet. Now to find a white area in your image. Step Eleven
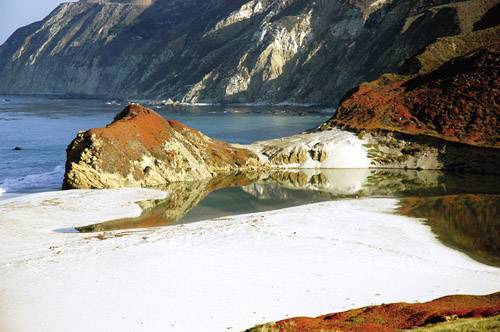
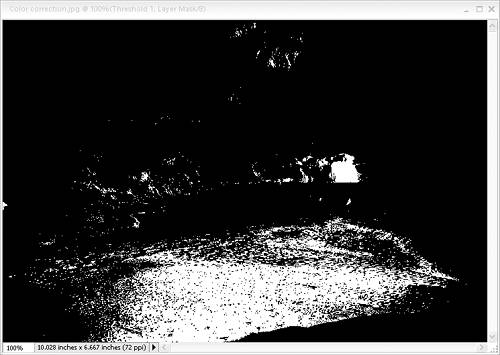 If you can't find an area in your image that you know is supposed to be white, you can use the same technique to find the highlight areas. With the Threshold dialog still open, drag the slider all the way to the right. Your photo will turn black. Slowly drag the slider back toward the left, and as you do, you'll start to see some of your photo reappear. The first area that appears is the lightest part of your image. Make a mental note of this area as well (yes, you have to remember two things, but you have to admit, it's easier than remembering two PIN numbers). You're now done with Threshold so just click Cancel because you don't actually need the adjustment layer anymore. Step Twelve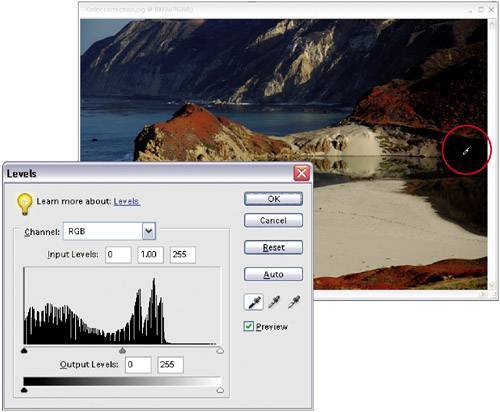 Press Control-L to bring up the Levels dialog. First, select the shadow Eyedropper (the one half filled with black) from the bottom right of the Levels dialog. Move your cursor outside the Levels dialog into your photo and click once in the area that Elements showed you was the darkest part of the photo (in Step 10). When you click there, you'll see the shadow areas correct. (Basically, you just reassigned the shadow areas to your new neutral shadow colorthe one you entered earlier as a preference in Step 4.) If you click in that spot and your photo now looks horrible, you either clicked in the wrong spot or what you thought was the shadow point actually wasn't. Undo the setting of your shadow point by clicking the Reset button in the dialog and try again. If that doesn't work, don't sweat it; just keep clicking in areas that look like the darkest part of your photo until it looks right. 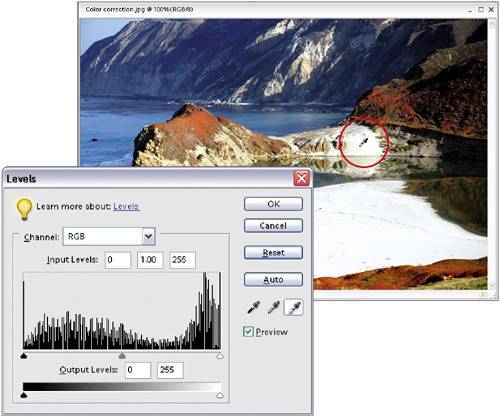 Step ThirteenWhile still in the Levels dialog, click on the highlight Eyedropper (the one filled with white). Move your cursor over your photo and click once on the lightest part (the one you committed to memory in Step 11) to assign that as your highlight. You'll see the highlight colors correct. Step Fourteen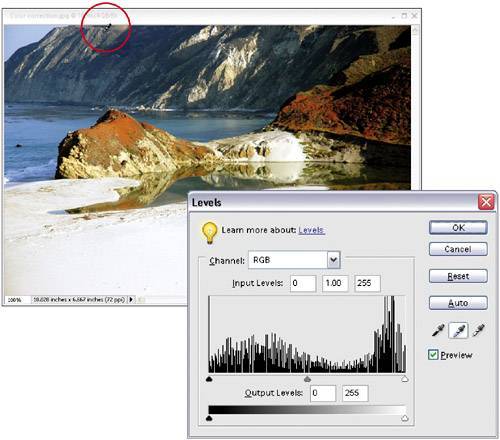 Now that the shadows and highlights are set, you'll need to set the midtones in the photo. It may not look as if you need to set them, because the photo may look properly corrected, but chances are there's a cast in the midtone areas. You may not recognize the cast until you've corrected it and it's gone, so it's worth giving it a shot to see the effect (which will often be surprisingly dramatic). Unfortunately, there's no Threshold adjustment layer trick that works well for finding the midtone areas, so you have to use some good old-fashioned guesswork (or try "Dave's Amazing Trick for Finding a Neutral Gray" in this chapter). Ideally, there's something in the photo that's gray, but not every photo has a "gray" area, so look for a neutral area (one that's obviously not a shadow, but not a highlight either). Click the middle (gray) Eyedropper in that area. If it's not right, click the Reset button and repeat Steps 12-14. Step Fifteen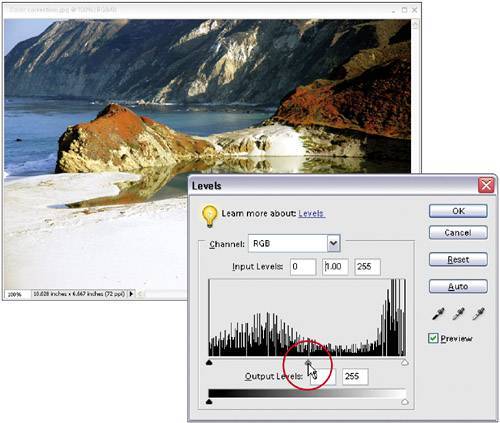 There's one more important adjustment to make before you click OK in the Levels dialog and apply your correction. Under the Histogram (that's the black mountain-range-looking thing), click on the center slider (the Midtone sliderthat's why it's gray) and drag it to the left a bit to brighten the midtones of the image. This is a visual adjustment, so it's up to you to determine how much to adjust, but it should be subtlejust enough to bring out the midtone detail. When it looks right to you, click OK to apply your correction to the highlights, midtones, and shadows, removing any color casts and brightening the overall contrast. Before
After
|


EAN: 2147483647
Pages: 201