Bracketing with Camera Raw
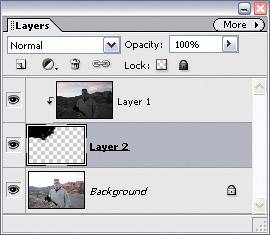
| If you forgot to bracket in the camera itself, you can use Camera Raw to create multiple exposures, and then open those images in Elements 4, where you can composite them together to create an image that one exposure alone couldn't capture. Here's how it's done: Step One©SCOTT KELBY 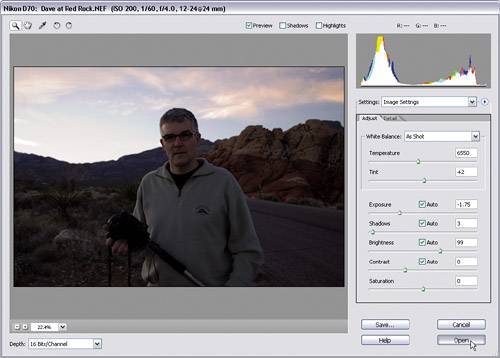 Using the Organizer, press Control-I to open the RAW image to which you want to apply a bracketing technique. In this example, the sky's exposure looks pretty decent, but the subject (my buddy and fellow photographer Dave Moser) is almost totally in the shadows. So, using Camera Raw (and the default Auto settings), create the first photo that has the proper exposure for the sky. So even though Dave's dark, as long as the sky looks good to you, click Open to create the first version of your bracketed photo in the Elements Editor. Step Two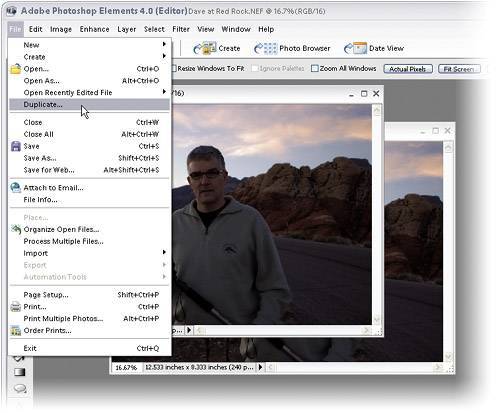 In the Editor, go under the File menu and choose Duplicate to make a copy of this image. Click on the original photo and close this original image (without saving it). By doing this, we can reopen the RAW file in the next step and create a second version of this image that exposes the foreground, taking Dave out of the shadows. Step Three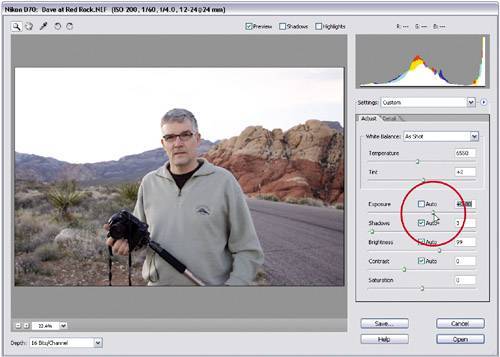 Now, go back to the Organizer, click on the thumbnail for that same RAW photo, then press Control-I to open the RAW file again. Once the photo is open in Camera Raw, drag the Exposure slider to the right until Dave (and the foreground around him) is properly exposed. This will totally blow out the sky, but just ignore that and focus on getting a good exposure for Dave, our subject. When it looks good to you, click the Open button to create this exposed version of the photo in the Elements Editor. Step Four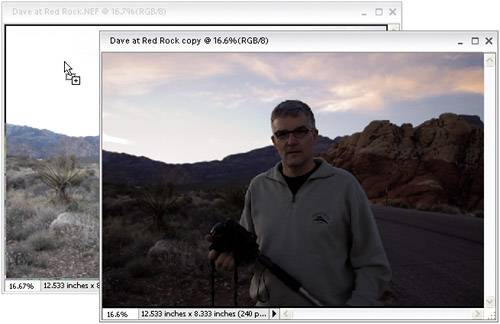 Now you should have both versions of the image open in the Elements Editor: the brighter one exposed for the highlights (to bring out Dave) and the darker one exposed for the shadows (to bring out the sky). Arrange the windows so you can see both onscreen at the same time. Press V to get the Move tool, and with the shadow image active, press-and-hold the Shift key and drag-and-drop the darker version on top of the lighter version. The key to this part is holding down the Shift key while you drag between documents, which perfectly aligns the dark copy (that now appears on its own layer in the Layers palette) with the lighter version on the Background layer. (This exact alignment of one identical photo over another is referred to as being "pin registered.") You can now close the shadow document without saving, as both versions of the image are contained within the lighter version. Step Five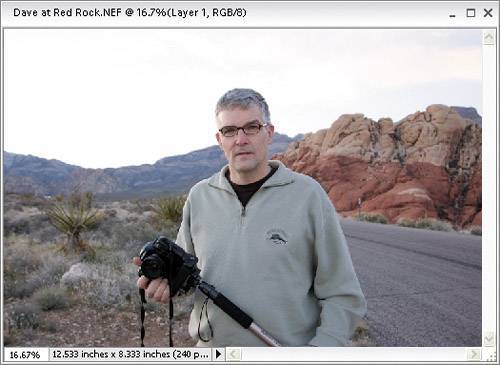
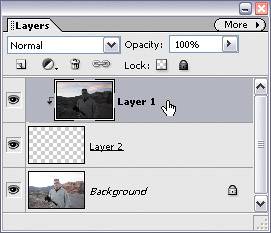
Go to the Layers palette, hold down the Control key, and click the Create a New Layer icon at the top of the Layers palette. This creates a new blank layer directly beneath the photo exposed for the sky. Now, in the Layers palette, click on the photo exposed for the sky (it should be the top layer), and then press Control-G. This groups your image with the blank layer, covering it so you now only see the version of the photo that's exposed for Dave (which is on the Background layer). Step Six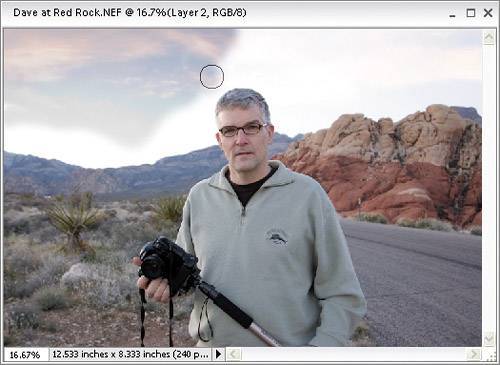
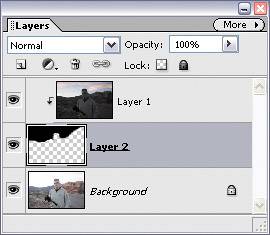
It's time to "reveal" the sky on the darker version of the photo. Here's how: First, in the Layers palette, click on the blank layer between the two image layers. Then press the letter B to get the Brush tool, and click on the down-facing arrow next to the Brush thumbnail in the Options Bar. Choose a medium-size, soft-edged brush from the Brush Picker that appears. Now, press the letter D to set your Foreground color to black, and start painting over the areas of the photo that you want to be darker (in this case, the sky). As you paint, the sky is revealed. Step Seven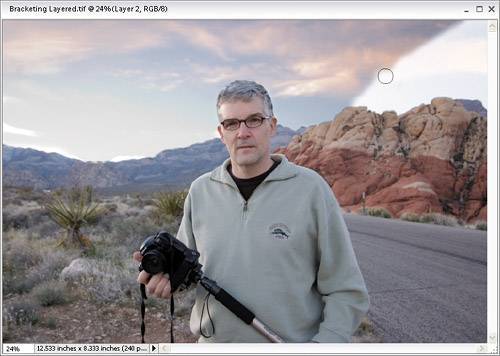
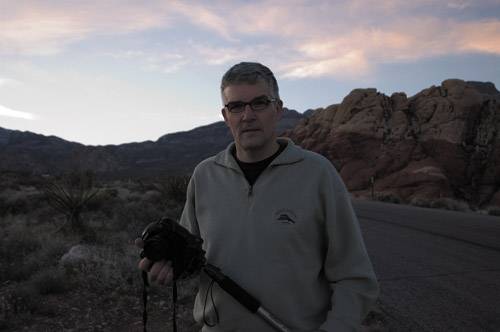
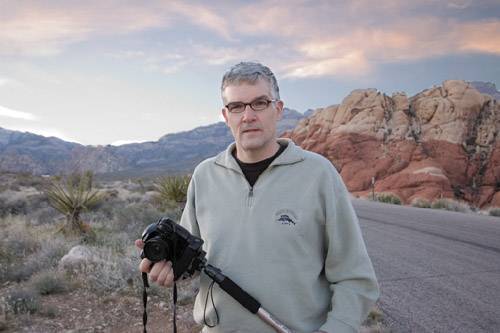
Keep going until you've painted the entire sky area in, so you have an image that your digital camera couldn't possibly have captured, because in a situation like this it's going to either expose for the ground or the sky, but not both. (Note: If you make a mistake, press E to switch to the Eraser tool and begin erasing.) If you want this "best of both worlds," where the sky and the subject/ground are perfectly exposed, you'll have to pull it off here in Photoshop Elements, but that's not a bad thing. In fact, it totally rocks (sorry, I mean "that's fascinating"). By taking these few extra steps, you'll wind up with an image like the one shown hereone where the subject and background are perfectly exposedit's the best of two photos combined. Before
After
|
EAN: 2147483647
Pages: 201