Repairing Damaged or Missing Parts
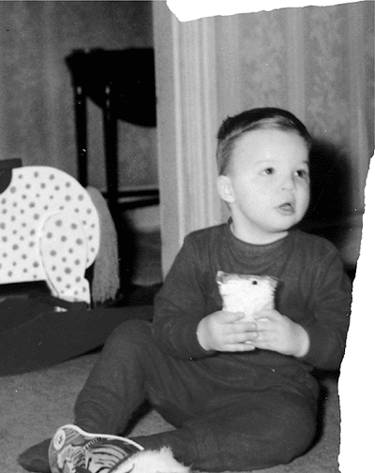
| If you have an old photo with a serious rip, tear, stain, or other major anomaly, there's a reasonable chance that one of these little nasties could affect a part of your photo's main subject (for example, if it's a photo of a person, a stain could cover a body part or facial feature, leaving you with quite a task). Here's how to repair missing or damaged partsthe easy way. Step One©DAVE MOSER
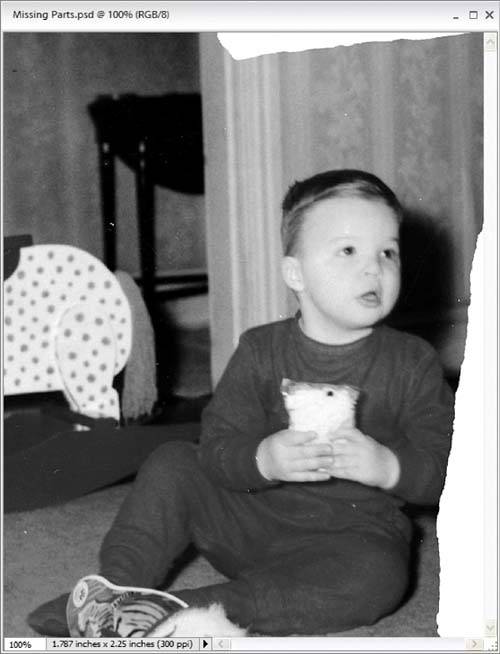
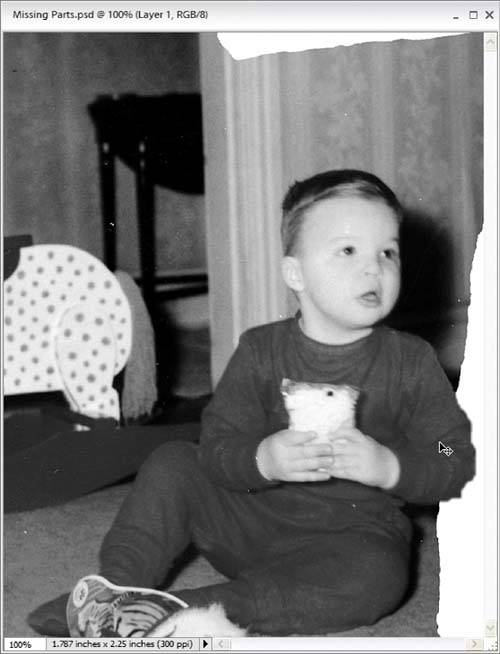
Open the photo that contains a damaged feature (in this case, part of his arm and his whole elbow are missing because of a tearplus, part of the rug and the wallpaper are also missing). Step Two
Use one of Elements' selection tools (try the Lasso tool if you just need to make a loose selection like the one I did here) to select an undamaged part of the image that you can use to fix the damaged area. For instance, if you're trying to fix a person's left elbow and the right arm is undamaged, select the right arm to use for the repair. Step Three
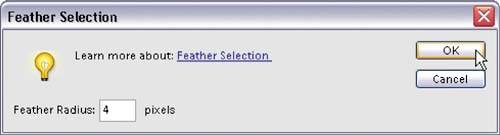
To keep from having a hard edge around the selected area, you'll need to apply a feather to the edges of your selection. Go under the Select menu and choose Feather. When the dialog appears, enter a Feather Radius. For low-res images, use a 1-to 2-pixel Radius. For high-res, 300-ppi images, you can use as much as 4 or 5 pixels. Step Four
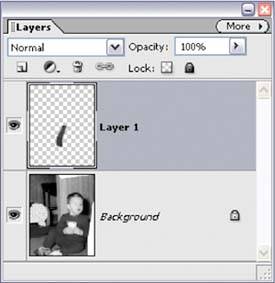
You'll need to duplicate the selection, so go under the Layer menu, under New, and choose Layer via Copy (or press Control-J). This creates a new layer with a copy of your selected area on it. Step Five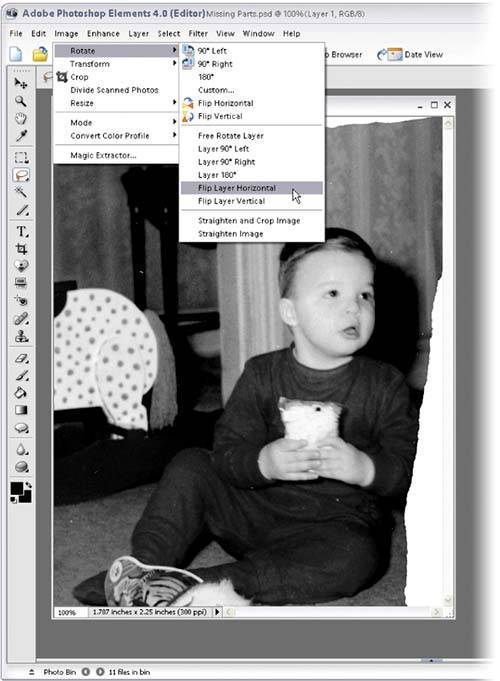 You probably can't just drag this patch over to fill the empty space (because the person would end up with two right arms, leaving him looking slightly freakish). So, you'll need to flip the copied layer by going under the Image menu, under Rotate, and choosing Flip Layer Horizontal, which turns your patch layer into a mirror reflection of the original selection. Step Six
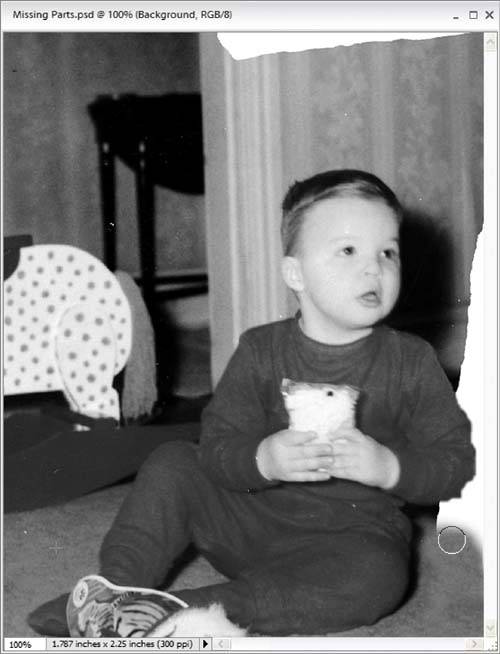
Now, switch to the Move tool by pressing the V key, and with the patch on its own layer, drag it over to where the tear is on the right side of the photo. (Note: If you lower the Opacity of the patch layer to about 60%, it may help you precisely position the patch because you'll be able to see some of the original image on the layer beneath it.) If your selection looks a little rough, you can press E to switch to the Eraser tool and erase a little bit along the edge to make it smoother. It probably looks a bit jaggy right now, but once you put some background behind it, you'll be amazed at how it blends right in. Step Seven
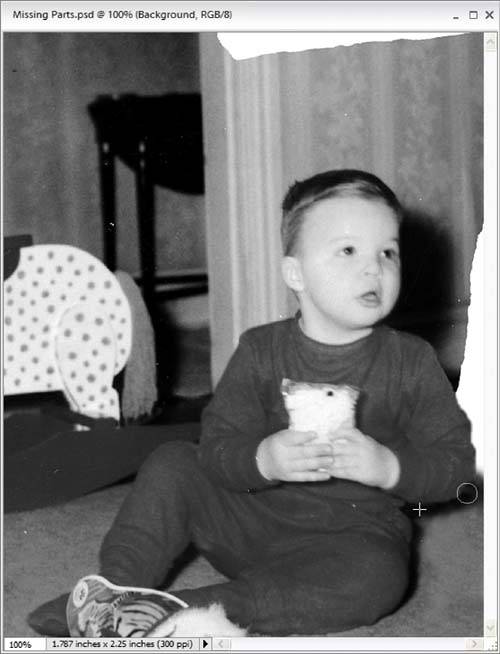
Go to the Layers palette and click on the Background layer. Now we're going to start fixing the missing carpet to the right of his left knee. Start by pressing S to get the Clone Stamp tool, and then Alt-clicking in the clean area of rug to the left of his right leg (you'll see the plus-sign cursor showing the spot where you Alt-clicked). Then move over to the white area to the right of his left knee and start painting (okay, cloning) over that entire corner of the photo. The carpet on the left will be cloned into that white area on the right. You might have to Alt-click a time or two in different spots so you don't "run out of room" and start cloning other areas. Step Eight
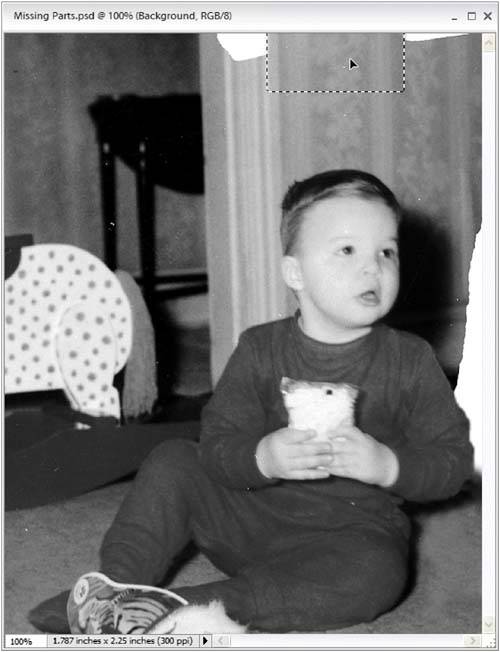
Now you'll want to add that missing dark shadow under his left arm and elbow, so Alt-click in the shadow under his arm, where his left arm and leg first touch (as shown herelook for the plus-sign cursor to see exactly where to Alt-click). Then move along under this arm to clone that shadow. Step Nine Now onto the wallpaper fix above his head. Start by pressing M to get the Rectangular Marquee tool and select a clean rectangular area of wallpaper below the tear (make sure you're on the Background layer). To soften the edges of your selection (to help hide any hard edges so your fix won't be a dead giveaway), go under the Select menu and choose Feather. When the dialog appears, enter 2 pixels (or higher for high-res, 300-ppi images) and click OK. Step Ten
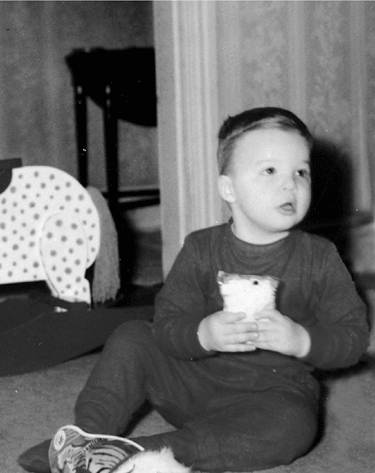
Press Control-J to put that area on its own separate layer. Now get the Move tool, and click-and-drag that copied layer up, positioning it so it covers the white area. Also, make sure the pattern lines up in the wallpaper. Do the same things for the white areas to the left and right of where you just fixedmake a selection on the Background layer, feather it, put it on its own layer, and then click-and-drag it into place. To finish, you'll switch back to the Clone Stamp tool, go to the Layers palette, click on the Background layer, and clone in more areas around his left arm. I cloned down part of the wall to fill in the white areas. The final results are complete in a few quick minutes. Before
After
|

EAN: 2147483647
Pages: 201
- Challenging the Unpredictable: Changeable Order Management Systems
- Enterprise Application Integration: New Solutions for a Solved Problem or a Challenging Research Field?
- Context Management of ERP Processes in Virtual Communities
- Data Mining for Business Process Reengineering
- A Hybrid Clustering Technique to Improve Patient Data Quality