Amusing the User While Preloading There might come a day when you create a file that just plain takes a while to download. With a really big file, watching the percent load numbers roll by is even less exciting than watching paint dry. Why not distract your users with a simple game? Give them something to do, and you've got a better chance of them sticking around. The key to making this work is that the game must be simple. You can't have much in the way of graphics and animation. In other words, needing a preloader for your preloader is not cool. The preloader that you'll build in this exercise is a take-off on the classic refrigerator magnets. In an added twist, you can set it up to randomly load a different set of magnets every time. (See Figure 16.5.) Figure 16.5. The final version of this file is a take-off on the classic refrigerator magnets. Just like real magnets, you can drag and drop these to create your own sayings. 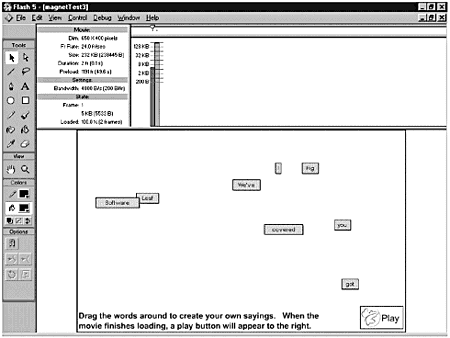 The bulk of the interactions are carried out using ActionScript, which helps keep the file very lightweight. Other than the actions, all of which are attached to an empty movie clip, you have one simple three-layer movie clip that contains the background for the magnet, the text field for the magnet word, and an invisible button inside a movie clip. That's it. For the sake of saving time, the magnet already has been assembled for you. However, it's important that you know how the magnet was assembled to understand the actions you'll be adding. The individual magnets are created on-the-fly using the attachMovie() method of the Movie object. That means you'll never actually need to place a copy of the magnet movie clip on the Stage, but it does have to be set up for export using the Linkage properties in the Library (Library Options > Linkage). This already has been done for you. The unique identifier name assigned to the magnet movie clip is magnet. The magnet movie clip itself is composed of three major components on three layers . A layer-by-layer breakdown follows : -
Button layer. This layer contains InvisibleButtonMC, which is just a movie clip with an invisible button in it. Rather than have the invisible button set up in the usual way, with a shape only in the Hit state, this one has a shape in the Up state with its alpha set to 0. Why? The only thing in this movie clip is an invisible button. It turns out that you can't resize an otherwise empty movie when the invisible button only has a hit state. Go figure. The button has the usual startDrag() and stopDrag() actions that you would expect. It also uses the swapDepth() function to make sure that the movie clip being dragged is always on top. You don't want to be dragging your magnets under other magnets. The complete code attached to the button is as follows: on (press) { _parent.startDrag(); _parent.swapDepths(_root.swap); ++_root.swap; } on (release, releaseOutside) { _parent.stopDrag(); } The InvisibleButtonMC has an instance name of Invisible. -
Text layer. This layer contains a dynamic text box that has been assigned a variable name of word. The font for the text box is set to _sans and the text is centered. -
MagnetImage layer. This layer contains the background image of the magnet embedded in a movie clip named MagnetImage. The background needs to be embedded inside a movie clip so that you can dynamically resize it. The MagnetImage movie clip has an instance name of MagnetImage. That's all you need to know about the magnet movie clip to begin coding. The next thing you need to think about is what you actually want your magnets to say and how you're going to get them onto the Stage. Each magnet contains a single word. Because you know you're going to be building the magnets dynamically and assigning the words to the magnets as you go, you should be thinking about using an array to hold the words. There are a couple ways you could approach this. You could just create an array and populate it with a set list, but that wouldn't be any fun. Why not pass in the information you need from a text file? That way, you could easily change the magnets whenever you get tired of the current set, and you won't even need to open your Flash file to make the change. In fact, you could set up several text files and have Flash randomly select one for you. The setup of the text file is simple. All you need in the text file is a name/value pair, where the name is the variable name and the value is the list of words you want to use on your magnets. The individual words have to be separated by some type of delimiter. The delimiter should be a character you won't be using on a magnet. Possible choices would be , ;, and :. In other words, you can use anything you're unlikely to use in a word. There are four text files already set up for you on the CD-ROM (data0.txt through data3.txt). The contents of data0.txt are displayed below: dataString=FigLeafSoftwareWe'vegotyoucovered! The variable name is dataString. The pipe character is used as a delimiter between the individual words. Notice that the string is not enclosed in parentheses. If you use parentheses, they'll be interpreted as part of the string. So, how do you get that data out of the string and into an array? It's actually not terribly difficult. The data is already in a string, so you can use the String object methods on it. The String object has a function called split() that takes the string of information and splits it into an array of strings based on what you used as a delimiter between the words. For example, to split the above string and assign the values to an array, all you need to enter is the following: newMagnets = new Array(); newMagnets = dataString.split(""); Tip The internal split() function in Flash 5 is not very efficient. If you're going to be splitting large strings, you might want to use Branden Hall's version of the String object. It's included in the Chapter_16/Assets folder. Look for the file called string.as. All you need to do to include this in your Actions list is to copy it to the same directory as your Flash file and then add an include statement in your Actions list: #include action.as This replaces Flash's internal String object.
The first line creates a new instance of the Array object. The second line splits the string contained in the dataString variable based on the pipe delimiter and assigns it to the newMagnets array. After you have your data in an array, it's just a matter of manipulating it. This is one of those examples that can get talked to death. It's going to be easier to build this as you go so that you can see the file develop. You'll be adding Actions in two places. You use the main timeline to load the data from the text file. In addition, you use an empty movie clip on the Stage to hold the actions that create the magnets. Exercise 16.7 Creating a Preloader with a Built-In Game: Setting Up the File and Loading the Data -
Open magnetic_preload.fla from the Chapter_16/Assets folder on the CD. Save it to your hard drive. -
Copy the four data files (data0.txt, data1.txt, data2.txt, and data3.txt) into the same directory as you saved your FLA file. These are the data strings you'll be loading. Before you can think about loading your data, you need to know where to load it. The most logical place to load the data is to the movie clip that's going to hold your actions. -
Create a new movie clip and name it Preloader. -
Return to the main timeline and drag a copy of the empty Preloader movie clip from the Library onto frame 1 of the Preload layer and anywhere on the Stage. -
Use the Instance panel to assign the Preloader movie clip an instance name of preloader. -
Save your movie. Now that your data is loading, it's time to do something with it. Put on your ActionScripting shoes and start coding. Exercise 16.8 Creating a Preloader with a Built-In Game:Writing the Code to Create the Magnets You're already accustomed to using onClipEvent(enterFrame) when you set up a preloader. You'll be using another onClipEvent()onClipEvent(data)as a wrapper for your magnet game. This event is triggered when the data you sent to the movie clip from the main timeline finishes loading. After the data has loaded, you need to create your new Array() object, split the data string, and load your new array. -
Select the preloader movie clip on the Stage and launch the Actions panel. Add the code to set up the onClipEvent() and load your array with data from the text file (the variable name in the text file was dataString): onClipEvent(data) { //load the data and split it into an array newMagnets = new Array(); newMagnets = dataString.split(""); } -
You need to know how many items are in the new array so that you'll know how many magnets to create. You also need to keep track of a variable to control the swap depth of the movie clips. You can figure out the number of magnets you'll need by checking the length of the newMagnets array. Then all you have to do is add 1 to that value to set the next swap depth. Enter the following code between the asterisks : onClipEvent(data) { //load the data and split it into an array newData = new String(dataString); newMagnets = new Array(); newMagnets = newData.split(""); //******************************************* // initialize the variables _root.magnetNumber = newMagnets.length; _root.swap = _root.magnetNumber++; //******************************************* } -
Next you need to set up the for statement that loops through the array and builds the magnets. You'll build the magnets by using the attachMovie() method of the Movie object. Each magnet needs to have its own unique name and level. You also need to assign a word to each magnet. Enter the following code between the asterisks: onClipEvent(data) { //load the data and split it into an array newData = new String(dataString); newMagnets = new Array(); newMagnets = newData.split(""); // initialize the variables _root.magnetNumber = newMagnets.length; _root.swap = _root.magnetNumber++; //******************************************* for (i=0; i< newMagnets.length; i++) { //make the magnets _root.attachMovie("magnet", "magnet"+i, i); _root["magnet"+i].word = newMagnets[i]; } //******************************************* } -
Save and test your movie. Right now, all the magnets are the same length, and they load right on top of each other in the upper-left corner of the movie. (See Figure 16.6.) Note that you can click them and drag them around the Stage. Figure 16.6. At this stage, your magnets are loading, but they're all the same size and they all load in the upper-left corner of the movie. 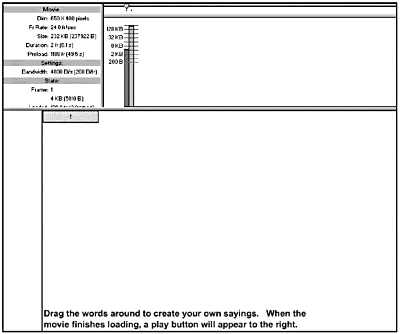 -
Next you set the width of each magnet based on the number of characters its word contains. You can check the length of any item in an array by using the length property of the String object. After you know the length, you can use that to set both the width of the MagnetImage and the Invisible button. Enter the following code between the asterisks: onClipEvent(data) { //load the data and split it into an array newData = new String(dataString); newMagnets = new Array(); newMagnets = newData.split(""); // initialize the variables _root.magnetNumber = newMagnets.length; _root.swap = _root.magnetNumber++; for (i=0; i< newMagnets.length; i++) { //make the magnets _root.attachMovie("magnet", "magnet"+i, i); _root["magnet"+i].word = newMagnets[i]; //******************************************* //check the number of characters in the array item magnetLength = newMagnets[i].length; // set the width of the magnet image and button _root["magnet"+i].MagnetImage._width = 10*magnetLength; _root["magnet"+i].Invisible._width = 10*magnetLength; //******************************************* } } Where did that 10*magnetLength come from? When you're setting the width of an object, you're setting the width in pixels. The individual letters all have different pixel widths, so you need to account for the possible settings. The letter m is the widest letter. For the font (_sans) and size (12) you're using, 10 or 11 pixels accommodates any character comfortably. -
Save and test your movie. Your magnets now are all different lengths, but they're still all stacked in the upper-left corner. (See Figure 16.7.) You just need to randomize their placement on the Stage. Figure 16.7. Your magnets now are all different sizes, based on the length of the word they contain, but they still all stack up in the upper-left corner of the movie. 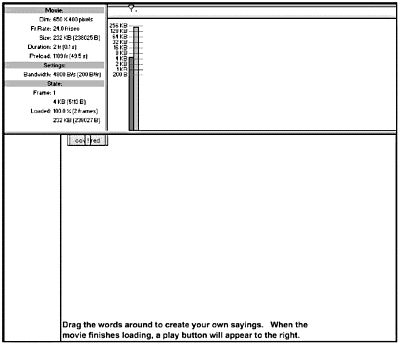 -
To randomize the magnets on the Stage, you need to individually set their x and y coordinates. You need to make sure, of course, that the coordinates actually fall somewhere inside the visible bounds of your movie. The Math.random() function returns a psuedo-random number between 0.0 and 1.0. Your movie is 650400 pixels. Unless you want the magnets to be partially off the edge of the movie, you should restrict the possible ranges. By multiplying the result of the Math.random() function by 550, the only possible values returned will be between 0 and 550. If you add 10 to the final number, you'll move the magnet 10 pixels to the rightno bumping up against the left edge of the movie. To randomize your magnets, enter the following code between the asterisks: onClipEvent(data) { //load the data and split it into an array newData = new String(dataString); newMagnets = new Array(); newMagnets = newData.split(""); // initialize the variables _root.magnetNumber = newMagnets.length; _root.swap = _root.magnetNumber++; for (i=0; i< newMagnets.length; i++) { //make the magnets _root.attachMovie("magnet", "magnet"+i, i); _root["magnet"+i].word = newMagnets[i]; //check the number of characters in the array item magnetLength = newMagnets[i].length; // set the width of the magnet image and button _root["magnet"+i].MagnetImage._width = 11*magnetLength; _root["magnet"+i].Invisible._width = 11*magnetLength; //******************************************* //randomize and place the magnet _root["magnet"+i]._x = Math.floor(550*Math.random()+10); _root["magnet"+i]._y = Math.floor(300*Math.random()+20); //******************************************* } } -
Save and test your movie. Now your magnets should be distributed randomly on the Stage. (See Figure 16.8.) Figure 16.8. Your magnets now are all different sizes and randomly placed on the Stage, but you still don't have a way to start the main movie. 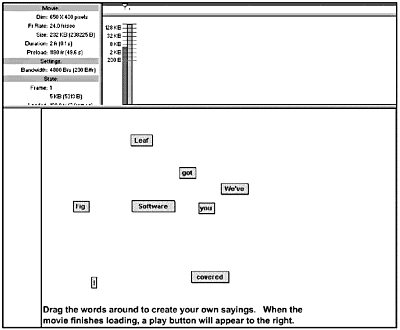 But wait, this is supposed to be a preloader. You need to add that final bit of code, which should be very familiar by now, to send you to the main movie when it's loaded. There's a little twist to this one. If your visitor is happily rearranging magnets on the screen, you don't want to interrupt the fun! This time, why not have a Play button appear when the main movie finishes loading? That way, you give the visitor the choice of when to quit playing. There's already a button set up in the Library for you to use. It's embedded in a movie clip, set to export, and has the identifier name of playButtonMC. All you need to do is attach it to your movie and set its x and y coordinates. -
To make your Play button appear, add the following code after the last curly brace in your Actions list: onClipEvent(enterFrame) { if (_root.getBytesLoaded()/_root.getBytesTotal() == 1) { _root.attachMovie("playButtonMC", "playButton", 1000); _root.playButton._x = 560; _root.playButton._y = 350; } } There's one more little bit of housekeeping you'll need to take care of. You have to make all the magnets you've attached to your movie go away. The magnets should disappear when your user presses the Play button. (See Figure 16.9.) Figure 16.9. After the main movie finishes loading, the Play button appears in the lower-right corner of the movie. 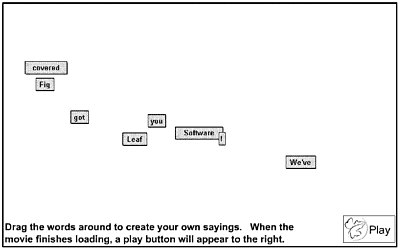 -
Double-click playButtonMC in the Library and select the Play button on the Stage. You just need to add the following code to remove the magnet movie clips, to go to the main movie, and to make the Play button invisible: on (release) { for (i=0; i < _root.magnetNumber; i++) { _root["magnet"+i].removeMovieClip(); } _root.gotoAndStop(2); this._visible = false; } -
Save and test your movie. You can rearrange the magnets to your heart's content. As soon as the movie finishes loading, your Play button appears. Click the Play button and all your magnets disappear and you advance to the main movie. You can further customize the magnet preloader by randomizing the data file that loads at the very beginning. If you copied all the datan.txt files (data0.txtdata3.txt) from the CD to your hard drive, you can do that now by changing the code in frame 1 of the Actions layer on the main timeline to the following: num = Math.floor(3*Math.random()); _root.preload.loadVariables("data"+num+".txt"); stop(); This minor change randomly causes one of the four data files to load.  |


