Writing a Class Library
|
Hopefully, we've begun to persuade you of the benefits of writing classes and class libraries for use in your applications - and particularly, for your ASP.NET database applications. In this section, we're going to look at how to write a simple class library. To help make our examples realistic, we will look at the solutions to the kinds of business problems that might be posed to us by Northwind Traders. Once the problem has been explained, we'll explain our solution, and then walk through the code.
Northwind's Business RequestsAs can be seen from a quick look at the Customers table in the Northwind database, the company does business with clients in several different countries - in fact, the 91 customers are drawn from 21 different nations. Now, in the past, Northwind didn't carefully manage the costs of shipping goods to its overseas customers, but now its auditors have recommended that it implement an additional shipping charge for such orders. After working with its shipping partner, Northwind has decided on a two-part international shipping charge:
The sum of these additional charges needs to be expressed in the currency used by the country being shipped to, on the date the order was shipped. Note that many of the European countries will now be using euros rather than their original native currency. (The Excel worksheet provided with the code download shows the shipping charges by country.) To keep things simple, the conversion rates and fees won't be changed more than twice a year, and Northwind would like to start by having this information available on its intranet site, which is called NwtNet.
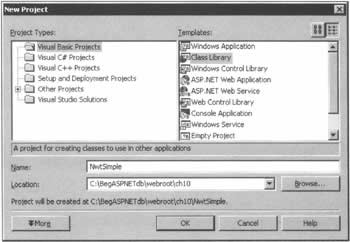
Structuring our SolutionOur solution to this problem is fairly simple. We'll create a class library that offers two classes: one for representing the international shipping charge, and one for computing the charge based on the country the items are being shipped to, the number of items, and the date on which shipping occurred. Later on, we'll use an ASP.NET web page to collect the shipping parameters and display the results. Try It Out - Building a Simple Class Library
Due to the amount of code in the full version of this example, we will restrict the number of countries we deal with. Following the instructions here will result in a functional application, but for the complete application you'll need to download the code from www.wrox.com.
How It WorksThe first line of code simply starts the ShippingCharge class, objects of which will be created by the ShippingChargeCalculator class and used to represent the amount of the shipping charge.
Public Class ShippingCharge We add two class-level variables: one to hold the name of the currency as a String, and a Decimal value to hold the charge amount.
Private _CurrencySymbol As String Private _ChargeAmount As Decimal Next, we expose the private class-level variables as properties of the ShippingCharge class.
Public Property CurrencySymbol() As String Get CurrencySymbol = _CurrencySymbol End Get Set(ByVal Value As String) _CurrencySymbol = Value End Set End Property Public Property ChargeAmount() As Decimal Get ChargeAmount = _ChargeAmount End Get Set(ByVal Value As Decimal) _ChargeAmount = Value End Set End Property As the last member in this class, the constructor simply sets some default values for the private variable. It is a good idea to do this, just in case somebody decides to create an instance of this class without using our shipping charge routine.
Public Sub New() _CurrencySymbol = "USD" _ChargeAmount = OD End Sub End Class Moving on to the second class, ShippingChargeCalculator contains two public functions:
Let's turn our attention first to GetCountryList(), which returns an ArrayList instance of the country names, sorted into alphabetical order. We've used an ArrayList specifically because it works well with ASP.NET web controls' data binding features (for simplicity, we have only shown two countries here).
Public Function GetCountryList() As ArrayList Dim CountryList As New ArrayList() Dim ListOfCountries As String Dim chra(1) As Char ListOfCountries = "Canada,Sweden" As we intend to store the country names in a simple, comma-delimited string, we can use the String object's Split() method to parse it into the ArrayList object. The Split() method expects an array of characters to represent the delimiters, for which we use the chra variable. To use the comma character as the delimiter, we just set the first element of chra to be a comma.
chra(0) = Convert.ToChar(",") Next, we call the Split() method on the country list string, passing the result to the AddRange() method of the ArrayList object. AddRange() simply appends an array to an ArrayList.
CountryList.AddRange(ListOfCountries.Split(chra)) Then, to sort the list of countries alphabetically, we can call the ArrayList.Sort() method without any parameters. (This may seem like a wasted step here, because the string we parsed already had the countries in alphabetical order. However, with this statement in place, we could insert a new country at the end of the ListOfCountries string without worrying about it breaking the sort order.) We then return the ArrayList object.
CountryList.Sort() Return CountryList End Function The function that actually determines the international shipping charge is CalculateInternationalCharges(), which starts like this, and returns an instance of the ShippingCharge class.
Public Function CalculateInternationalCharges( _ ByVal CountryShippingTo As String, _ ByVal NumberOfItems As Integer, _ ByVal EffectiveShipDate As Date) As ShippingCharge First, we need to create a ShippingCharge instance to work with. We also prepare a few local variables to hold the values needed in our calculations, and set them to the defaults for the US market. We'll also need to declare the standardized (see www.iso.org/iso/en/ISOOnline.frontpage) currency symbol, the conversion rate, the flat rate charges, and the total number of items being shipped. The number of items being shipped is based on their packaging; so one case of 24 cans counts as one item, not 24.
Dim sc As New ShippingCharge() Dim CurrencySymbol As String = "USD" Dim ConversionRate As Decimal = 1D Dim FlatCharge As Decimal = OD Dim PerItemCharge As Decimal = OD We know that Northwind ships products to customers in Europe, and we also know that some of the countries in Europe have started using a common currency: the euro. However, it's possible that some more countries will switch to the euro at a later date, so we'll need to check to see whether the current system time is before or after the date when the country in question switched to the new currency. In order to avoid computing the shipping charge in euros when we shouldn't, we'll simply set the default value of the EuroDate variable to the maximum possible system date and time (the end of 9999!).
Dim UsesEuro As Boolean = False Dim EuroDate As New Date(DateTime.MaxValue.Ticks) With these in place, we start the calculation by determining which country is being shipped to. Note that we use the ToUpper() method on the CountryShippingTo string, to avoid any problems with the case of the characters in the string.
Select Case CountryShippingTo.ToUpper() Based on the country, we assign the currency symbol, the conversion rate, the flat rate charge, and the per-item charge in US dollars. If the country is scheduled to switch to the euro, we can also set the UsesEuro flag and the switch date. We are giving free shipping to Canada.
Case "CANADA" CurrencySymbol = "CAN" ConversionRate = 1.61189D FlatCharge = OD PerItemCharge = OD Case "SWEDEN" CurrencySymbol = "SEK" ConversionRate = 10.4909D FlatCharge = 25D PerItemCharge = 1D Finally, if the country cannot be determined, we'll ask for payment in US dollars. We'll charge $50.00 as the flat charge, and $2.50 per item.
Case Else CurrencySymbol = "USD" ConversionRate = 1D FlatCharge = 50D PerItemCharge = 2.5D End Select If the country being shipped to uses the euro, we need to check whether the shipping date exceeds the conversion date. If so, we need to compute the shipping charge in euros.
' Update the shipping charge If UsesEuro And (EffectiveShipDate > EuroDate) Then CurrencySymbol = "EUR" ConversionRate = 1.13491D End If Finally, we populate the ShippingCharge object. We calculate the actual shipping charge by initializing it with the flat charge amount, then adding the total per-item charges. This returns the charge expressed in US dollars. To convert it to the correct currency, we simply multiply by the conversion rate. After the calculations are done, we can return the populated ShippingCharge instance.
sc.CurrencySymbol = CurrencySymbol sc.ChargeAmount = FlatCharge sc.ChargeAmount += Decimal.Round(PerItemCharge * NumberOfItems, 2) sc.ChargeAmount = Decimal.Round(sc.ChargeAmount * ConversionRate, 2) ' Return the shipping charges Return sc End Function End Class Of course, having our new class library ready for use is only half the battle. We also need a way to specify the three values required by the calculation - the country, the ship date, and the number of items being shipped. We'll accomplish this using an ASP.NET page.
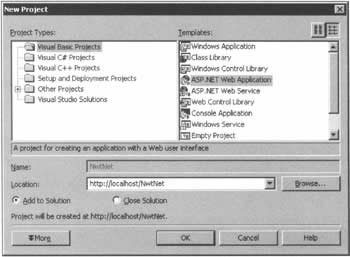
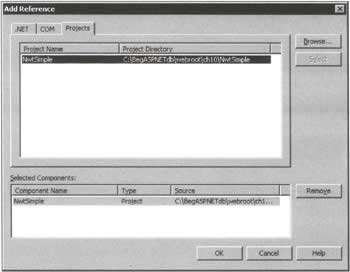
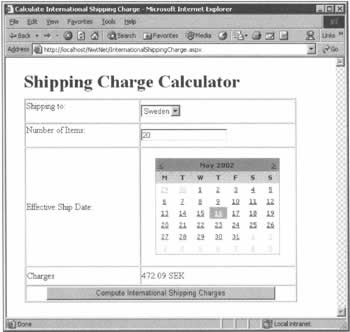
Using the Class Library in a Web PageThere are three steps involved in using our new class library from a web page. We have to create a web application, add a reference to the class library to the web application project, and finally use the library from ASP.NET. Let's see how we can do that. Try It Out - Creating a Web Application
How It WorksThe ASPX page that was assembled by Visual Studio on our behalf starts with a Page directive specifying the language, that events should be automatically posted back, the name of the file that contains the code that supports this page, and what class the page builds on:
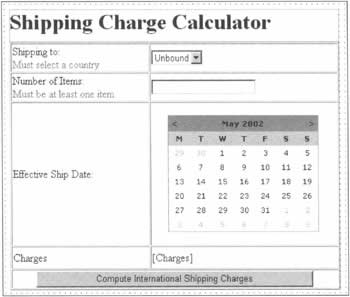
<%@ Page Language="vb" AutoEventWireup="True" Codebehind="InternationalShippingCharge.aspx.vb" Inherits="NwtNet.NwtNet.InternationalShippingCharges"%> After the header, we define a form to host our interactive web controls. The first control we use is a simple Label for the caption for the drop-down list of countries. This is tied to a RequiredFieldValidator control that makes sure that a country is selected:
<asp:Label runat="server">Shipping to:</asp:Label> <asp:RequiredFieldValidator runat="server" ErrorMessage="Must select a country" ControlToValidate="CountryList"> </asp:RequiredFieldValidator> The actual DropDownList control is placed in the next table cell; we'll populate it 'behind the scenes' in our code-behind file, in the Page_Load() event handler:
<asp:DropDownList runat="server"></asp:DropDownList> We then have a further Label control and a RangeValidator for the number of items being shipped. At least one item must be shipped, but no more than 65,535 can be shipped. The TextBox control for the quantity is in the next cell:
<asp:Label runat="server">Number of Items:</asp:Label> <asp:RangeValidator runat="server" ErrorMessage="Must be at least one item" ControlToValidate="NumberOfItems" MaximumValue="65535" MinimumValue="1" Type="Integer"> </asp:RangeValidator></TD><TD style="HEIGHT: 32px"> <asp:TextBox runat="server"></asp:TextBox> On the next row of the table, we have another caption and an ASP Calendar control. Calendar controls have a number of display-related properties, which are shown here. The settings here reflect the choices we made in Visual Studio's Properties window.
<TD style="WIDTH: 201px; HEIGHT: 211px"> <asp:Label runat="server">Effective Ship Date:</asp:Label> </TD> <TD style="HEIGHT: 211px" align=middle> <asp:Calendar runat="server" Height="72px" Width="223px" BorderColor="DarkGray" BackColor="White" CellPadding="4" DayNameFormat="FirstLetter" ForeColor="Black" SelectedDate="2002-04-01" Font-Names="Verdana" Font-Size="8pt"> <DayHeaderStyle Font-Bold="True" BackColor="LightGray"></DayHeaderStyle> <TitleStyle Font-Bold="True" BackColor="DarkGray"></TitleStyle> <WeekendDayStyle BackColor="LightGoldenrodYellow"></WeekendDayStyle> <OtherMonthDayStyle ForeColor="Silver" BackColor="White"> </OtherMonthDayStyle> </asp:Calendar> </TD> The next row has two Label controls: one for a caption on the charge amount, and one that will actually show the amount of the charge. Again, we will populate this 'behind the scenes'.
<TD style="WIDTH: 201px; HEIGHT: 33px"> <asp:Label bold">" runat="server">Charges</asp:Label> </TD> <TD style="HEIGHT: 33px"> <asp:Label runat="server"></asp:Label> </TD> Finally, in the last row of the table, we have the button that will trigger calculation of the charge:
<TD align="middle" colSpan="2"> <asp:Button runat="server" Width="410px" Text="Compute International Shipping Charges"> </asp:Button> </TD> Having looked at the display code, we now need to examine the code-behind file. We start by enabling strict code checking, and then import the class library that we're going to use through an Imports statement. The next lines then define a namespace for this class (as well as the class name), and specify that it inherits from the .NET Framework class, Page.
Option Explicit On Option Strict On Imports NwtSimple Namespace NwtNet Public Class InternationalShippingCharges Inherits System.Web.UI.Page Next come some lines that Visual Studio has added, in which the variables for the controls on the page are declared, and then we create an instance of our ShippingChargeCalculator class that's available for use by all of the other procedures in the InternationalShippingCharges class:
Private sc As New ShippingChargeCalculator() We then have a block of code generated by Visual Studio .NET. Although it's absolutely required, it's not something we should spend our time on here. Two things that we do need to look at closely are the Page_Load() and Calculate_Click() event handlers. In the former, we use the familiar If Not IsPostBack Then syntax to ensure that the drop-down control and the date on the calendar are set just once, when the page is first loaded:
If Not IsPostBack Then CountryList.DataSource = sc.GetCountryList CountryList.DataBind() EffectiveShipDate.SelectedDate = Date.Now End If In Calculate_Click(), we calculate the shipping charges by calling the CalculateInternationalCharges() method of the ShippingChargeCalculator object we set up earlier, and assigning the result to an instance of the other class in our library, ShippingCharge. Then we just display it by assembling a string to be placed in the label control called Charges.
Private Sub Calculate_Click(ByVal sender As System.Object, _ ByVal e As System.EventArgs) Handles Calculate.Click Dim sch As ShippingCharge sch = sc.CalculateInternationalCharges( _ CountryList.SelectedItem.Value, _ Convert.ToInt32(NumberOfItems.Text), _ EffectiveShipDate.SelectedDate) Charges.Text = sch.ChargeAmount.ToString() & " " & sch.CurrencySymbol End Sub And that's all there is to it. Do take a look at the longer example in the download code, and if you like, you could think about ways to change and improve this application. For instance, you might like to try using ADO.NET to bring in the list of countries and shipping costs from the Excel spreadsheet. For the time being, however, we'll move on.
SummaryWe usually save our summaries for the end of the chapter, but we've covered enough ground here to make it worth reiterating a few points. In particular, there are three things worth bearing in mind:
| |||||||||||||||||||||||||||||||||||||||||||||||||||||||||||||||||||||||||||||||||||||||||


EAN: 2147483647
Pages: 263