Maintaining Mixed Sites Within the Same Site Structure
The most pressing reason for maintaining an SMS 1.2 site as part of an SMS 2.0 site hierarchy is to enable you to manage those clients that are not supported by SMS 2.0—namely, MS-DOS, Apple Macintosh, and IBM OS/2 clients. SMS 2.0 certainly supports having SMS 1.2 site servers as part of the hierarchy.
Maintaining a friendly relationship between the sites, however, creates more work for you, the SMS administrator. For example, in a perfect network, the SMS 1.2 and SMS 2.0 sites would be separate and isolated, meaning that their boundaries would not overlap, they would not share servers, and most especially clients belonging to one site would never log on to a different SMS site. This separation would create more administrative work for you.
The most significant issue you may have to deal with occurs when clients log on to different sites. You want to be sure that you don't accidentally try to upgrade an SMS 1.2 client with SMS 2.0 client software when that would be inappropriate. In this section, we'll explore this and other interoperability issues.
SMS 2.0 supports the existence of SMS 1.2 primary and secondary sites. However, it deals with them slightly differently. Remember that SMS 1.2 sites can report to other SMS 1.2 sites or to SMS 2.0 sites but that SMS 2.0 sites can never report to SMS 1.2 sites. As mentioned, it is important that your SMS 2.0 migration strategy take this limitation into consideration. In general, a top-down upgrade approach, starting with the central site, will be the cleanest approach.
Applying Systems Management Server 1.2 Service Pack 4
It is imperative that any SMS 1.2 sites, primary or secondary, that will participate in a mixed SMS hierarchy have the SMS 1.2 Service Pack 4 applied. This service pack includes enhanced features that, among other things, improve the relationship between SMS 1.2 and SMS 2.0 sites.
One significant enhancement provided by the service pack affects the installation of SMS software on clients. Service Pack 4 upgrades the SMS 1.2 logon script files to include functionality that will determine whether a client computer executing the script has already been installed as an SMS 2.0 client. If a client computer has been installed, the script will essentially ignore that client computer. If a computer has not already been installed as an SMS 2.0 client, the script will proceed to install the SMS 1.2 client software on the computer. Later, the client could be upgraded to SMS 2.0 when one of the SMS 2.0 installation methods is employed.
A similar enhancement has been added to the SMS 1.2 site server. When the site server attempts to manage a domain or a list of servers, it wants to load its own client services—namely, Inventory Agent NT and Package Command Manager. If the client server is already an SMS 2.0 client, the functionality provided by these services is accomplished through other components. With Service Pack 4 applied, the SMS 1.2 site server can determine whether the server is already an SMS 2.0 client by noting the presence of the SMS Client Service, and if so, like the logon script update, the site server will effectively ignore the server.
The service pack also adds support for handling database updates to the parent SMS 2.0 site, as well as for reducing the number of duplicate data keys and other database inconsistencies that sometimes occur within the SMS 1.2 database.
The SMS 1.2 Service Pack 4 is available as a downloadable file from such sources as the Microsoft TechNet CD series or the Microsoft Developer's Network. It is a self-extracting executable file named SMS12SP4.exe. To apply the service pack to an existing SMS 1.2 site server, follow these steps:
- Copy SMS12SP4.exe to a folder on your site server.
- Double-click on the filename to extract the service pack files. The default target directory is generally C:\Temp. Place the files in a directory on a partition other than the partition in which SMS is installed.
- Navigate to that folder and expand it.

TIP
The Readme.txt file contains detailed information regarding the execution of the service pack. For example, Readme.txt contains the procedure for running the service pack from the same partition as that in which SMS is installed.
- Double-click on Setup.exe to launch the Systems Management Server Setup program, shown in Figure 19-21.
- Click Continue. A message box will appear, notifying you that an existing installation of SMS 1.2 was discovered, as shown in Figure 19-22. (This is a good thing.)
- Click Continue to display the Installation Options screen, shown in Figure 19-23.
- Click the Operations button to display the Site Operations screen, shown in Figure 19-24.
- Click Upgrade to begin the upgrade process. A progress bar dialog box will be displayed. You will notice SMS services stopping, files being copied, and services being restarted.
- A message box will be displayed when the update process is complete.
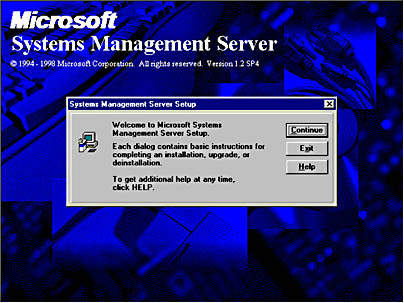
Figure 19-21. The Systems Management Server Setup program welcome screen.
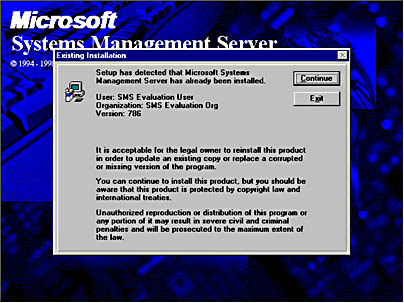
Figure 19-22. A message box notifying you of an existing installation of SMS 1.2.
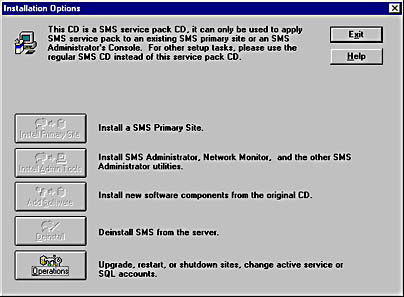
Figure 19-23. The Installation Options screen.
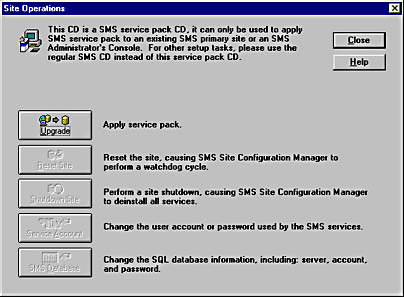
Figure 19-24. The Site Operations screen.
![]()
REAL WORLD Distributing the Service PackUpdates such as applying a service pack to a site affect only the site itself. Changes will be propagated to the site's site systems (logon servers and so on), secondary sites, and clients. However, the changes will not propagate to other child sites.
To distribute the service pack update to all child sites, you can use the PDF SMS12SP4.pdf. The obvious strategy is to distribute the package from the central site.
To distribute the service pack upgrade, follow these general steps:
- In the SMS Administrator window, switch to the Packages window, shown in Figure 19-25.
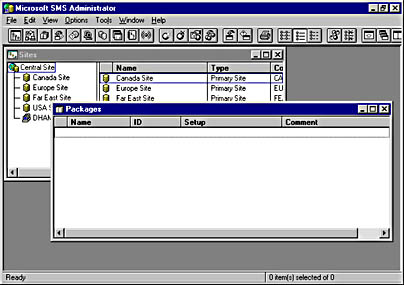
Figure 19-25. The Packages window.
- Create a new package by choosing New from the File menu or by clicking the New button (the globe with a star) on the toolbar to display the Package Properties dialog box, shown in Figure 19-26.
- Click the Import button to display the File Browser dialog box, shown in Figure 19-27, and navigate to the folder from which you extracted the service pack files.
- In this case, locate the file SMS12SP4.pdf, select it, and then click OK. The Package Properties dialog box will be filled in with service pack information, shown in Figure 19-28.
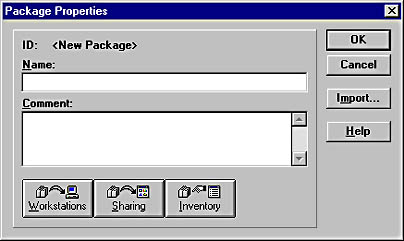
Figure 19-26. The Package Properties dialog box.
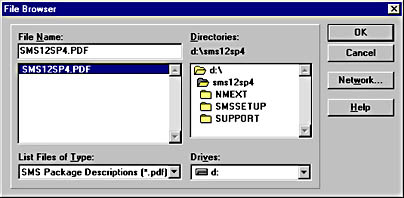
Figure 19-27. The File Browser dialog box.
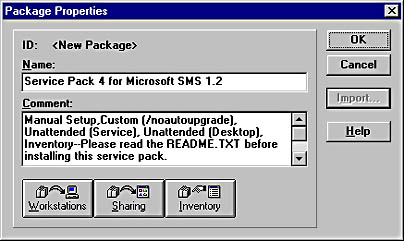
Figure 19-28. The updated Package Properties dialog box.
- Click the Workstations button to display the Setup Package For Workstations dialog box, shown in Figure 19-29. Enter the name of the folder containing the service pack source files or click the Browse button to locate the folder.
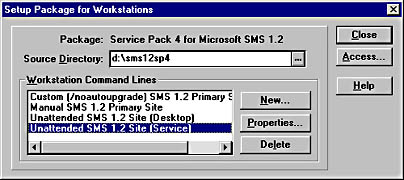
Figure 19-29. The Setup Package For Workstations dialog box.
- If you want, select one of the command-line entries and click Properties to display the Command Line Properties dialog box, shown in Figure 19-30. Here you can familiarize yourself with the command that will be executed or modify the command if necessary.
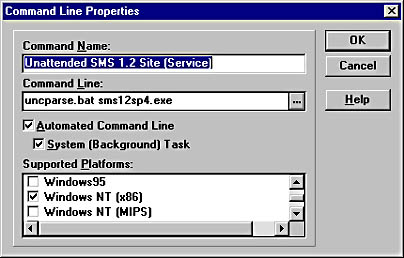
Figure 19-30. The Command Line Properties dialog box.
- Click OK, and then click Close to save your changes.
You may see a message to the effect that the source file path may not be accessible to other SMS machines. Depending on the configuration of your site, you may need to refer to the source file path as a UNC path rather than a local path. You will need to test which path works within your environment.
- Click OK in the Package Properties dialog box to update the package at all sites, and click OK again in the confirmation screen.
- Switch to the Jobs window in the SMS Administrator window.
- Create a new job by choosing New from the File menu or by clicking the New button on the toolbar to display the Job Properties dialog box, shown in Figure 19-31.
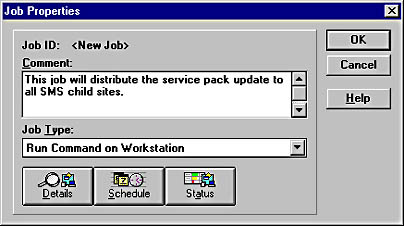
Figure 19-31. The Job Properties dialog box.
- In the Job Properties dialog box, enter a descriptive comment for the job.
- Click Details to display the Job Details dialog box, shown in Figure 19-32. Select the Service Pack 4 For Microsoft SMS package, and select the appropriate SMS site or site group to target. Verify that the Only If Not Previously Sent option has been selected and that both check boxes in the Distribute Phase section have been checked. This will ensure that the package is copied completely.
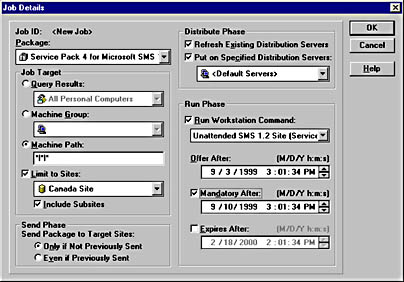
Figure 19-32. The Job Details dialog box.
- In the Run Phase section, select the appropriate command to execute from the drop-down list. Refer to the service pack Readme.txt file for information about the use of each command. In this example, the command selected is Unattended SMS 1.2 Site (Service) Intended For SMS Site Servers Running Package Command Manager As A Service. If you have chosen an unattended installation, you should also make the job mandatory by checking Mandatory After and entering a date and time.
- Click OK to return to the Job Properties dialog box, and then click the Schedule button to display the Job Schedule dialog box, shown in Figure 19-33. Modify the Start After, Priority, and Repeat entries if necessary. The only option you are likely to modify is Priority. Higher priority jobs will always be processed ahead of lower priority jobs. Click OK.
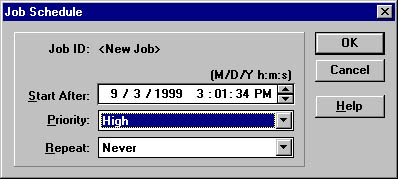
Figure 19-33. The Job Schedule dialog box.
- Click OK again to save and schedule your job.
You can follow the status of the job by refreshing the Jobs window periodically and then double-clicking on the job entry and clicking the Status button. You will probably want to double-check each site server, or at least do a spot check, to verify that the site servers have been upgraded.
Database Support
If your migration strategy involves upgrading an existing SMS 1.2 site hierarchy to SMS 2.0 and you have taken all the necessary steps to ensure a clean transition as outlined earlier in this chapter, your databases should be up-to-date and all information should have been passed up through the hierarchy. Assuming a top-down upgrade approach, after the central site has been upgraded to SMS 2.0 its SMS 1.2 child sites will continue to forward delta MIF files from their databases that the central site will successfully process and add to the database. This procedure will be followed for each subsequent site level as well; it is also the cleanest approach.
You can attach an SMS 1.2 site to a new or an existing SMS 2.0 site, however, as may be appropriate in some organizations. In this scenario, the SMS 1.2 site will send a complete inventory of its database to the new SMS 2.0 parent site. The SMS 2.0 parent site is unable to process this data because of its different structure. In the preceding example, we started our upgrade with an existing database that included all child site records. Subsequent updates to those records are successfully processed. In this case, the child site records do not already exist; therefore, the parent site does not recognize them and discards the information.
The good news is that over time the SMS 1.2 child site will continue to send delta MIF files for its clients to the parent site. The parent site, having received a delta MIF file for a record it does not already have, will of course generate a resynchronization request that will pass to the child site, causing it to generate a new inventory for each client that is passed back up to the parent site and into the database. Voilà!
The bad news is that this process can take a good long time, especially if the inventory frequency set at the clients is long or if the clients are not logged on all the time. Also, the initial attempt by the SMS 1.2 site to send its complete inventory will almost certainly result in network congestion and performance stresses at both site servers.
SMS 1.2 Service Pack 4 makes available at the SMS 1.2 site a new registry key designed to suppress the replication of its database on the SMS 2.0 site. Because the SMS 2.0 parent site cannot process the complete database anyway, this key would be a good parameter to set. To do so, in the Windows NT Registry Editor navigate to the key HKEY_Local_Machine\Software\Microsoft\SMS\Components\ SMS_Hierarchy_Manager. Add the following entry as type REG_DWORD: Don't Send DB To Parent Site. Set the key's value to 1, which enables it. The SMS 1.2 site will no longer forward its complete database to the SMS 2.0 parent site.
Now, if you understand and accept that inventory records for SMS 1.2 clients will not immediately pass but will instead eventually trickle into the SMS 2.0 database, just sit back and wait. Let's say that the inventory frequency for those clients is set to the default value of 7 days. You will wait on average at least 7 days for the inventory to be received and updated in the SMS 2.0 database because you are waiting for a resynchronization event to occur.
If you want to populate the SMS 2.0 database more quickly, you can delete all the .HMS and .SMH files stored in the SMS\Site.srv\Inventry.box\History directory on the SMS 1.2 site server. This will cause the Inventory Data Loader to treat each client inventory as a new record, thus forwarding a complete inventory for each client as a delta MIF file to the parent SMS 2.0 site. Again, the good news is that the inventory data will be forwarded more quickly. The bad news is that you are once again looking at potential network congestion as well as performance degradation on the SMS site servers and SQL servers involved.
Another option is to create an intermediary SMS 1.2 site for the sole purpose of collecting the target SMS 1.2 site's database inventory. This sleight of hand works as follows: Suppose you want SMS 1.2 site ABC to connect to SMS 2.0 site XYZ. Instead of directly attaching site ABC to site XYZ, you create an intermediary SMS 1.2 site named TMP and attach ABC to it. Since both are SMS 1.2 sites, site ABC can successfully forward its complete inventory to site TMP. After this transfer is accomplished, you upgrade site TMP to SMS 2.0, thus converting the database, and then attach site TMP to site XYZ. Because TMP and XYZ are now both SMS 2.0 sites, the database is forwarded successfully from TMP to XYZ. Later, you can attach site ABC to site XYZ (with the aforementioned registry key configured). Because XYZ will now include the records from site ABC, delta MIF files sent from ABC to XYZ will be received and processed successfully.
No matter how you look at it, a lot of planning and work is involved when you need to maintain the SMS 1.2 site and its database in a mixed-site hierarchy.
Client Support
Clients maintained by SMS 1.2 sites will continue to be maintained by those sites in a mixed-site environment with little difference. You will need to be able to access these sites through SMS 1.2 Administrator windows, as noted earlier. We will discuss some specific issues regarding the SMS Administrator window in the section "Systems Management Server 1.2 Administrator Window" later in this chapter. For now, let's look at three areas of concern for clients participating in a mixed-site environment: package distribution, Program Group Control (PGC) support, and logon contention.
Package Distribution
Obviously, the package distribution process has changed significantly from SMS 1.2 to SMS 2.0. For one thing, the concept of an SMS 1.2 "job" does not exist in SMS 2.0. In SMS 1.2, we target a package to a client by creating and scheduling a job. Once that job is completed, any new clients that need the package require the creation and scheduling of a new job.
As we've seen, SMS 2.0 begins with the creation of a package and a program. Programs are advertised to collections of clients (or users, or user groups). Any new collection member automatically receives all advertisements targeted to that collection. You cannot directly distribute a package from an SMS 2.0 site to an SMS 1.2 client. However, you can originate the package and job from the SMS 1.2 site if it is a primary site. Alternatively, you can advertise programs to SMS 1.2 child sites, which can in turn send these programs to target clients by means of a job.
For this technique to work, you must have created an address in the parent site (or sites) to every SMS 1.2 child site below the parent in the hierarchy to which you will be distributing programs. Then you must determine whether the program needs to be run as a Run Command On Workstation job at the SMS 1.2 site or as the alternative Share Package On Server job.
Making this distinction is actually quite easy, as the type of job you choose depends solely on how you are sharing the package files. If you choose to originate a Run Command On Workstation job from an SMS 2.0 site server, you begin by creating the package just as you normally would (see Chapter 12). In the Package Properties window, select the Data Access tab, and enable the Access Distribution Folder Through Common SMS Package Share option.
In SMS 1.2, the Run Command On Workstation job can be accessed only from the default SMSPKGx share. The Share Package On Server job, on the other hand, implies that the package is being copied to a specific share point on a server from which the client can access it using PGC. It should be no surprise, then, that the way to initiate a Share Package On Server job from an SMS 2.0 site is to create the package as you normally would and then, in the Package Properties window, switch to the Data Access tab, and enable the Enable Share Distribution Folder share name option, having created the share ahead of time.
Using either of these methods, you can distribute the programs to the SMS 1.2 child site. The child site treats the package accordingly, and it can then be targeted to the clients as usual through SMS 1.2 jobs.
Program Group Control
As long as we've mentioned the Share Package On Server job, we should also talk about PGC support. This feature does not change for SMS 1.2 clients managed by SMS 1.2 sites. However, when an SMS 1.2 client is upgraded, it loses PGC support since SMS 2.0 does not provide that feature on the client to share applications from a network server. You must determine ahead of time whether you need to continue providing this type of functionality to your users.
You can provide similar support for your SMS 2.0 clients. In general, you should consider creating the four elements on the following page when you are implementing PGC support.
- The shared application image that will be distributed to distribution points. As with SMS 1.2, creating this image may require an administrative or a network installation of the application first.
- A package script that creates a shortcut to the application on the user's desktop. This script takes the place of the PGC in SMS 1.2.
- A package script or setup program that copies appropriate client files, registry values, and so on that may be required on the client computer and that are usually accomplished through the application's normal client setup routine (sometimes referred to as a one-time setup). This program is usually referenced on the configuration command line for the SMS 1.2 Sharing package type.
- A package or script that can make any needed modifications to the application image on each distribution point, such as a client installation update file.
TIP
Consider creating a new SMS 2.0 site rather than upgrading an existing SMS 1.2 site that is providing PGC functionality. Once the upgrade begins, PGC functionality will not be available to your users until you have configured it successfully through SMS 2.0. This could result in an inappropriate period of downtime for your clients. Instead, create a new SMS 2.0 site, configure similar functionality and test it, and then configure your site boundaries and installation methods to begin upgrading your SMS 1.2 clients. This way you can more seamlessly migrate the clients with little or no loss of application access.
Although the procedure will vary somewhat from application to application, here are the basic steps for configuring SMS 2.0 to support shared application functionality:
- Distribute the installed application to the designated distribution points or shares.
TIP
Remember that if the application is distributed to a specific share rather than to the default share, it can also be advertised to down-level SMS 1.2 sites as a Share Package On Server job.
- Create a script using SMS Installer that creates a shortcut to the application, copies any files that are needed on the client computer, and modifies appropriate registry entries, .INI files, and so on. Use SMS Installer to create a PDF to facilitate the package creation process.
- Create a collection that identifies clients that need this type of access to a shared application. To more closely simulate PGC, you might consider creating a collection based on user or user group membership rather than computer resources.
- Create a new package using the PDF you created in step 2, including all appropriate programs that install the client as necessary.
- Test your package and programs before going to production.
- Advertise the programs to the collection you created as a mandatory assignment that runs immediately.
- Create and advertise any additional programs that may be required to update the applications themselves.
This procedure will provide your clients with basic functionality that mimics that provided by PGC. Refer to Chapter 5 in the SMS 2.0 Resource Guide for more detailed information regarding various types of shared application and client scenarios.
SMS 2.0 includes a PGC Migration Wizard, which can be effective in helping you migrate PGC applications already defined in an SMS 1.2 database that you are upgrading. This wizard provides both a simple migration for applications that do not require extensive modifications (or any modifications) at the client and a manual page-by-page method that enables you to identify more challenging items such as configuration command-line commands that need to be run on the client. Again, this wizard is explored thoroughly in the Microsoft Systems Management Server 2.0 Resource Guide (part of the Microsoft BackOffice 4.5 Resource Kit, available through Microsoft Press).
Logon Contention
If SMS 1.2 and SMS 2.0 sites participating in the same site structure rely on logon scripts for client discovery and installation, you need to determine whether clients from one site version would ever need to log on to a different site version. Logon contention issues can arise when SMS 1.2 clients that need to remain such have a need to periodically log on to SMS 2.0 sites and, conversely, when SMS 2.0 clients that need to remain such have a need to periodically log on to SMS 1.2 sites.
The latter case is easy to take care of, especially if you are not using a customized version of the SMSls.bat file. When you upgrade your SMS 1.2 sites with Service Pack 4, you will automatically update the SMS 1.2 logon script files to include a utility (Check20.exe) that checks for an installation of the SMS 2.0 client on a computer before executing the script.
If you have a customized SMSls.bat file, you will need to copy the SMS 2.0 client check files (SMSLS12a.bat, Check20.exe, and Checkver.exe) from the SMS 2.0 CD to the WINNT\System32\Repl\Export\Scripts directories of your SMS 1.2 logon servers. Then follow these steps to prevent contention among SMS 2.0 clients:
- Using a text editor, in the customized SMSls.bat file, locate the following line:
- Add the following lines immediately after the line in step 1:
- Locate the line of code shown here:
- Add these lines immediately after:
if "OS%" == "Windows_NT" goto RUN_NT:Run_DOS |
REM Call checkVer to verify that this is a supported OS for 2.0. %0\..\checkVer if errorlevel 1 goto RUN_DOS_2 REM Call the check20 to check whether this is a 2.0 client. %0\..\check20 if errorlevel 1 goto RUN_DOS_2 REM This is an 2.0 client; skip processing. goto RESTORE :RUN_DOS_2 REM This is not an 2.0 client; process script. |
:RUN_NT |
%0\..\check20 /v if errorlevel 1 goto RUN_NT_2 goto RESTORE :RUN_NT_2 |
In the case of SMS 1.2 clients logging onto SMS 2.0 sites, the process is a little more sneaky. It involves placing a "dummy" file somewhere on each SMS 1.2 client and then amending the SMS 2.0 SMSls.bat file to look for the existence of that file. If it finds the file, it essentially skips the logon script. To use this technique, follow these steps:
- Create a dummy file containing a couple lines of descriptive text in a directory on each SMS 1.2 client. You can name the file whatever you like—in this example, our dummy file is named IAMSMS12.txt. A good place to store the file might be the C:\MS folder created on each of these clients.
TIP
Use SMS package distribution to copy this file to the same location on each SMS 1.2 client.
- Modify the SMSls.bat file in the WINNT\System32\Repl\Import\Scripts folder on each SMS 2.0 logon point so that its first line reads as follows:
if exist C:\MS\IAMSMS12.txt goto END |
For the special case in which SMS 1.2 and SMS 2.0 do share logon servers, as can happen if the two sites share the same Windows NT domain, you must configure the logon process so that computers with platforms not supported by SMS 2.0 are not installed with SMS 2.0 client software. SMS 2.0 provides an alternative logon point configuration file designed to list the files required by SMS 1.2 clients as well as SMS 2.0 clients. To use this configuration file, follow these steps:
- In the \SMS\Data\NT_Logon folder on the site server, locate the file NT_Logon.pcf. This file contains a list of the files needed by SMS 2.0 clients only—the default case, in which no potential SMS 1.2 clients will be logging onto an SMS 2.0 logon server.
![]()
NOTE
In the case of NetWare logon points, follow the same procedure, but look for the folder and file names prefixed with "NW_" for NetWare bindery and "ND_" for NetWare NDS logon points.
- Rename this file something like NT_Logon.old.
- Locate the file NT_Logon_Interop.pcf and rename it NT_Logon.pcf. This file contains a list of the files required by both SMS 1.2 and SMS 2.0 clients. The site server will read this file and copy the files listed to all its logon points.

CAUTION
Be sure to turn off automatic updating of the logon script on the SMS 1.2 site that shares the logon points to prevent that site from accidentally overwriting the script files.
Systems Management Server 1.2 Administrator Window
As mentioned, running the SMS 1.2 Administrator window and the SMS 2.0 Administrator Console on the same Windows NT workstation is not supported. To maintain support for your SMS 1.2 sites, you will need to maintain a separate Windows NT workstation for each SMS Administrator window.
The Microsoft BackOffice 4.5 Resource Kit includes a utility designed to allow you to install both consoles on the same Windows NT workstation: the Add/Remove 1.2 Console tool (V12Admin.ipf). This tool is located in the \Resource Kit\SMS\V12Admin folder after you install the Microsoft BackOffice 4.5 Resource Kit. The Add/Remove 1.2 Console tool enables you to add the SMS 1.2 Administrator window to (or remove it from) a computer already running the SMS 2.0 Administrator Console.
To install both an SMS 2.0 Administrator Console and an SMS 1.2 Administrator window on the same workstation, you must first remove the SMS 1.2 Administrator window from the workstation if it exists, then install the SMS 2.0 Administrator Console on the workstation, and then use the Add/Remove 1.2 Console tool to reinstall the SMS 1.2 Administrator window.
Those of you with a keen eye will recognize that the .IPF extension denotes an SMS Installer script file. In fact, you will need SMS Installer to create an executable file from this script to add the SMS 1.2 Administrator window to the workstation. You will also need the SMS 1.2 source files. To create an executable file, follow these steps:
- Launch SMS Installer and open the V12Admin.ipf file, shown in Figure 19-34.
- In the Installation Expert window (the default), click the Compile button to start the Select Compile Settings program, shown in Figure 19-35. Enter the path to the SMSSetup source file folder.
- Click Next to display the second screen of the Select Compile Settings program, shown in Figure 19-36, and select the platform type.
- Click Next again. SMS Installer will proceed to create the compiled executable, which it will save in the same directory in which you stored the V12Admin.ipf file.
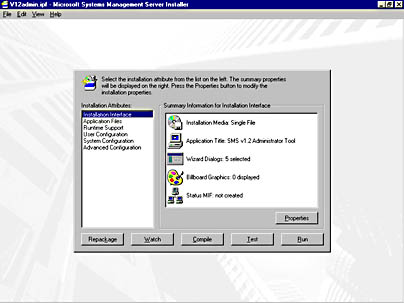
Figure 19-34. The SMS Installer window with V12Admin.ipf open.
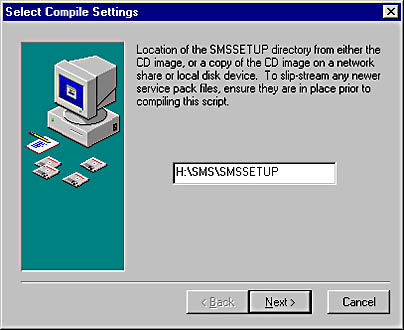
Figure 19-35. The Select Compile Settings program.
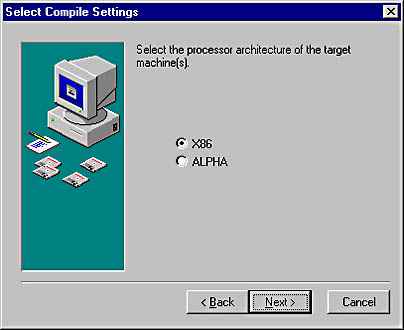
Figure 19-36. Selecting the platform type.
You can now use this executable to install the SMS 1.2 Administrator window on the Windows NT workstation computer. If you need to remove the SMS 1.2 Administrator window later, you can run the file using the /remove switch. Of course, you can also run the file in silent mode using the SMS Installer /s switch. The installation process creates a new program group named Systems Management Server v1.2 Tools. As shown in Figure 19-37, this program group includes the full range of SMS 1.2 tools required by the SMS administrator.
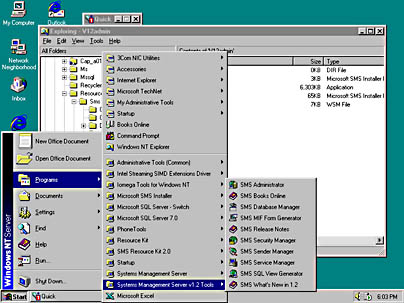
Figure 19-37. The Systems Management Server v1.2 Tools program group.
EAN: 2147483647
Pages: 167