| Kick your actions up a notch by adding conditions. This action uses conditional logic to automatically resize photographs to a uniform height and to optimize photos and related text graphics in different formats for display on the Web. 1. | Open a Photo and a Text Graphic
You can make actions more useful by including logic that triggers a step only if a certain condition is met. In this project you'll create an action that identifies photos that are taller than a certain size and resizes them so you have a uniform collection of vertical and horizontal photos to display on a Web page. The action also distinguishes between photographs and related text graphics (like Web page headers or photo captions), and optimizes the former as JPEGs and the latter as GIFs.
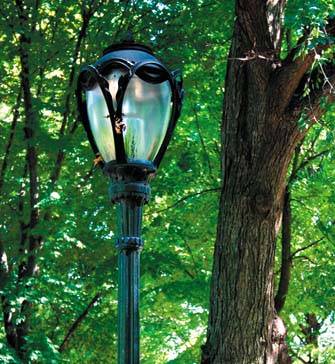
Start by opening a vertical photo and a related text graphic in ImageReady. You'll use these files to set up the action. Later you'll apply the action to a batch of photos using a droplet. Conditional logic is an ImageReady-only feature, so this project takes place in ImageReady.

INSIGHT Conditional Actions Simplified. You don't have to be a programmer to understand and use conditional actions in ImageReady. A conditional action is just like a regular action except that it only takes place if a particular condition is met. ImageReady accomplishes this by applying simple conditional logic: if X is true then do Y. The conditional commands are easy to apply because they're simplified and built into one dialog box, as you'll see in this project.
|
TIP Font Warning. When you open this text file, you may get a warning about substituting fonts. Allow the font substitution and change the font later if you have one that looks better to you.
|
| 2. | Create a New Action
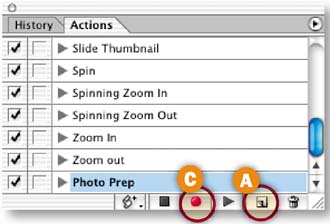
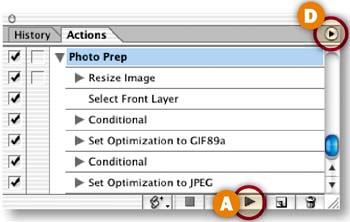
Select the photo, and open the Actions palette (Window>Actions). Click the Create New Action icon at the bottom of the ImageReady Actions palette A. In the New Action dialog box, name the action Photo Prep and click Record B. The red button at the bottom of the Actions palette means the action is recording C.

TIP No Action Sets in ImageReady. Actions made in ImageReady, unlike those in Photoshop, are not arranged in action sets.
|
| 3. | Choose Resizing Options
The first step you'll record comes with a built-in condition. This step tells ImageReady to resize every image on which the action is run to a height of 300 pixels, but only if the image is taller than 300 pixels to begin with.
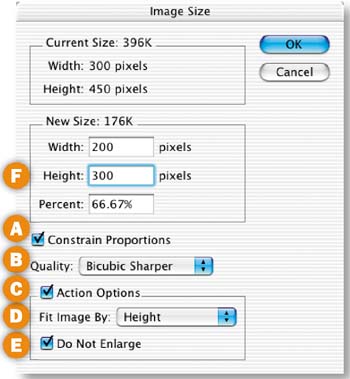
Choose Image>Image size to open the Image Size dialog box, and set the options in the dialog box in this order.
Constrain Proportions: Checked A. (to maintain the proportionality of the resized photos) Quality: Bicubic Sharper B. (see sidebar) Action Options: Checked C. (to turn on the following options that are designed for batch processing) Fit Image By: Height D. (to make the reduced photographs the same height. The width of each resized photo will vary based on the proportions of the original.) Do Not Enlarge: Checked E. (to ensure that no image will be upsampled, which protects the quality of your photos.) Height: 300 pixels F. (to set the height to which each image taller than 300 pixels will be resized. Width changes automatically and will be different than the 200 pixels you see here for photos that are different proportions than this one.)
INSIGHT Bicubic Sharper Interpolation. This is the interpolation method the program will use to downsample (reduce the number of pixels in) the resized images. The Bicubic Sharper method is designed to be used when you're reducing image size. It keeps images relatively sharp so that further sharpening with the Unsharp Mask filter is often unnecessary.
|
 Complete the Resize Step Complete the Resize Step
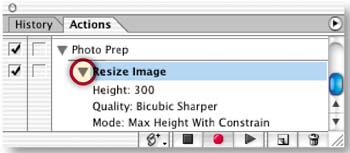
Click OK to close the Image Size dialog box and resize the open photograph to a height of 300 pixels. There's now a Resize Image step in the Photo Prep action. Click the arrow to the left of the step to see its parameters.
 Select the Top Layer Select the Top Layer
Now you'll begin building steps that optimize text graphics as GIFs and photographs as JPEGs. You'll add a command to make sure the action selects the top layer of every file, because the text graphics on which you'll be running this action contain type on their top layers and pixel-based graphics on their other layers.
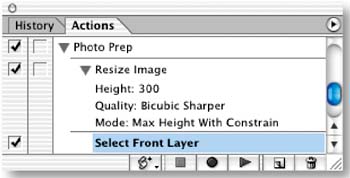
Click on the open text graphic. Press Shift+Option/Alt-] (the right bracket key on your keyboard). This is the shortcut for selecting the top layer in a file. You'll see a new step in the action labeled Select Front Layer.
TIP Use Generic Commands. When you're building an action to run on multiple files, use generic commands, rather than commands tied to one file. This will make the action more flexible, so that it will run successfully on many different files. For example, in this step, we used the generic command for moving to a top layer, instead of clicking on the top layer in the open file, which would have inserted a specific layer name in the action and limited its applicability to other files.
|
| 6. | Insert a Conditional Statement
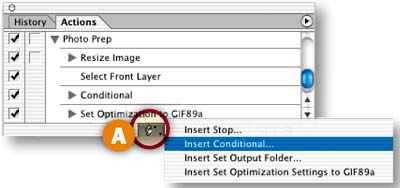
In this step you'll insert a conditional statement to ensure that your text graphics are optimized as GIFs. Click the Insert Step icon at the bottom of the Actions palette A and choose Insert Conditional from the pop-up menu. In the Conditional dialog box, choose the following settings and then click OK:
Choose Layer Type from the top pop-up menu B; Choose the button labeled is C; Choose Text from the second pop-up menu D; Choose Include from the third pop-up menu E. Type 1 in the field at the bottom of the dialog box F.
INSIGHT Interpreting the Statement. In this project step you inserted a conditional statement based on if/then logic. The statement tells ImageReady that if a particular condition is met (if the selected layer is a text layer) then the action should include the next step (which will be to optimize the image as a GIF). If that condition is not met, the action will skip that next step.
|
| 7. | Choose GIF Optimization Settings
Click the Stop button at the bottom of the Actions palette A to stop recording the action. Otherwise, every change you make to the optimization settings will be recorded as a separate step in the action, which is unnecessary.

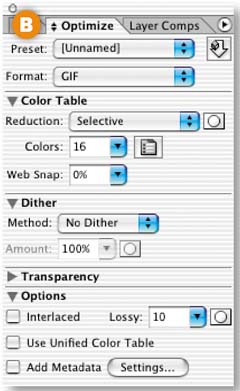
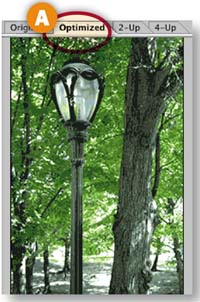
Click the Optimized tab in the document window, and open the Optimize palette (Window>Optimize). Choose the following optimization settings for this image in the Optimize palette Format: GIF, Reduction: Selective, Colors: 16, Dither: No Dither, Lossy: 10; Add Metadata, unchecked B. Leave the other settings at their defaults.
 Insert a GIF Optimization Step Insert a GIF Optimization Step
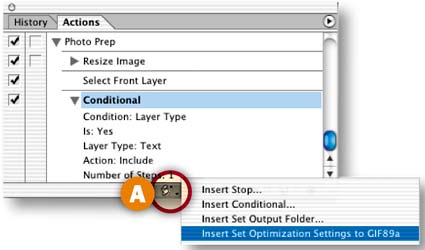
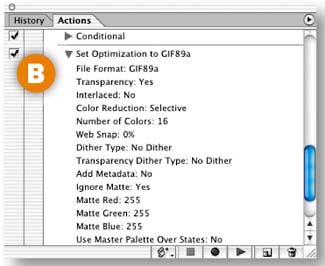
With record still off, click the Insert Step button at the bottom of the Actions palette A and choose Insert Set Optimization Settings to GIF89A (a fancy name for GIF). This adds a step to the action that contains the GIF optimization settings you chose in the last step B.
 Add Another Condition Add Another Condition
Now you'll insert a conditional statement that ensures your photographs will be optimized as JPEGs. Leave record off. (It doesn't have to be on when you use the Insert Step commands). Click the Insert Step icon A and choose Insert Conditional from the pop-up menu. In the Conditional dialog box, choose the following settings and click OK:
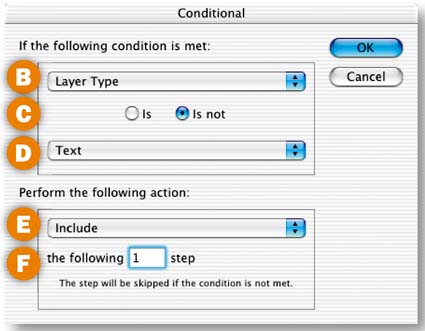
Choose Layer Type from the top pop-up menu B; Choose the button labeled is not C; Choose Text from the second pop-up menu D; Choose Include from the third pop-up menu E. Type 1 in the field at the bottom of the dialog box F.
INSIGHT Interpreting this Statement. This conditional statement is similar to the one on the preceding page. It tells ImageReady that if the selected layer is not a text layer then the action should include the next step (which will be to optimize the image as a JPEG). The combination of these two conditional actions will cause each image on which the action is played to be optimized to the appropriate Web file format.
|
| 10. | Choose JPEG Settings
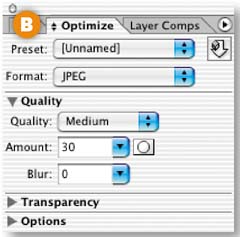
Click on the Optimized tab in the document window of the open photograph A. With record still off, choose the following optimization settings in the Optimize palette B Format: JPEG, Quality: Medium. Leave the other settings at their defaults.
 Insert a JPEG Optimization Step Insert a JPEG Optimization Step
With record still off, click the Insert Step button at the bottom of the Actions palette A and choose Insert Set Optimization Settings to JPEG. This adds a step to the action that contains the JPEG optimization settings you chose in the last step B.

Test the Action on Individual Files
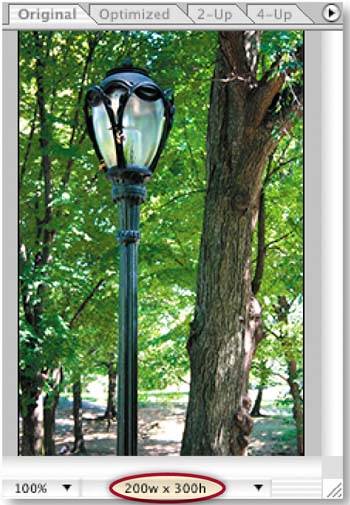
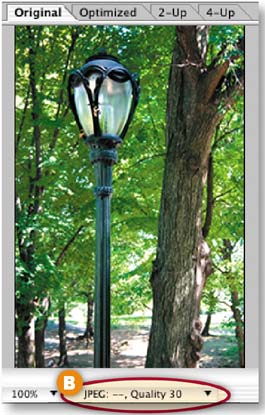
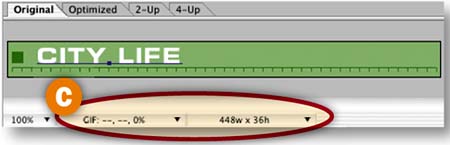
Choose File>Revert to return the open photograph to its original, larger state. Click the Play button on the bottom of the Actions palette A. The photograph should become smaller. Click the Information box at the bottom of the photograph's document window and choose Optimized Information. The Information box should indicate that the image is now a JPEG B. Repeat this step on the open text graphic. The text graphic should stay the same size (because it was shorter than 300 pixels to start with) and become a GIF C. If all went as expected, move to the next step.
TIP Information Box. ImageReady offers two identical Information boxes at the bottom of every document window. (You only see one in the open photograph because its window is narrow.) The Information menus contain lots of valuable information about an image. Explore them when you get a chance.
|
If the action doesn't work as expected, troubleshoot by selecting each step in the action one-by-one, clicking the side arrow on the Actions palette D, and choosing Play [name of step]. If you find a faulty step, double-click it to try to open its command, where you can fix the settings. Or drag the step to the Trash icon in the Actions palette and re-record. If all else fails, start all over.
| 13. | Insert Output Folder
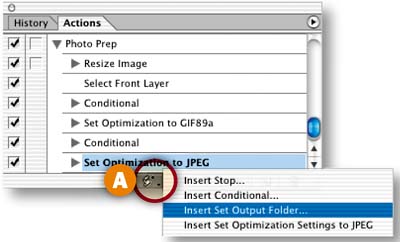
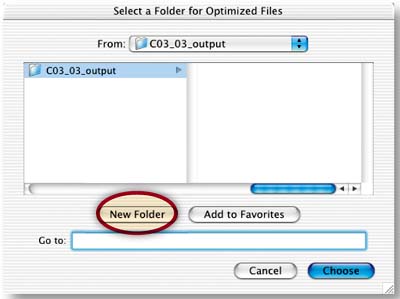
Click the Insert Step icon at the bottom of the Actions palette and choose Insert Set Output Folder A. In the dialog box that opens, click New Folder to make an output folder for the files generated by this action and click Choose. Be aware that if you move your output folder, the action won't be able to find it. In that case, create a new output folder as explained in the tip.
 Create a Droplet Create a Droplet
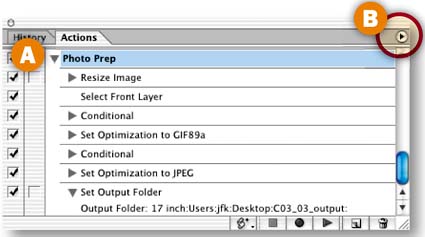
The real advantage of recording a conditional action is that you can use it to process a whole folder of images. Select the Photo Prep action in the Actions palette A. Click the palette's side arrow B and choose Create Droplet. Navigate to your desktop and click Save. The named droplet icon C will appear on your desktop.
TIP Changing the Output Folder. You can change the output folder any time by double-clicking the droplet icon on your hard drive to open a list of the droplet's steps. Double-click the Set Output Folder step. In the dialog box that opens, create a new output folder and click Choose. Close the droplet list and click Save. The new output location is saved as part of the droplet.
|
 Process a Folder of Photographs Process a Folder of Photographs
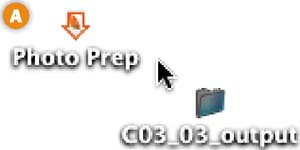
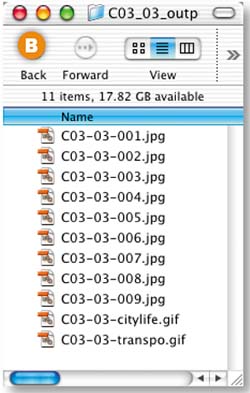
Now comes the best part! Drag the C03_03_images project files folder onto the Photo Prep droplet on your desktop A. Then sit back while ImageReady runs the action on all the files in the folder. Check the results by opening your output folder B. It will be filled with vertical and horizontal photographs optimized as JPEGs and resized to 300 pixels high, along with the two text graphics files optimized as GIFs. These files are all ready to be brought into a Web site building program. Try running this droplet on your own images to save processing time. 
|
|