Superimpose Effect
| [ LiB ] |
Superimpose Effect
The first compositing effect you'll explore is a basic superimpose. A superimpose effect is created when several images are viewed together with varying levels of transparency.
To create a superimpose, step through these actions:
-
Edit the video you want as the background onto to video track 1.
-
Add additional video tracks. In this example, you add two more tracks.
-
Patch the second clip to video track 2 and perform an edit.
-
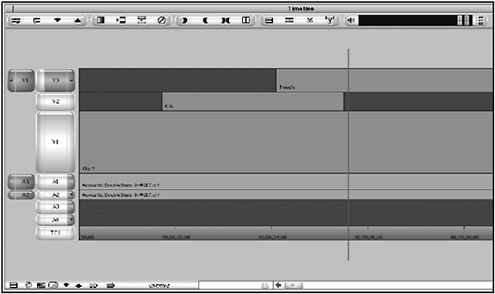
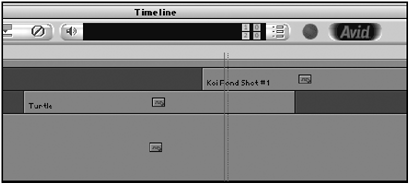
Patch the third track to video track 3 and perform an edit. In this example, the clips were staggered (see Figure 9.3).
Figure 9.3. Three tracks of video, ready to be superimposed.
-
Drag a superimpose effect, from the Blend category, on the clips that are on tracks 2 and 3.
NOTE
 TIP
TIP Here is a quick method to add several effects to several clips. Click one of the Segment Mode keys and Shift-click all the clips you want to add an effect to in the Timeline. Double-click the effect from the Effect Palette. The effect is applied to each clip.
-
Step into the Effect mode on the clip that is on video track 2.
-
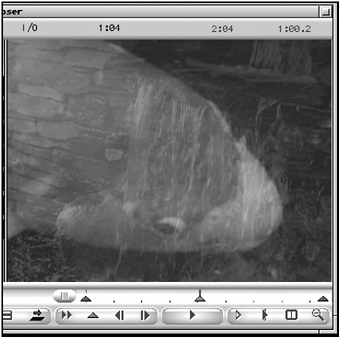
Add a keyframe (the N key on the keyboard) somewhere in the middle of the clip (see Figure 9.4).
Figure 9.4. A keyframe was added to the middle of the clip.
-
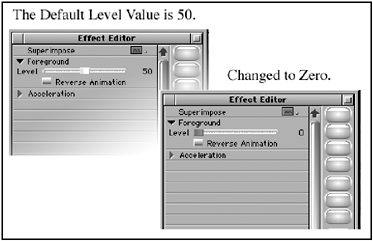
Shift-click on the first and last keyframe to highlight them. Change the Foreground level to 0. When you placed the superimpose effect on the clip it defaulted the Foreground level setting to 50 (see Figure 9.5).
Figure 9.5. The default level for a superimpose is 50. Change the level of the first and last keyframe to 0.
-
Render the effect and play it while monitoring track 2. You'll notice the clip on track 2 starts totally transparent, fades in slightly (50%), and then fades out.
-
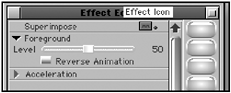
To apply this same superimpose to track 3, click on the Effect icon from track 2's Effect Editor and drag it to the clip on track 3 (see Figure 9.6). Render the effect on track 2 and 3 and play the effects.
Figure 9.6. Drag this icon straight from the Effect Editor onto the clip on track 3.
In this example, there are times when all three images are displayed, as shown in Figure 9.7.
Figure 9.7. This superimpose effect shows all three tracks at one point.
| [ LiB ] |