Bin Management
| [ LiB ] |
Bin Management
Keeping your bins in order is essential when you're editing with Avid Xpress Pro. Not being able to access a clip when you need it only slows down the creative process. Maintaining, properly naming, and creating custom bin views are only parts of the process of bin management. Other options, such as deleting, moving, and opening bins from other projects, are also critical to proper bin management.
Opening a Bin from Another Project
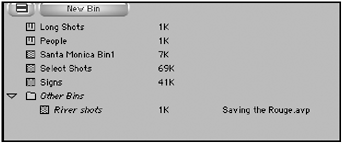
There might be times where you want to use footage from another project that currently resides on your computer. In the Project window, you'll only see the bins that were created for that project. To open and use a bin from another project, make sure no bins are selected within your Project window. Select Open Bin from the File menu. Navigate through your hard drive until you find the other project. Open the project and select the bin that contains the footage you need. Opening the bin allows you access to footage in that bin. Notice that the bin's name is italicized. The program also lists which project the bin came from (see Figure 1.29). This lets you, as the editor, know that you are borrowing footage. This footage is not linked to your project, but be carefulyou can still delete this footage.
Figure 1.29. When bins are opened from other projects, their name becomes italic.

NOTE
 TIP
TIP
Make a new project called "Video Elements." Keep all those extra clips you need to finish an edit in a bin within this project items like color bars, slates, backgrounds, sound effects, and the like. This makes all these elements available to any other project you're working on.
Deleting Bins
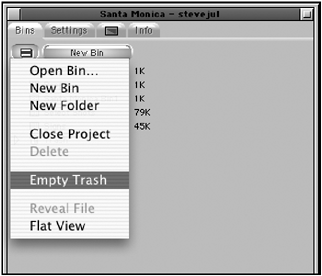
At any time you can delete an unused bin. Click on the bin icon in the Project window and press delete on your keyboard. This moves the bin into the trash. It does not delete the bin. The bin can then be deleted if you select Empty Trash from the project's Fast Menu (see Figure 1.30).
Figure 1.30. You can empty the trash from the Project window's Fast Menu.

Basic Settings
At any time during the edit, you can change the project's settings or your user settings. You'll explore more settings throughout this book as needed. As a basic example, let's say you want the software to auto-save every 10 minutes instead of every 15. In the Project window, click on the Settings tab (see Figure 1.31).
Figure 1.31. The Settings tab is where all project, user, and site settings are stored.

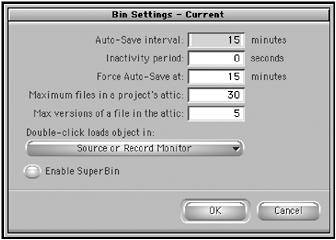
Notice that a list of settings is revealed. Any setting that says "user" is a setting dedicated to you the editor. This allows you to design the editing interface to your preferences. For this example, select Bin Settings (see Figure 1.32).
Figure 1.32. The Bin Settings is where you can customize when Avid Xpress Pro saves your project.

Notice the auto-save settings are set to auto-save every 15 minutes. You can change this to every 10 minutes to instruct Avid Xpress Pro to auto-save every 10 minutes, not 15. You'll read about proper saving techniques in Chapter 13, "Saving Your Work".
| [ LiB ] |