Bonus Tips
| [ LiB ] |
Bonus Tips
As I was writing this book, I wondered if it was wise to give away all my tips and shortcuts. But the holidays were getting close, so I threw in a few more tips as a bonus. These are tips that I use on a regular basis and that you might also find very helpful.
Bonus Tip 1: Use Add Edit to Change a Clip's Order
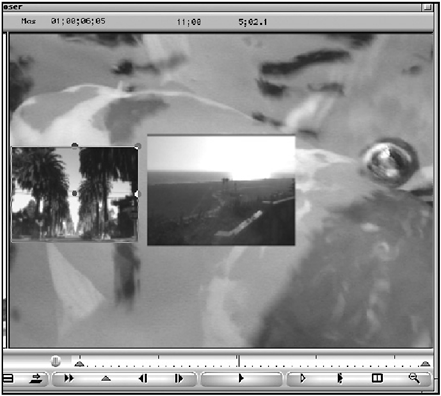
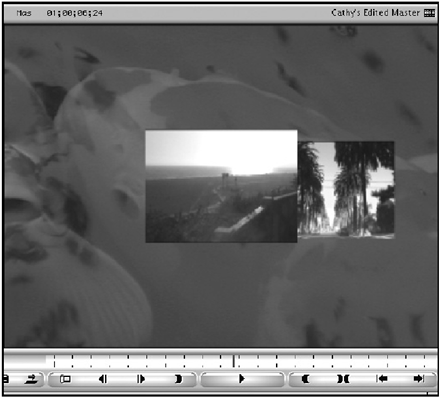
The Add Edit function can be used in a variety of situations. One of my favorite reasons to use this feature is when I need to re-order a clip. In other words, I need a certain clip to be above another clip. For example, let's say you had two PIP clips that cross each other in the middle of the screen (see Figure 16.36).
Figure 16.36. One PIP crosses over the other.
As the two clips pass each other, the clip that is on track 3 will be on top of the clip that is on track 2. This is the order that Avid Xpress Pro follows . Higher tracks are always on top of lower tracks (see Figure 16.37).
Figure 16.37. As the PIP on track 3 crosses the PIP on track 2, the clip on track 2 is covered.
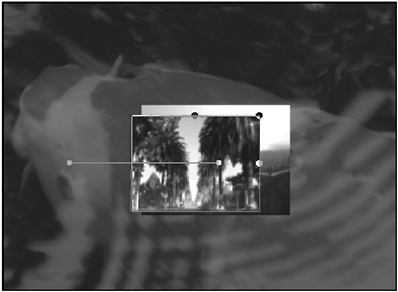
But let's assume that after the top PIP passes the lower PIP, you want the top PIP to come back across the screen, but this time underneath the PIP on track 2. So the move basically looks like Figure 16.38.
Figure 16.38. The top track basically has three key frames . It starts from the left, moves to the right, and then moves back to the left.

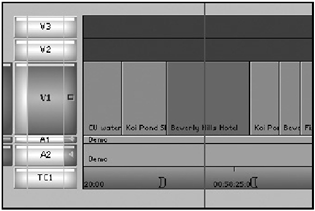
To perform this move correctly, use the Add Edit feature. After the top PIP moves past the lower PIP, select the top track and lower track and perform an add edit. The Timeline will display two add edits (see Figure 16.39).
Figure 16.39. After the PIP moves past the other PIP, add two edits, one on track 3 and one on track 2.
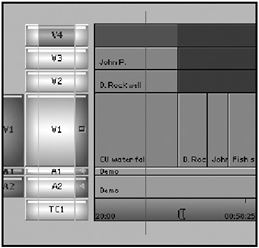
Add an additional track, select one of the Segment Mode buttons , and then drag the end portion of the clip that's on track 3 up to this new track. To ensure that the clip doesn't move to the left or right, use the Ctrl key (Macintosh OS) or the Alt key (Windows) as you move the clip up (see Figure 16.40).
Figure 16.40. Using the Segment Mode buttons, it's easy to re-order the clips.
Still using the Segment Mode keys, drag the clip on track 2 up to track 3 and drag the clip on track 4 to track 2. Basically, all you did was re-order the clips. Because the PIP was already created, the clips will continue to move behind one another. Now, as the PIP moves back across the screen, the clip that was on top will now be on the bottom (see Figure 16.41).
Figure 16.41. The results produce an effect where it appears that one PIP moves behind another.
This tip works great anytime you need one object to change the order with any other object.
Bonus Tip 2: Ignore the IN or OUT Points in the Timeline
Okay, so this might be a weird tip, but it sure comes in handy when you don't want to interfere with an established IN point. Let's say you marked an IN point in the Timeline and then moved the Position Indicator to a new position and decided the edit might work better where the Position Indicator is rather than where the IN point is. If you perform an edit, an established IN point always overrides the Position Indicator. If you want to ignore the IN point, perform the edit while holding down the Ctrl (Macintosh) or Alt (Windows) key. The edit will ignore the IN point in the Timeline and use the Position Indicator as the IN point. Simple tip, but very effective.
Bonus Tip 3: Use the Mark Clip Button for Clips on a Lower Track
This tip should almost be used every time you use the Mark Clip button. The Mark Clip is a great feature to mark IN and OUT points quickly. If you use this feature in the Timeline, the IN and OUT points are determined by the selected tracks. So, if you only had the video track selected, it would only mark an IN and OUT point on the clip on which the Position Indicator is parked (see Figure 16.42).
Figure 16.42. The Mark Clip feature marks an IN and OUT point on the clip the Position Indicator is parked on and depends on which tracks are on.
For this tip, let's say you want to stack a bunch of clips on top of each other. The Mark Clip is a great feature that will ensure that each clip is the same length in the Timeline. But, what if you have track 3 on and want to use the IN and OUT points from the clip that's on track 2? Instead of turning on track 2, turning off track 3, pressing the Mark Clip button, turning track 2 off, and then finally turning track 3 back on, you can use this tip. When you press the Mark Clip button, hold down the Option (Macintosh) or Alt (Windows) key. This shortcut will mark an IN and OUT point in the Timeline based on the clip beneath the track that is currently selected. When you build a multi-layered effect, you'll witness all the advantages this tip has (see Figure 16.43).
Figure 16.43. Even though the top track is on, the Mark Clip used the clip below to determine the IN and OUT points.
Bonus Tip 4: Fade Several Tracks to Black
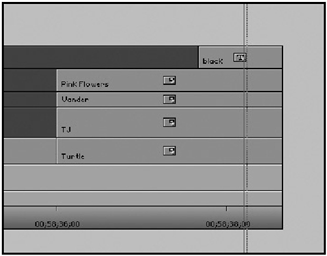
Say you've built a multi-layered effect and want all the tracks to fade to black at the same time (see Figure 16.44).
Figure 16.44. In this example, there are four tracks that need to fade to black all at the same time.
Your first option is to add dissolves to each of the tracks. If you choose to go this route, you might be waiting a while to see the results. I can honestly say all the elements will not fade at the same rate. Images that are brighter will appear to stay on the screen longer than dark images.
To create a smooth fade to black, use the following tip:
-
Open the Title tool and create a black page by turning off the video background button. Save it to a bin.
-
Add a new video layer to your Timeline.
-
Mark an IN and OUT point in the black title the same length you want the fade to be. So if you want a one-second fade to black, mark an IN and OUT for one second.
-
Edit the black title to the top track so that it ends at the same time your sequence ends (see Figure 16.45).
Figure 16.45. On a new video track, edit on the black title.
-
Before you add a dissolve to the black title, click the Remove Effect icon to make the title simply a piece of black media.
-
Add a 30-frame dissolve, starting at the cut, to the black piece of media. As the dissolve plays through, all the tracks will fade at the same rate.
Bonus Tip 5: Never Stop Learning
This might seem like the most obvious tip when it comes to becoming a better editor, but how do you go about learning more about the craft of editing? Try these suggestions for starters:
-
Ask to sit in on an editing session at a professional post-production facility. At first you might think this impossible , but you might be surprised how many facilities will allow you to do this. Many post-production companies spend thousands of dollars on their editing suites and love to show them off. If they won't allow you to sit in on an edit, at least ask for a tour. Simply tell them you're a producer and want to see their facility.
-
Take an Avid class. Avid, as a company, has developed a lot of great courses. Whereas most software companies are content with simply publishing a tutorial to throw into the user manuals, Avid has stepped it up a notch with quality classes taught at authorized training centers around the world. Visit www.avid.com/ training/centers/ to find a center near you.
-
Watch Robert Rodriguez's movies ( El Mariachi and From Dusk Till Dawn , for example). Why his? Robert not only writes and directs most of his movies, he also edits them. Watch his DVDs with the commentary track on. The same is true with the Coen brothers ( Raising Arizona and Fargo , for example). In fact, watch any movie with the commentary track on. It's like sitting in a film course in college, but it costs a few bucks!
-
So you like editing on Avid Xpress Pro. Start learning other software programs. This will only enhance your work. Some suggestions: Boris FX, Adobe Photoshop, and Adobe After Effects.
-
Finally, edit. I don't know of a single editor who hasn't improved their skills by simply practicing their craft. Spending time with Avid Xpress Pro software is really the only way to master your skills. As time goes by, watch programs or projects you edited in the past and discover ways to improve as you work on future projects.
I hope all these tips help you as you edit with Avid Xpress Pro. It truly is a great piece of software that has taken years to develop. Access to some of the basic techniques you perform in Avid Xpress Pro used to cost thousands of dollars. These same techniques are now at your fingertips for a fraction of the cost. Here's your chance to create that program or project you always knew you could create. Thanks to Avid Xpress Pro, it's a great time to be an editor!
| [ LiB ] |