Sifting a Column
| [ LiB ] |
Sifting a Column
Another method of organizing a bin while in Text view uses the sifting command. Sifting allows you to view clips that meet a certain criteria. If your bin contains hundreds of clips, sifting the bin is a great way of finding only those clips you want to use. For example, let's say your bin contains several shots of cars and some are labeled with the word interior . Simply sift the bin for the word "interior". To perform a sift, follow these steps:
-
Open the bin you want to sift.
-
Using the Headings command from the bin's Fast Menu, select the headings you want to be displayed in Text view.
-
Make sure the bin is highlighted and choose Custom Sift from the Bin menu.
-
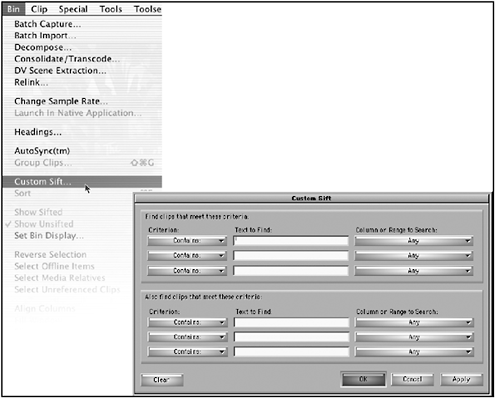
A dialog box will open (see Figure 14.9).
Figure 14.9. The Custom Sift dialog box allows you to type in the criteria a clip must have to be displayed.
-
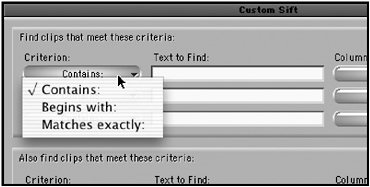
In the Custom Sift dialog box, choose the method Avid Xpress Pro will use to perform the sift. Your options are Contains, Begins with, and Matches Exactly. Start with the Contains option. If your search or sift needs to be more narrow, select one of the other options (see Figure 14.10).
Figure 14.10. The Custom Sift dialog box gives you three options when you perform a sift.
-
Type the information you are searching for.
-
Select the column in which you want the sift to perform.
-
Click on the OK button.
-
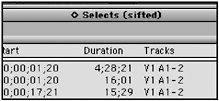
The bin you highlighted becomes sifted. Only the clips that meet the criteria you applied are displayed. The bin's name now includes the word sifted (see Figure 14.11).
Figure 14.11. When a bin has been sifted, the word "sifted" is included in the bin's title bar.
-
To display all the clips in the bin, choose Show Unsifted from the Bin menu. This option will always be grayed out unless a bin has been sifted.
NOTE
 TIP
TIP
Use the sift mode prior to printing out a bin. This way, you can display only the clips you or your client want to see instead of the entire bin.
| [ LiB ] |