User Settings
| [ LiB ] |
User Settings
Project settings are linked on a project-by-project basis. Project settings are not carried over to the next project. User settings move from project to project. These settings change how Avid Xpress Pro's screens look and how the keyboard interacts with the software. These settings allow you to customize almost every aspect of your workflow. Although there are numerous user settings, many have been covered in previous chapters. The user settings covered here deal with customizing your interface, the keyboard, and your workspaces.
Interface Settings
When you scroll down the settings list, you might notice that there are several settings with the title Interface . These are settings that control how the Avid Xpress Pro interface appears on-screen (see Figure 12.13).
Figure 12.13. Avid Xpress Pro comes with a series of preset interfaces for you to choose from.
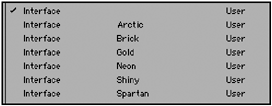
To apply any of these styles, simply click next to the style's name and a check mark will appear next to that particular Interface style. To explore this setting, use an Interface style that is not among the presets; this should be the default setting. It's the Interface setting that is unlabeled and has a check mark next to it. To open it, double-click on the word Interface (see Figure 12.14).
Figure 12.14. Open an interface setting that has not been titled.

It does not contain a name because you have yet to assign it one. Double-click on this interface to open its settings window (see Figure 12.15). The Interface settings window has two tabsGeneral and Appearance.
Figure 12.15. The Interface window allows you to make adjustments to Avid Xpress Pro layout.
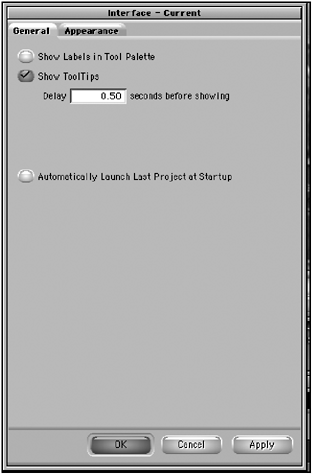
The General Tab
Let's investigate some of the features in the Interface General tab.
Show Labels in the Tool Palette displays small labels when you open any of the Fast Menu tool palettes. The problem with these titles is that they are practically illegible (see Figure 12.16).
Figure 12.16. Labels in the Tool Palette are nice; too bad you can't read them!
The ToolTips option is great for new users of Avid Xpress Pro. In fact, even editors who have been editing with Avid for some time simply leave this feature on with an extended delay. ToolTips appear when you place your cursor over a button. If the cursor does not move in the amount of time you typed in the delay box (the default is half a second), the name of the button will appear in a small ToolTips box (see Figure 12.17).
Figure 12.17. ToolTips are very handy when first learning Avid Xpress Pro. As you begin to get comfortable with the interface, simply leave ToolTips on but increase the delay. This way, you can still use them when needed.
The last option in the General tab of the Interface settings is to launch the last project you were working on in Avid Xpress Pro. I love this setting. If selected, Avid Xpress Pro will skip the first window, where you determine which project you're working on, and launch the last project you had open. Avoid using this option if there are multiple users accessing the Avid version you're working on.
The Appearance Tab
The Appearance tab allows you to adjust the colors, spacing, style, and shading of all the buttons , the appearance of the tracks in the Timeline, and the background colors for both the Project window and the bins .
To change any of the colors, simply click on the colored box next to button, track, or background you want to change and select a new color .
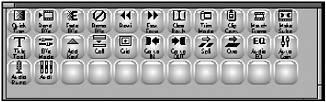
The options below the color options are pull-down menus and include a variety of preset options (see Figure 12.18).
Figure 12.18. Several preset options are available in the Appearance tab, including Button Style.
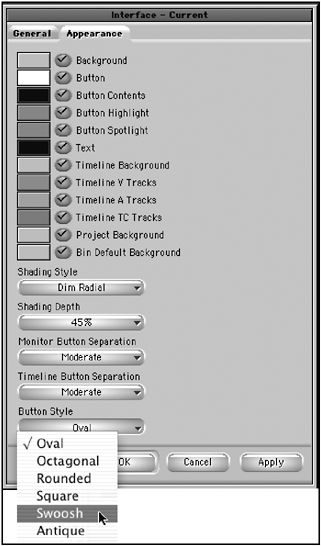
Once you've completed all your selections, click Apply. The changes will affect the on-screen interface of Avid Xpress Pro.
NOTE
 TIP
TIP
If you really want your Timeline to "pop" as you work on Avid Xpress Pro, choose black for the Timeline's background. This way, all the tracks stand out. Performing a trim edit by circling an edit is easy because there is now a distinction between the top track and the actual background of the Timeline.
Mapping Buttons and Menus
Perhaps as you have worked with Avid Xpress Pro you have wished that you could change the keyboard shortcuts of some of the commands. Forget wishing and start mapping your keyboard. Avid Xpress Pro makes mapping buttons and menus extremely easy. Before you map buttons and menus, though, it's a good idea to become comfortable with some of the default keys and buttons. It's best to find out which buttons and commands you actually like and use on a regular basis. Many of these keys and buttons are part of the default settings in Avid Xpress Pro.
To map a button to another button, follow these steps:
-
Open the Command Palette from the Tools menu.
-
Step through the different tabs until you find the button you want to map. If you're new to Avid Xpress Pro, you're going to see a lot of foreign buttons.
-
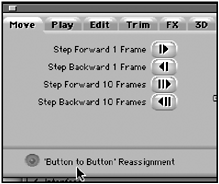
Make sure the Button to Button Reassignment button is active (see Figure 12.19).
Figure 12.19. The Button to Button Reassignment button needs to be selected to map buttons.
-
Click and drag any button from the Command Palette to a button on either the Composer window or the Timeline window. If there currently is a button assigned, the new button will override the old button.
-
With the Button to Button Reassignment button on, you do not have to use buttons from the Command Palette; you can simply move any button from one position to another.
NOTE
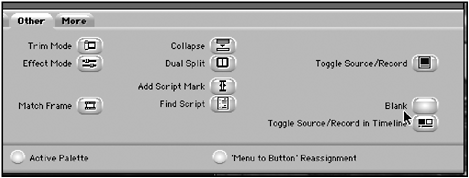
TIP If your mapping gets out of control and you want to get rid of certain buttons, choose the Other tab in the Command Palette and drag the blank key to a button to void the command (see Figure 12.20).
You can map blank buttons if you need to get rid of a button.
Mapping a menu item is a slightly different process. Switch from Button to Button Reassignment in the Command Palette to Menu to Button Reassignment. As you move your cursor over any buttons on the Composer screen or the Timeline, you'll notice it turns into a small white box. Click on the button you want to map and then choose the menu item from any of the menus. This is the only time when all the menu items are available.
NOTE
TIP
The best menu items to map are those that do not have a quick key. For example, the New Title command from the Clip menu does not have a quick key or shortcut. Mapping this menu command will certainly speed up the editing process. The Button to Button
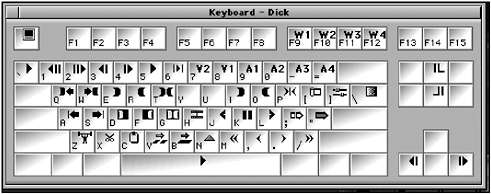
To map any button or menu item to your keyboard, open the Keyboard setting from the Settings tab in the Project window. The default keyboard will open (see Figure 12.21).
Figure 12.21. This is a layout of the default Avid Xpress Pro keyboard.
Open the Command Palette and either map a button to a key on the keyboard or map a menu item.
NOTE
TIP
Your keyboard can also be mapped on the Shift level. While the keyboard is open, hold down the Shift key to view the available keys. To make a little sense out of using the Shift keyboard, it's best to map opposite keys at the Shift level. For example, if the 5 key is the Play key, make the Shift+5 key play in reverse.
Linking Toolsets
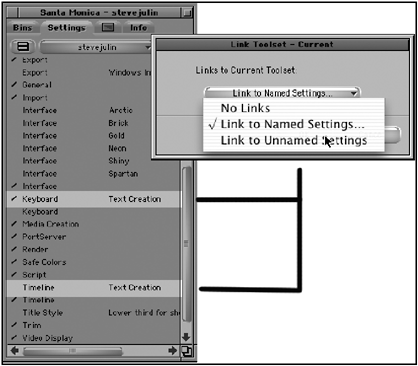
Toolsets can also be customized to a setting. Using the Toolsets menu, it's possible to link a user setting and project setting by its name. For example, say you have created a keyboard setting called Text Creation and you want to link the keyboard with a specific Timeline view. If you create a Timeline view also called Text Creation, you can link the two by selecting Link Current to from the Toolset menu. A dialog box will open; choose Link to Named Settings from the pull-down menu (see Figure 12.22). Type the name; those settings will be linked to that particular toolset.
Figure 12.22. These two settings are now linked to a toolset. When the toolset is selected, these settings become active.
Saving Your User Settings
If you plan on freelance editing or moving from one Avid system to another, it's a good habit to take along your settings. To save your user settings, locate your Avid user folder on your hard drive and open it. Inside, you should see your user settings (see Figure 12.23).
Figure 12.23. The Avid user folder holds all the user files.
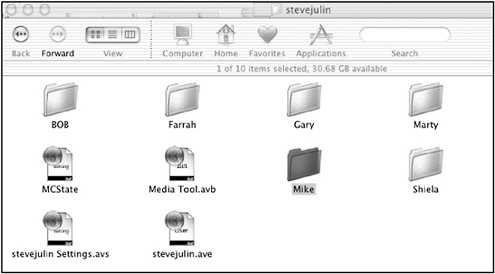
Copy this file to a floppy disk, Zip disk, CD, or any other form of removable media. Before you start working on a different system, place your settings in the Avid users folder; your name will then be one of the options when you log into Avid.
| [ LiB ] |