|  PP07S-4.5.2 Use PowerPoint's timing features to make sure that your presentation is not too long or too fast. You can specify the amount of time given to each slide or use Rehearse Timings, which ensures that your timings are legitimate and workable. By rehearsing timings, you can vary the amount of time each slide appears on the screen. If you want the timings to take effect, make sure the show is set to use timings in the Set Up Show dialog box. Set Timings Between Slides 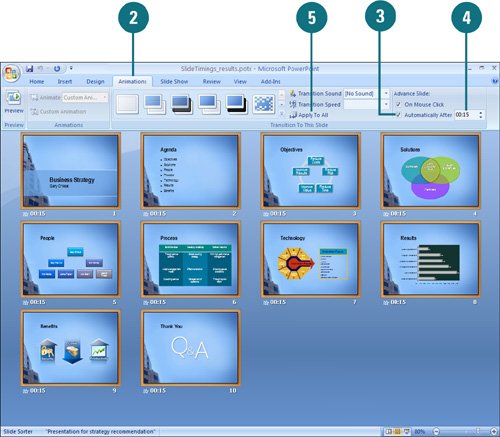
 Click the slide(s) to which you want to set slide timings. Click the slide(s) to which you want to set slide timings.
 Click the Animations tab. Click the Animations tab.
 Select the Automatically After check box. Select the Automatically After check box.
 Enter the time (in seconds) before the presentation automatically advances to the next slide after displaying the entire slide. Enter the time (in seconds) before the presentation automatically advances to the next slide after displaying the entire slide.
 To apply the settings to all slides, click the Apply To All button. To apply the settings to all slides, click the Apply To All button.
Did You Know? You can use the mouse to control slide timings. In Slide Show View, a mouse click always advances a slide, even if the set timing has not elapsed, and holding down the mouse button prevents a timed transition from occurring until you release the mouse button. |
Create Timings Through Rehearsal 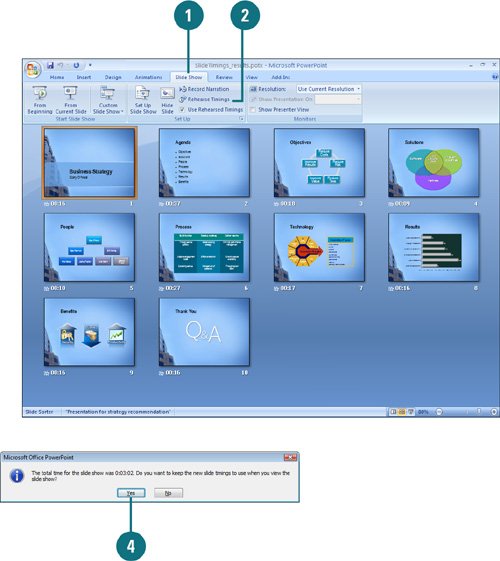
Click the Slide Show tab. Click the Rehearse Timings button. As the slide show runs, rehearse your presentation by clicking or pressing Enter to go to the next transition or slide. When you're done, click Yes to accept the timings. To test timings, start the slide show and note when the slides advance too quickly or too slowly.  Review and edit individual timings in Slide Sorter view. Review and edit individual timings in Slide Sorter view.
Edit Timings 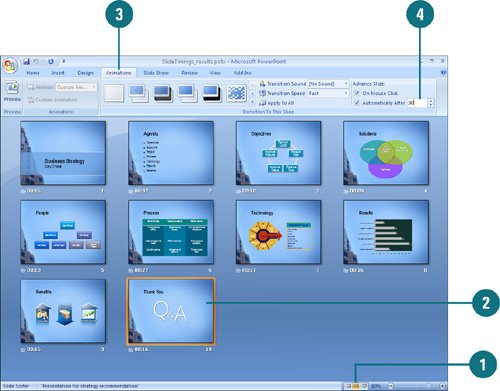
Click the Slide Sorter View button. Click the slide whose timing you want to change. Click the Animations tab. Enter a new value in the Seconds box. Press Enter or click anywhere in the presentation to save the new timing.
|