Inserting Information the Smart Way
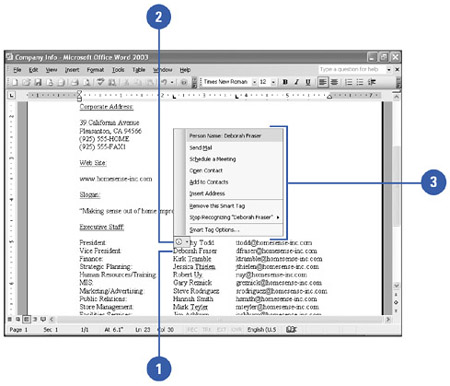
| When you type certain information, such as the date and time, personal names , places, telephone numbers , or recent e-mail recipients, a purple dotted line appears under the item, which indicates a Smart Tag is available. A Smart Tag provides options for commonly performed tasks associated with the information. For example, you can add a name and address that you just typed in a Word document to your Contacts list in Office Outlook. When you point to the purple dotted line, the Smart Tags Option button appears below it. When you click the button, a menu appears with a list of available options. The available options differ depending on the Smart Tag content. Insert Information Using Smart Tags
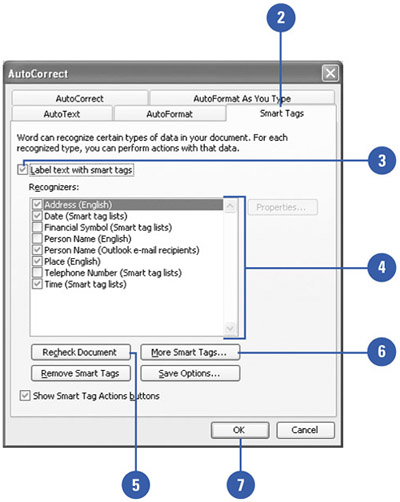
Change Smart Tag Options
|
EAN: N/A
Pages: 310
- Linking the IT Balanced Scorecard to the Business Objectives at a Major Canadian Financial Group
- Technical Issues Related to IT Governance Tactics: Product Metrics, Measurements and Process Control
- Governing Information Technology Through COBIT
- The Evolution of IT Governance at NB Power
- Governance Structures for IT in the Health Care Industry