Creating Editable Views
|
An editable view is one that can be used to edit data in the underlying data dictionary tables. In short, an editable view is one where the SQL SELECT statement used to create the view produces an editable result set.
SQL SELECT statements that produce editable result sets select data from only one table or view. If selecting from a table, that table must be in the same data dictionary as the view, and there must be a one-to-one correspondence between the individual records and columns in the query result set and the table being queried. In other words, you cannot use SQL keywords like DISTINCT, UNION, or GROUP BY, and only a list of one of more fields, or all fields (using the * operator), may appear in the SELECT clause. Similarly, you cannot use aggregate functions or subqueries in a view if you want to edit the results.
If selecting from a view, the view being queried must produce an editable result set.
The following steps show you how to create a simple, editable view using the sample files you have been working with in preceding chapters:
-
Open the DemoDictionary data dictionary (with the DemoDD alias) in the Advantage Database Manager.
-
Right-click the VIEWS node in the Advantage Database Manager tree view, and select Create. The View dialog box is displayed, as shown in Figure 6-1.
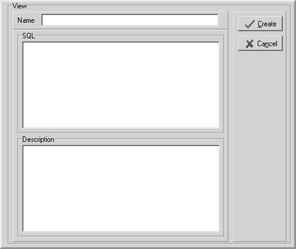
Figure 6-1: Creating a new view -
Set Name to Employee Tab.
-
Enter the following SQL statement in the SQL section:
SELECT "Employee Number", "First Name", "Last Name", "Department Code" FROM EMPLOYEE
-
Set Description to View of EMPLOYEE table without the Salary field.
-
Click Create. After a moment, a dialog box is displayed indicating that the view was created successfully. Accept this dialog box.
Note You will not see the final confirmation dialog box if you have set the Message Dialog dropdown list to No in the Advantage Database Manager.
Testing a View
You test a view by opening it, or by querying it. Either way, the result set created by the view is returned. Both of these techniques are shown in this section.
Opening a View
Use the following steps to demonstrate opening a view:
-
If the VIEWS node in the Advantage Database Manager tree view is not already expanded, expand it.
-
Click the Employee Tab node. The View dialog box is displayed. Unlike when you initially created the view, this dialog box now has one additional button, as shown in Figure 6-2. This button is labeled Open.
-
Click the Open button. After a moment the result set created by the view is opened in the Table Browser, as shown in Figure 6-3.
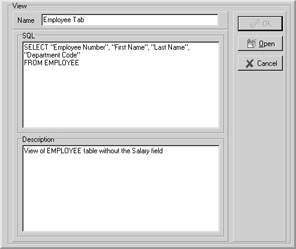
Figure 6-2: After a view has been created, you can select and open it.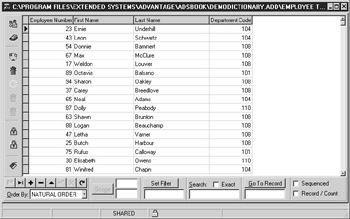
Figure 6-3: A result set returned by a view in the Table Browser
Notice that the Salary field, which was not included in the SELECT clause of the query, is not in this view.
This view is an editable view. For example, if you wanted to change the department code for one of the employees, you could do so from this view using the Table Browser. Any changes that you write to the view will be applied directly to the underlying table from which the records were obtained.
Querying a View
Views are often used in the FROM clause of SQL queries in client applications, and in other views. In both of these situations, the view itself is being treated as though it were a table in your database.
Use the following steps to demonstrate querying a view:
-
Select Tools | Native SQL Utility from the Advantage Data Architect main menu. The Native SQL Utility is shown in Figure 6-4.
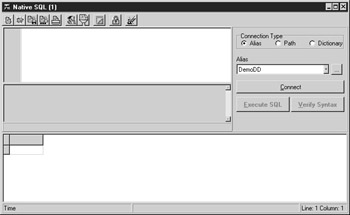
Figure 6-4: The Native SQL Utility -
Set Connection type to Alias and set Alias to DemoDD.
-
Click the Connect button. When prompted, set User Name to ADSSYS and password to password.
-
In the SQL pane in the upper-left corner of the Native SQL Utility, enter the following SELECT statement:
SELECT * FROM "Employee Tab"
-
Click the Execute SQL button to execute this query. After a moment, the query result is returned, as shown in Figure 6-5.
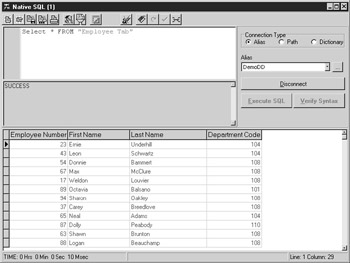
Figure 6-5: A SQL SELECT statement that selects all fields from a view.
Making Views Accessible
As described in Chapter 4, it is possible to restrict groups and specific users access to data dictionary objects. Doing so provides you with additional security in your database.
If you followed the steps in Chapter 4 to enable security for your data dictionary, the view that you just created is accessible to the data dictionary administrator, but not to any of your defined users. Specifically, since you entered the data dictionary administrator’s user name and password when you opened the Native SQL Utility, you were permitted to execute a query against the view. However, if you log in using the adsuser user name, access would be denied.
Use the following steps to demonstrate this:
-
If the Native SQL Utility is still open, click the Disconnect button to drop your connection using the data dictionary administrator account (ADSSYS). If you closed the Native SQL Utility, select Tools | Native SQL Utility to open it again.
-
Click the Connect button. This time enter the user name adsuser, and the password password.
-
The SQL statement that you entered in the preceding section should still be in the SQL Editor. If it is not, reenter the SQL SELECT statement provided in step 4 of the preceding section. Now click Execute SQL. This time you will receive an error message. This error message indicates a 7079 error, which results when you do not have sufficient rights to the table or view.
In order to provide access to views to regular (nonadministrative) users, you must either explicitly grant the users rights to the view or grant rights to the view to the one or more of the groups to which the users are members.
The following steps show you how to add access rights to the Employee Tab view:
-
Open the DemoDictionary in the Advantage Database Manager if it is not already open.
-
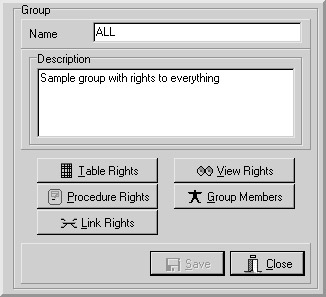
Expand the GROUPS node of the Advantage Database Manager tree view and select the ALL group. The Group dialog box is displayed:
-
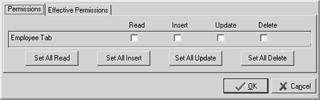
Click View Rights to display the Permissions dialog box:
-
Click the Set All Read, Set All Insert, Set All Update, and Set All Delete buttons to enable all rights for this view to this group. Click OK to close the Permissions dialog box.
-
On the Group dialog box, click Save to save these rights.
-
Click the READONLY group to display the Group dialog box again.
-
Click the View Rights button to display this group’s Permissions dialog box.
-
Click the Set All Read button, and then click OK to close the Permissions dialog box.
-
Click the Table Rights button from the Group dialog box to display the table Permissions dialog box. Uncheck the Read checkbox associated with the Employee table. Click OK to close the Permissions dialog box.
-
Click Save from the Group dialog box to save these rights.
Since the adsuser user inherits rights from the ALL group, anyone connecting to this data dictionary using the adsuser user name and password will be able to work with the EMPLOYEE table data using either the table itself or the Employee Tab view. However, any user belonging only to the READONLY group will be able to view the EMPLOYEE data using the Employee Tab view, but will not be able to change the data in any way and will be denied any kind of direct access to the EMPLOYEE table.
Changing a View
You can change the SQL that defines a view, so long as the new SQL that you provide is valid for a view. To change a view, select the node for the view you want to change under the VIEWS node in the Advantage Database Manager tree view. Using the View dialog box, modify the SQL that appears in the SQL section. When you are done, click OK to save the view.
One change that you cannot make to a view is changing its name. If you want to change the name of a view, copy the SQL text from your original view, and then create a new view and paste the copied text into the SQL area.
Once you have created a new copy of the view using a new name, you can delete the old view. To delete a view, right-click the node for the view you want to delete under the VIEWS node and select Delete.
| Caution | You should exercise caution when changing a view that is used by deployed client applications. If your client applications refer to specific fields by name or position in the result set, changes you make to column names, or changes to the order and/or number of columns in the result set, can cause errors in your client applications. Make sure to test all client applications before deploying data dictionaries with updated views where these types of changes have been applied. |
|
EAN: 2147483647
Pages: 129