How can I turn my pivot table report into an interactive web page?
ProblemYou have a pivot table report that you would like to share with clients on your department website. You need to create a web page that allows your clients to retain all the interactive functionality of your pivot table. SolutionThe good news is that Excel contains inherent functionality that allows you to turn an entire workbook, a single spreadsheet, a range of cells, or a single object into a web page. You can use the Save as Web Page option to create a static or an interactive web page. Using this option, you can easily create an interactive web page with your pivot table on it. To start this process, open up your workbook and activate the sheet that contains the pivot table. Go up to the application menu and select File, Save as Web Page. The dialog box shown in Figure A.23 will activate. Figure A.23. Start the process of creating a web page by activating the Save as Web Page dialog box.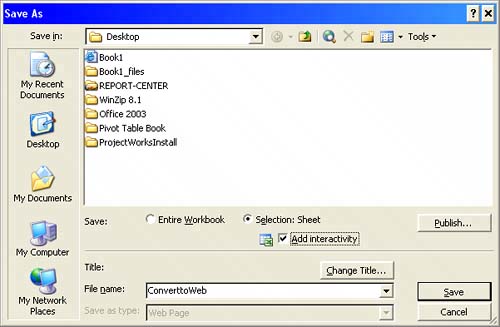 As you can see, you have the option of saving the entire workbook or a selection in your workbook. In this case, because you are only interested in publishing your pivot table, you will select Selection: Sheet. In addition, because you need your web page to be interactive, you will need to place a check in the Add Interactivity box. You will also see the Change Title button in Figure A.23. Clicking this button will allow you to enter a title for your web page. This title helps your clients identify the nature of the report they are reviewing. Finally, the File Name input box allows you to change the name of your resultant web page files. In most instances, this name defaults to the name of your spreadsheet. When you are comfortable with your initial settings, click on the Publish button to continue the process. After you click Publish, the Publish as Web Page dialog box, shown in Figure A.24, will be activated. You will notice that this dialog box has three main sections: Item to Publish, Viewing Options, and Publish As. Figure A.24. Activate the Publish as Web Page dialog box.
The first thing you will have to do is to identify which items you would like to publish. That is, you will have to choose what object or objects you want to bring into your web page. In the example in Figure A.24, you only want to show the pivot table that is contained in the Summary tab of your workbook. Therefore, you will select Items in Summary from the Choose drop-down list and then select PivotTable. You will notice that selecting PivotTable in the Item to Publish section will force Viewing Options to default to PivotTable Functionality. This is perfect, because that is exactly the functionality you need. CAUTION Be careful not to remove the check from the Add Interactivity With check box. If you do, pivot table functionality will be disabled, effectively giving you a static web page. In the Publish As section, you will select a location to output your web page and its supporting documents. In addition, you can place a check in the AutoRepublish check box. This will ensure that your web pages are automatically republished each time this workbook is saved. NOTE After you enable the AutoRepublish feature, you will receive the following message the next time you save the workbook after publishing: "This workbook contains items that are automatically republished to Web pages each time the workbook is saved." You will have two options to select from: Disable AutoRepublish and Enable AutoRepublish. To ensure that you AutoRepublish your web page after changes, you will have to select the Enable AutoRepublish option. To finish, click on the Publish button. Go to the location you specified for the output, andyou will see an HTML file and a folder that contains two XML documents. The HTML file is your final web page. The XML documents contain the pivot cache and the components necessary to make your web page go. Place all these documents on your web server to allow your clients to hit your newly created web page. Your final web page will look similar to the one shown in Figure A.25. Figure A.25. You have successfully created your first interactive web-based pivot table!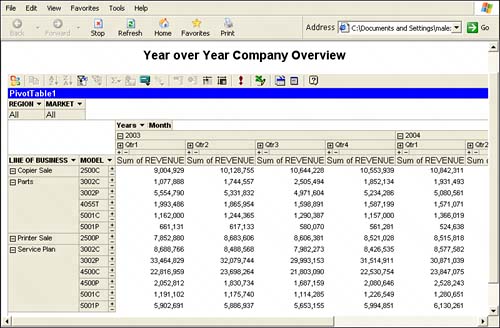
|

EAN: 2147483647
Pages: 140
- Challenging the Unpredictable: Changeable Order Management Systems
- The Effects of an Enterprise Resource Planning System (ERP) Implementation on Job Characteristics – A Study using the Hackman and Oldham Job Characteristics Model
- A Hybrid Clustering Technique to Improve Patient Data Quality
- Relevance and Micro-Relevance for the Professional as Determinants of IT-Diffusion and IT-Use in Healthcare
- Development of Interactive Web Sites to Enhance Police/Community Relations
- Chapter VI Web Site Quality and Usability in E-Commerce
- Chapter XIII Shopping Agent Web Sites: A Comparative Shopping Environment
- Chapter XIV Product Catalog and Shopping Cart Effective Design
- Chapter XVI Turning Web Surfers into Loyal Customers: Cognitive Lock-In Through Interface Design and Web Site Usability
- Chapter XVIII Web Systems Design, Litigation, and Online Consumer Behavior