Animations In PowerPoint 2000 And Earlier
Alicia's original slides were quite boring. For example, her definition slides looked like this:
| |
Vocabulary Words
-
Krill “ A type of plankton that looks like a very small shrimp. Main whale food.
-
Mammal “ Warm blooded animal with hair. Young born live. Breath air.
-
Whale “ Large sea dwelling mammal
-
Fluke “ Side pieces of whale's tale
-
Fish “ Cold blooded animal. Breaths by drawing oxygen from water with gills.
-
Blowhole “ Hole at top of whale's back. Used to inhale and exhale air.
-
Plankton “ Small, almost microscopic sea animals.
-
Migration “ The movement of animals in response to seasonal changes.
| |
Figure 6-1: Initial Vocabulary Words Slide
The first thing to do is to change the slide so it only contains the words to be defined. Because we are adding action to this slide, we are also going to tell the students how to access the additional information.
To explain how PowerPoint actually animates objects, we change this slide to make it less text intensive . Because it would also be useful to be able to click on any of the words and have the definition for the word appear and then disappear, we use the process of creating this effect to demonstrate how PowerPoint actually animates objects.
PowerPoint 2000 only allows objects to appear and disappear in a set order. To make PowerPoint do what we want, we need to fool the students into seeing what we want them to see.
The new slide looks like this:
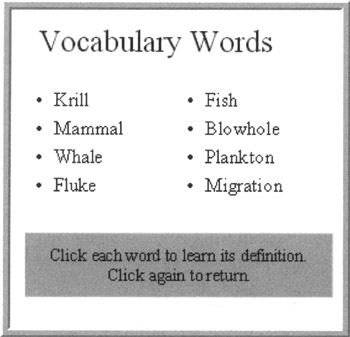
Figure 6-2: Redesigned Vocabulary Words Slide
This main slide is linked to a series of other, almost identical slides that show each individual definition on the screen. By linking each slide to a word, clicking any word appears to make a box with its definition appear. Clicking a second time returns to the word list. Using this process, the students are fooled into believing the definitions appear and disappear, no matter what order the words are clicked.
What we are going to do is to make it impossible to tell we have changed slides. PowerPoint animation works much like an old-fashioned child's flipbook. As long as the background stays the same, making small changes in slide objects allows the viewer to see movement.
In this case, we are going to move from the slide in Figure 6-2 to a slide containing the definition of the word krill.
When we click on the word, the definition box appears. When done with the animation, we click again. This returns us to the word list slide. The effect is the box disappears. Since the animation of the definition for krill is now on a separate slide, we can do things outside of a linear timeline and make it appear everything is happening on the same slide.
Example: Create The Slides
Let's create a sample definition slide so you can see exactly how this is going to work. First, create a presentation containing the word list shown above. Next , use Insert ’ Duplicate Slide to create a copy of the slide.
On the first duplicate slide, add an autoshape box or circle and enter the definition for the first term (krill). Since we want the words to zoom out on the slide, make the autoshape into a 3-D shape. The final slide looks something like this:
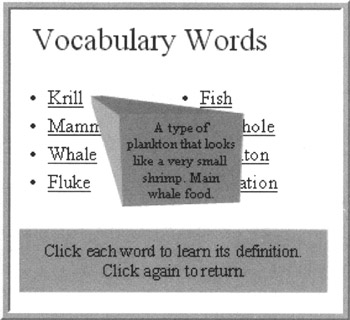
Figure 6-3: Defining Words using Linked Slides
We are now ready to make the box and the graphic appear. Go to the Custom Animation window and set up the definition shape and the graphic to appear after no delay, using the Zoom from center effect. This causes both items to enter as soon as the slide comes up. Test the slide to make sure it works.
Once the slide is working, create a custom show containing just this slide (see Custom Shows in Chapter 3). Once the custom show is created, hide each of the definition slides so they do not play when the presentation is run.
Finally, we need to be sure everyone knows there is more information available on the word krill. To do this, select the word and create a hyperlink to the custom show containing the new slide. When creating the hyperlink, be sure the Play and Return box is checked. Then, the word krill might look like this:
-
Krill
After creating the link, the word Krill changes color and becomes underlined . This indicates the word contains a hyperlink. To make sure the linked slides still look the same as the original slide, select the rest of the vocabulary words and underline them.
When the word krill is clicked, PowerPoint bring up the new slide, runs the animation and waits for a mouse click. When clicked again, PowerPoint returns to the main presentation so the presentation can continue on.
| |
Using this technique on built slides? After duplicating the slide, delete any text not showing on the screen. This situation is more likely to appear when presenting the presentation yourself than when someone else is working through the presentation automatically.
| |
One Slide, Many Tips?
Create a link, a custom show and a hidden slide for each tip. In our case, after creating all the links the main slide would look like this:
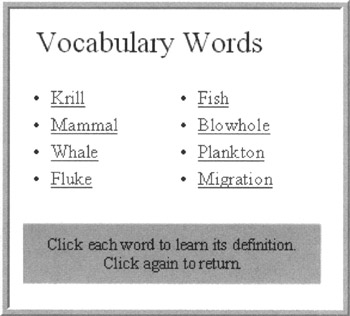
Figure 6-4: Completed Linked Vocabulary Words Slide
Making Things Appear And Disappear In Order
To set up several pictures to appear and disappear on the same slide, use the Hide on Mouse Click options on the custom animation pane. Animate each picture to appear in order with the animation desired and the hide option set. When someone is viewing the presentation, clicking on a picture makes it disappear and makes the next one reappear.
Want this to happen automatically? Instead of setting the animations to happen on mouse click, set each one to happen after a set time has passed.
Create A Review With Animation
The same technique can be used to make the whale's anatomy slide into a review instead of just a presentation of the information. This slide lets the students know if the answer they provide is the right one or the wrong one.
To do the review, Alicia displays the main slide. When she points to a box, the students call out an answer. By clicking in various places, Alicia can let the students know if they gave the right answer or not.
Let's Try It!
Make a slide with a large picture of a whale. Create callouts next to several elements of the whale's anatomy, such as the teeth, the flukes, the tail and so forth. Figure 6-5 is the base slide.
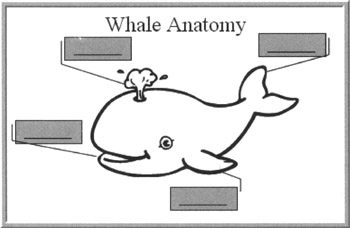
Figure 6-5: Base Whale Anatomy Slide
For each callout, make another slide brings up the right answer. For the fluke, this slide would look like Figure 6-6:
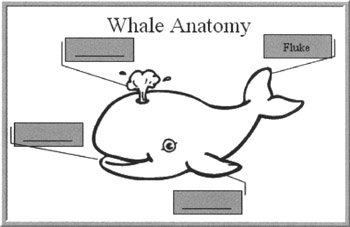
Figure 6-6: Correct Answer Slide
In addition, create a slide with the whale with a graphic over it that says "Wrong answer." This slide would look like Figure 6-7:

Figure 6-7: Incorrect Answer Slide
Create a custom show for each of these slides and then hide them.
We don't want the students to know where we are going to click because clicking will bring up either a confirmation of the answer or the wrong answer slide. However, we want the transfer between slides to be seamless. To do this, we need to create links to the right and wrong answer slides.
Link each of the callouts to the correct custom show. Create an empty box and copy it three times. Drag one extra box to each corner of the slide. Link each box to the wrong answer slide.
Running the main slide show allows you to bring up the confirmation slides and the wrong answer slide in any order desired.
Taking The Animation One Step Further
Alicia's definitions now work much better. It is time to move on to the slide with the migration path of the whales.
To achieve the look Alicia wants, we combine the two techniques above. We create a slide showing the whales at each of the four migration locations. We link each location to a custom show simulating the movement of the whales between migration locations.
We can achieve the movement by creating one slide with many objects, each a little different from the one before. We use a variation of this method to create the seasons slide. Another method is to create one slide, which contains many objects appearing and disappearing in succession to depict movement.
One Slide, Many Objects
Using a single slide with many copies of the same object works best when all the objects to show at the end of the slide.
The four migration paths need to appear in succession and clicking each location brings up the slide moving the whales from one location to the next.
Place the whales and season names at the appropriate locations along as shown in Figure 6-8:
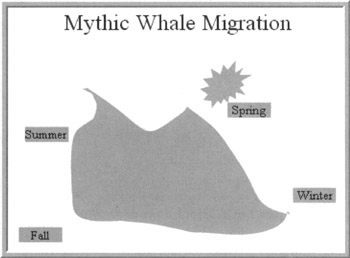
Figure 6-8: Preliminary Whale Migration Slide
Because we want the whale and the season to appear at the same time, group each pair together.
Set up the custom animation to make each group appear in succession. Open the custom animation window and set each group to appear automatically after 2 seconds. Set the order of the animations to go around the circle. The animation window should look about like Figure 6-9:
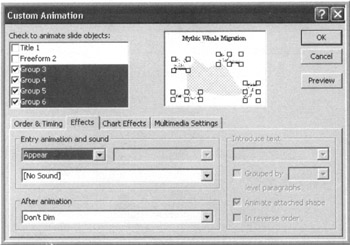
Figure 6-9: Custom Animation Window
Notice all four groups are selected in the screenshot above. This applies the same animation to all four groups at one time.
Many Slides, One Object
Using one slide for each movement works best when you want only one object on the slide at any time. This technique makes it easier to select and work with the correct item for animation.
Use Insert ’ Duplicate slide from the migration slide to create the base slide for each show. Set each slide to transition automatically after zero seconds to the next slide. Hide each of these four slides. Do the following process for each season:
-
On the first slide, delete all whales and seasons except the word Spring and its whale. This is the starting point for the whale animation.
-
Duplicate this slide. Ungroup the whale and the word. Move the whale one-half of its width along the path to the summer location. The slide will look something like Figure 6-10:
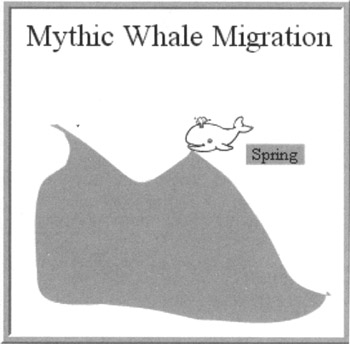
Figure 6-10: Simulating Motion Using Duplicate Slide -
Repeat the previous step several times, moving the whale small amounts each time. Because you are using duplicate slides, the animation settings and the transition settings should remain as you want them.
-
When satisfied with the number of whale movements, hide each of these slides. Now move to the second of the four slides you created at the start of this process. On this slide, delete all whales and seasons except the word Summer and its whale. This is the ending point for the animation.
-
Create a custom show containing the spring slide, the in-between slides and the summer slide. Call this show SpringToSummer.
-
Go back to the slide containing all four seasons. Select the word Spring and its whale. Create a hyperlink from them to the show SpringToSummer. Be sure to click the Show and return box.
Verify the slides work as intended, then repeat the process for each of the other three season changes.
After completing the creation of all four custom shows, test out the slide show. Entering the migration slide should bring up just the background. After eight seconds, the four migration locations will be on the screen. Click a season and the whales move from one location to the next.
| |
To make objects appear in what appears to be random locations, place each object in a different spot on the slides, rather than right next to each other. Animate them in the order desired. The audience will not know what the order is and will believe the object appearances are random.
| |
Why Not Just Use "Fly" Or "Crawl?"
At first glance these two effects would seem the logical choice for creating the effect of something marching across the screen. In some cases, it does work. However, both animation effects have the limitation that the timing cannot be controlled. Fly is always very fast, crawl is always very slow. If these are the right speeds, use them.
- Structures, Processes and Relational Mechanisms for IT Governance
- An Emerging Strategy for E-Business IT Governance
- Technical Issues Related to IT Governance Tactics: Product Metrics, Measurements and Process Control
- Governing Information Technology Through COBIT
- Governance in IT Outsourcing Partnerships