| Now that you know what tools are available for your use, it's time to start putting them to use. Probably the most common element of all Web pages is text that conveys information. Because text itself does not convey emphasis or emotion, a variety of styles, fonts, sizes, and colors can be used to tailor the message to the audience. You enter text into Dreamweaver by either typing directly in the Document window or cutting/copying and pasting text from another source. Text can be selected for editing or cutting and pasting within the document, using many of the same menu commands and keyboard shortcuts available in most word processors. After the text is entered into the Document window, you have many options for formatting it. Paragraphs A lot of the text in your documents is likely to be standard paragraphs. To create a paragraph break, simply press (Return) [Enter] and a blank line of whitespace is inserted below the paragraph. NOTE From a markup standpoint, Dreamweaver assumes your text is in paragraph format by default until you apply formatting to the contrary. All text within the <p> </p> tag pair is formatted as one paragraph.
Line Breaks Whitespace is important for control of design and readability. In most HTML editors, including Dreamweaver, when you press the (Return) [Enter] key, a new <p> tag is inserted. Dreamweaver also automatically inserts a new HTML paragraph with a nonbreaking space entity between the opening and end tags. If you then type on this new line, the nonbreaking space is replaced with your content. If you leave the paragraph blank, however, the paragraph remains with a nonbreaking space. Because the tag is not empty, browsers correctly interpret this paragraph as a blank line. Conversely, you might want to start a new line of text without that blank line inserted by the paragraph tags. To do this, use a line break. A line break inserts a carriage return in the text without closing the paragraph tag and, thus, without inserting extra space between the two lines. To add a line break, follow these steps: - Position your cursor where you want to force a line break.
- Select Insert, Special Characters, Line Break from the menu, or press (Shift-Return) [Shift+Enter].
The text is forced to a new line without additional whitespace between lines. Line breaks can also be used to force more whitespace within a paragraph if you add multiple breaks consecutively.  | Find out why you'll get a validation error if text isn't properly formatted in strict HTML or XHTML documents in "Validation Errors Related to Text," in the "Troubleshooting" section at the end of this chapter. |
Styling Text Styling the text used to present your content is usually one of the easiest ways to spice up the presentation of your information. Until the last few years , the use of the font element as the preferred method of styling left Web developers with a very limited selection of "safe" fonts and attributes from which to choose. However, with the announcement of new HTML 4.0 standards, the font element has been deprecated (meaning it's not recommended anymore) by the World Wide Web Consortium (W3C) and Macromedia has shifted the way that Dreamweaver MX 2004 applies font styling to pages from the use of <font> tags to Cascading Style Sheets (CSS). NOTE Dreamweaver MX 2004 has not abandoned the use of the font element completely. If you have existing projects that already use the font element, you can continue applying font styling in that manner by choosing Edit, Preferences, and removing the check in the box next to Use CSS Instead of HTML Tags.
The nice thing about using CSS in Dreamweaver is you can have as much or as little control over them as you wish. If you're used to using the standard fonts that have traditionally been "safe" for Web use, then the Font dropdown in the Property inspector allows you to apply a font and never have to touch a style sheet. Now that's a full-service code generator! If, however, you would like to work with new fonts and styles that are available with the adoption of CSS, then you can create custom style sheets that can easily be applied on a page-by-page basis or throughout your entire site. We'll cover CSS in-depth in Chapter 8. | | Want to use the font element and still follow best practices? Check out which HTML and XHTML document types allow you to use the font element in "Font Use" in the "Troubleshooting" section at the end of this chapter. |
When applying a style to your text, there are several attributes that can be accessed easily via the Property inspector (see Figure 5.34). Figure 5.34. The Property inspector puts the most common text style attributes within easy reach. 
Setting the Font Face In Dreamweaver, fonts are chosen from one of the defined font groups. Select a range of text, and then select a font group from the Font Type drop-down menu in the Property inspector. To change the font of a block of text, follow these steps: - Highlight the text to which you would like to apply the font.
- Click the Font drop-down list in the Property inspector.
- Choose a font from the list.
Setting the Font Size Prior to the adoption of CSS as the preferred styling method, the font element used a set of arbitrary font sizes ranging from 1 to 7. The worst part about these sizes is that different browsers interpreted their sizes differently. This meant that text would appear differently in different browsers. Through the use of CSS, however, we can now control the exact pixel size of our fonts, ensuring that they are displayed consistently across every browser. To set the font size for a block of text, do the following: - Select the text to be sized . If no text is selected, the size change is applied to subsequent text.
- In the Property inspector, click the Size drop-down list.
- Select a size from the list.
Setting the Font Color The default text color is set in the Page Properties dialog box. Unless you modified the page properties, the default color for text is black (#000000). To change the color of text from the default, select the text and then use the Color Picker in the Property inspector to select a new color (see Figure 5.35). The Text Color field uses the same Dreamweaver color picker as the Page Properties and other color tools. Alternatively, you can type the hexadecimal code in the text box to the right of the Color Picker. Figure 5.35. Using the color picker to set the font color is a quick, visual way to colorize your fonts. 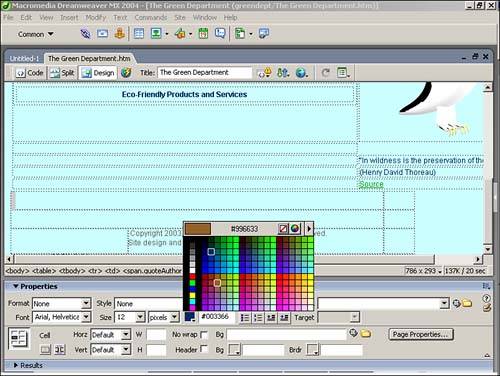
NOTE To return text to the default text color, click the Color Picker and then click the white square with the red strikethrough button.
Setting Font Styles A font style is formatting such as bold or italics applied to a font. The most typical font styles were shown in Figure 5.34 and can be applied from the Property inspector. You can choose additional font styles by selecting Text, Style from the menu (see Table 5.2). You can also choose more than one style for the same text selection, such as when creating bold, italicized text. Table 5.2. Font Faces and Their Uses | Font Style | HTML Element | Used For | | Bold | b | Adding bold emphasis | | Italic | i | Adding emphasis with italicization | | Underline | u | Adding emphasis with underline | | Strikethrough | s or strikethrough | Editorial purposes | | Teletype | tt | Monospaced font | | Emphasis | em | Usually displayed as italics | | Strong | strong | Stronger emphasis than just using the emphasis style, usually displays as bold | | Code | code | Text that represents a computer program listing | | Variable | var | Text that represents a program variable | | Sample | samp | Text that represents sample output from a program | | Keyboard | kbd | Text that represents user input | | Citation | cite | Source of a quote | | Definition | dfn | Text that is a definition | | Definition | del | Text that has been deleted from the page | | Definition | ins | Text that has been inserted into the page |
If you select a style before typing, the style is applied to all subsequent text. CAUTION Remember, if you underline text on your pages, it can be confused with a link.
Aligning Text Paragraph alignment is used to position text relative to its confining margins, whether those margins are the page margins, a table cell , or a layer. To change the alignment of text, follow these steps: - Select the text you want to align, or insert the cursor at the beginning of the text.
- Click Align Left, Align Center, Align Right, or Justify on the Property inspector.
You can also align text by selecting Align from the Text menu. NOTE Alignment is considered presentational and therefore can be used only in HTML and XHTML transitional documents.
Indenting Text Text can be indented or outdented in several ways. Select the desired text and use one of the following methods to indent or outdent the text: -
Use the Property inspector and click the Indent or Outdent button. -
From the menu bar, select Text, Indent or Text, Outdent. -
If the text you highlight is a list, you can right-click it and select List, Indent or List, Outdent from the context menu. Indents and outdents can be applied multiple times until the text is positioned where you desire . Although this is easy to do, it's not the preferred method for positioning text. A better solution is to use a table or CSS. |