If you are an experienced Flash developer, you know there is a lot that you can do to add to the Captivate experience. As long as you stay within the parameters of the Flash Player 6no ActionScript 2.0 and no streaming video, for examplemoving Captivate movies to another level of interactivity through the addition of Flash animations to your Captivate movies is now an option.
If you are a RoboDemo or Captivate developer with little or no experience with Flash you can still use Flash to add a little zip to your Captivate movies. The easiest way of getting going with Flash, without having to really know Flash, is through the use of a feature new to Flash MX 2004Timeline Effects. Though Flash developers tend to regard this feature with more than a little disdain, it wasn't added to the application to please them. Timeline Effects were designed to give the new Flash user an opportunity to add special effects to his or her movie without having to know how to code using ActionScript.
If used sparingly, you can use these small animations in your Captivate movies as a bridge between subject changes, new captures, and even mode changes.
1. | Open Flash MX 2004 and from the start page, select Create New > Flash Document.
|
2. | Select the Text tool, single-click the stage, and enter your name.
|
3. | Select your name on the stage and press the F8 key.
The Convert to Symbol dialog box opens.
|
4. | Name the symbol, select Graphic as the behavior (Figure 10.18), and click OK.
Figure 10.18. Get into the habit of converting everything you create in Flash into a symbol. 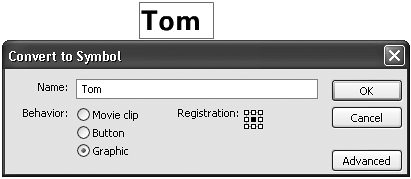
The dialog box closes.
|
5. | Right-click (PC) or Control-click (Mac) the symbol.
The context menu opens.
|
6. | Select Timeline Effects > Effects > Explode.
The Explode dialog box opens (Figure 10.19).
Figure 10.19. The Explode Timeline Effect enables you to control how many aspects of the object will shatter. 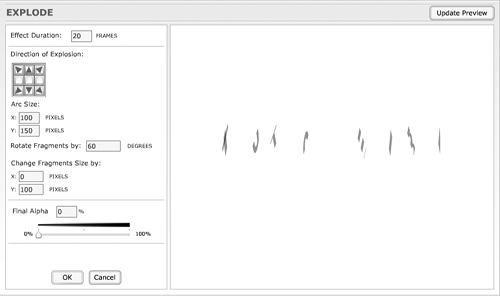
|
7. | Enter the following settings:
Effect Duration: 30 frames. This will result in a one-second animation in Captivate. Rotate Fragments by: 45 degrees Change Fragments Size by: X = 20 pixels
|
8. | Click the Update Preview button to review the effect.
|
9. | Click OK.
This accepts the changes, closes the dialog box, and adds the effect to the main timeline.
|
10. | Change the frame rate of the Flash movie to 30 fps to match that in Captivate (Figure 10.20).
Figure 10.20. The effect is added to the main timeline, and the frame rate is changed to 30 fps. 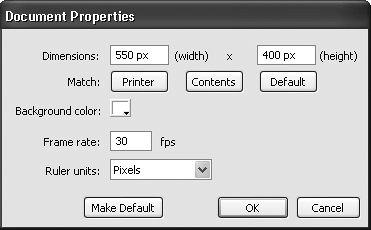
|
11. | If you want to preview the effect, press Control-Enter (PC) or Command-Return (Mac), or select Control > Test Movie. Click the Close button when you're finished.
|
12. | Save the movie and select File > Publish Settings.
The Flash Publish Settings dialog box opens.
|
13. | Select the Formats tab and deselect the HTML option.
There is no need for the document because the SWF is going to be placed in a Captivate movie.
|
14. | Click the Browse folder beside the name of the Flash (SWF) file, navigate to the folder where the SWF will be saved (Figure 10.21), and click Save.
Figure 10.21. Use the Flash Publish Settings dialog box to indicate the folder in which the Flash SWF file is to be saved. 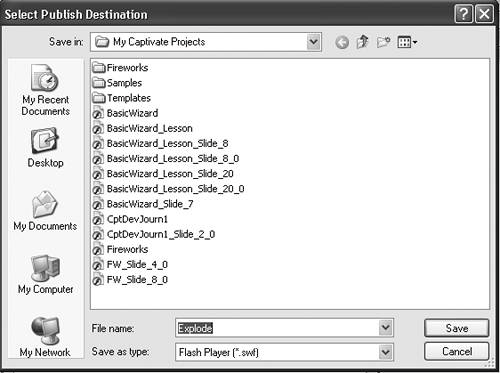
|
15. | Select the Flash tab.
The Flash Player settings open.
|
16. | Enter the following values:
|
17. | Your settings should resemble Figure 10.22; click Publish.
Figure 10.22. Captivate can accept only SWF files that are compatible with the Flash 6 Player and that use ActionScript 1.0. 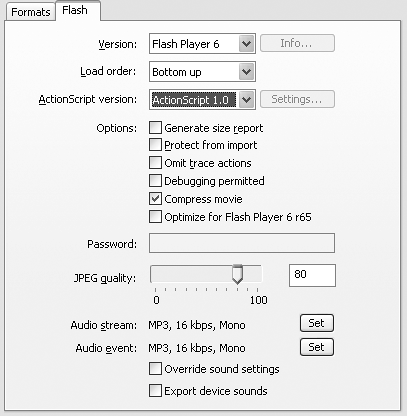
A progress bar appears.
|
18. | When the progress bar disappears, click OK.
The dialog box closes.
|
19. | Save the file and quit Flash.
|
20. | Open the Captivate movie in which the animation will be placed.
|
21. | In the Storyboard view, double-click the slide where the effect will be placed.
The slide opens in the Edit View panel.
|
22. | Select Insert > Animation.
The Open dialog box opens.
|
23. | Navigate to the folder containing the SWF you just created and double-click the file.
The New Animation dialog box opens.
|
24. | Set the properties and options, and add any necessary audio.
|
25. | Click OK.
The animation appears in the Captivate slide (Figure 10.23).
Figure 10.23. A Timeline Effect created in Flash MX 2004 is placed in a Captivate slide. 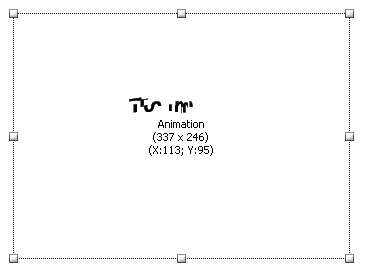
|


