KreateCD
KreateCD
KreateCD is a CD burning application that enables you to burn both audio and data files to CDs. Using KreateCD, you can convert your MP3 files to audio CDs as well as burn ISO images. The only thing you have to make sure of before getting started is that you have a CD burner .
Creating Data CDs
If you want to back up your data or just copy some files, KreateCD provides you with an easy-to-use interface where you can burn your files to CD in a few clicks of the mouse button.
-
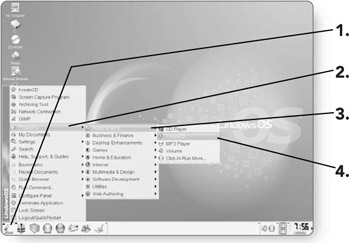
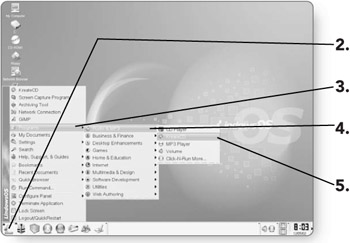
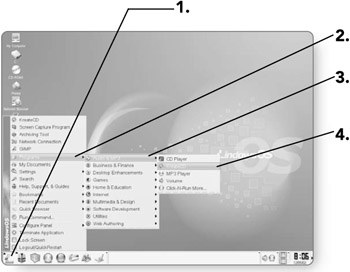
Click on the Launch button . The Launch menu will appear.
-
Click on Programs . A list of program categories will appear.
-
Click on Audio & MP3 . A list of different programs will appear.
-
Click on KreateCD . The KreateCD program will be launched.
Tip You can start KreateCD from the Run command by typing in kreatecd and clicking on the Run button.
-
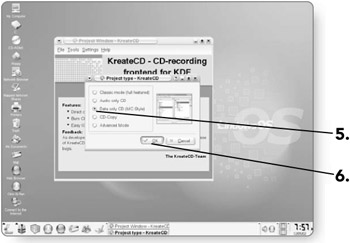
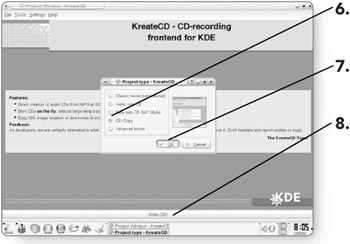
Click on the radio button beside Data only CD (MC Style).
-
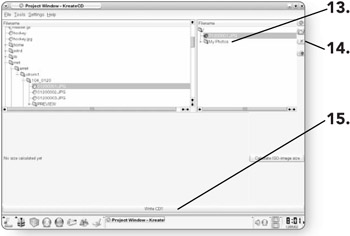
Click on OK . The program will open , and there will be two panes in the KreateCD Project window. The left pane represents the files on your computer, and the right pane represents the files on your CD.
-
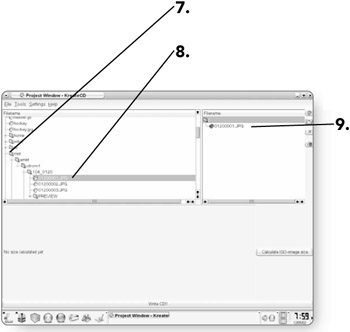
Click on the plus sign (+) beside the directory that contains the files you'd like to burn to a CD.
-
Click and drag a file or folder from the left pane to the right pane. If you drag a folder onto the CD, the entire contents of the folder will be burned to the CD.
-
Release the mouse button when you are over the right pane. The file will be added to the root directory of the CD.
-
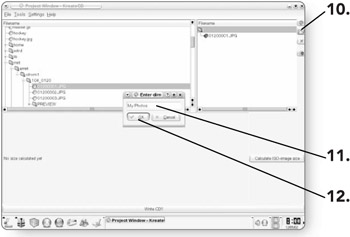
Click on the New Directory button . When you click and drag files from your computer onto your CD, they go into the master directory of the CD. This step will let you create new directories on the CD that you'll be burning. This step is completely optional.
-
Type a name for the directory. You can call it any name.
-
Click on OK . The new directory will appear in the right pane, showing the file structure of the CD. You can click and drag files from your computer into the new directory.
-
Click on any file in the CD pane. It will be highlighted.
-
Click on the Remove button . The file that you selected will be removed from the CD layout.
-
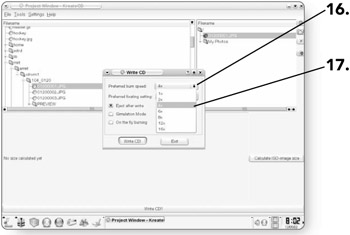
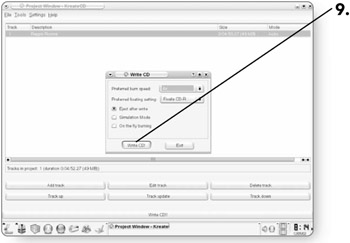
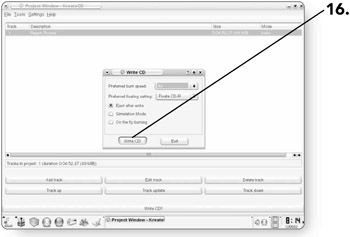
Click on the Write CD!! button after you've finished adding the files onto your CD layout. The Write CD dialog box will open.
-
Click on the down arrow beside Preferred burn speed. A list of speed options will appear.
-
Click on the desired burn speed . The speed you choose will depend on the speed of your CD burner.
-
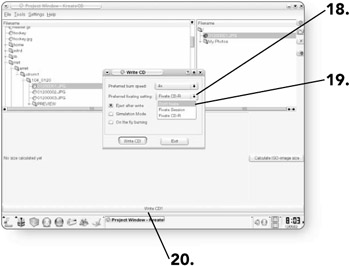
Click on the down arrow beside Preferred fixating setting. A list of Fixate options will appear.
-
Click on Don't fixate . Fixating closes your CD session, which is necessary if you want to play your CD in an audio player; but for data files, you can leave it unfixated so that you can later burn more files to the same CD if there is any room left over.
-
Click on the Write CD!! button . Your files will be burned to the CD.
Copying a CD
CDs are a sensitive medium. If you were to do a thorough search of my car, I'm sure that you'd find a few of my favorite CDs hiding under the seats, covered in scratches. One way to back up your CDs is through the CD-Copy function in KreateCD.
-
Insert the CD you'd like to copy into the CD-ROM Drive.
-
Click on the Launch button . The Launch menu will appear.
-
Click on Programs . A list of program categories will appear.
-
Click on Audio & MP3 . A list of different programs will appear.
-
Click on KreateCD . The KreateCD program will be launched.
-
Click on the radio button beside CD-Copy . The option will be selected.
-
Click on OK . The program will start and read the contents of the CD in the drive.
-
Click on Write CD!! A dialog box will appear where you can select from some burning options.
-
Click on the Write CD! button . The CD will be written.
Creating an Audio CD from MP3s
You can create an audio CD from the popular digital format MP3 by selecting individual files and adding them as tracks to the CD.
-
Click on the Launch button . The Launch menu will appear.
-
Click on Programs . A list of program categories will appear.
-
Click on Audio & MP3 . A list of different programs will appear.
-
Click on KreateCD . The KreateCD program will be launched.
-
Click on the radio button beside Audio only CD. The option will be selected.
-
Click on OK . The program will start.

-
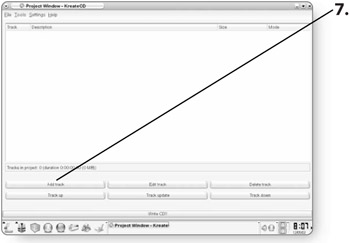
Click on the Add track button . The Track Properties dialog box will open where you can select the MP3 file you'd like to add to the CD.
-
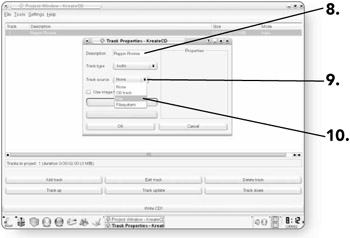
Type a name for the track in the Description text box. Typing the name of the song would probably be a good idea here.
-
Click on the down arrow by Track source. A list of different sources will appear.
-
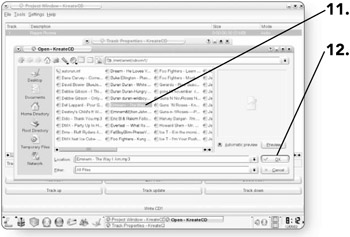
Click on File . The Open dialog box will appear where you can select the track you'd like to add.
-
Click on the MP3 file you'd like to add. It will be highlighted.
-
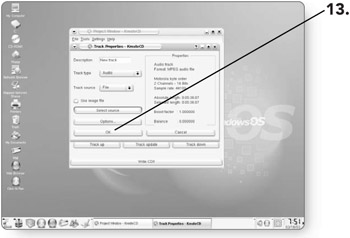
Click on OK . The track will be selected, and the details of the track will appear in the Properties window of the next dialog box.
-
Click on OK . The track will be added to the CD.
-
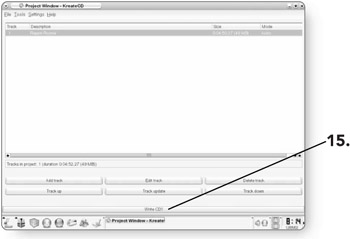
Repeat Steps 7 “13 until you've added all the songs that you'd like to the CD or the CD has reached its capacity. You can determine the amount of space the tracks take up by looking at the Track column in Project window.
-
Click on Write CD!! A dialog box will appear where you can select from some burning options.
-
Click on the Write CD! button . The CD will be written.
EAN: 2147483647
Pages: 152