Fixing Corrupt Settings
|
|
Even if you've followed my advice to this point, you're going to run into problems. Sometimes a simple change to the registry has ripple effects that restoring a backup copy of a value won't fix. Windows XP and most applications are incredibly resilient, though, so fixing a problem is a simple matter of telling it to heal thyself.
The quickest route is to remove the offending value and allow the program to re-create it using a default. Windows XP and most programs re-create missing settings, which is what makes this work in most cases. This is tantamount to uninstalling and reinstalling an application. The difficult part is figuring out which value contains the troublesome setting. Chapter 8, "Finding Registry Values," helps you track down settings. For example, if your mouse pointer bounces around the screen in convulsive fits, remove the key HKCU\Control Panel\Mouse. When you log off and back on to Windows XP, the mouse settings are re-created. The operating system won't re-create everything you delete, though, particularly file associations in HKCR. So back up any setting you delete before you try this troubleshooting technique.
IT professionals dodge most problems with settings by managing them properly. The first and most important practice is not to dump users into the local Administrators group. I understand the reasons you might do this, such as legacy applications that won't otherwise run properly, or users who can't change settings because their accounts are in the local Power Users or local Users groups. You can successfully deal with all these issues using tools such as Security Templates, which you learn about in Chapter 7, "Managing Registry Security." It's not difficult, and moving users from the local Administrators group to the Power Users or Users group can save professionals a lot of frustration, and save their companies serious loot.
Policies are another good way to manage settings. Policies accomplish two goals: first they configure settings for the user, if for example, he or she doesn't know the appropriate values. Policies also configure settings according to IT policy, and users can't change them. Moving users out of the local Administrators group saves your company money by reducing lost downtime and deviations from corporate standards, but policies actually help you recover money from your IT investment. Chapter 6, "Using Registry-Based Policy," describes exactly how policies benefit IT and how to use them.
In the Windows XP registry, you can also set keys' permissions to prevent users from changing those settings. This might sound like a great idea, but micro-managing settings is so cumbersome that it is almost impossible to maintain. If you need to manage a key's Access Control List (ACL), use Security Templates instead. Security Templates are much easier to deploy and maintain across the board, and you learn how to use them in Chapter 7.
For those settings that Windows XP or other programs don't re-create, you have other options. If you used Files And Settings Wizard to transfer your settings from an earlier version of Windows to Windows XP, you can reapply your old settings to your current configuration. IT professionals use the User State Migration Tool for the same purpose. Of course, there must be copies of the original user state data for this to be possible. Chapter 10, "Deploying User Profiles," describes this tool. Other options for repairing settings are described later in this chapter.
Allowing Windows XP to Fix Errors
Perhaps you can't find a setting in the registry, or removing that setting from the registry doesn't fix the problem. In that case, head for Control Panel. You can fix many per-user settings and a few per-computer settings in it. That includes the configuration of all your input and output devices, particularly the pointing device, keyboard, display, and printer. It also includes accessibility and regional options.
When a device just doesn't work, your best bet is often to remove and redetect the device. In my experience, this fixes a vast number of problems. You remove a device using Device Manager, restart the computer, and then have Windows XP redetect it. If the operating system doesn't redetect the device, use Add Hardware Wizard to detect it. You start Add Hardware Wizard on the Hardware tab of the System Properties dialog box. Removing a device directly from the registry isn't a good idea because Windows XP scatters devices' settings, and the linkages are difficult to remove accurately. Follow these instructions to reinstall a device:
-
Open Device Manager.
To open Device Manager, click Start, and then click Control Panel. Click Performance And Maintenance, and then click System. On the Hardware tab, click Device Manager.
-
Click the device you want to remove, and then click Uninstall on the Action menu.
Tip Sysprep is used to prepare a disk containing Windows XP for duplication and deployment; it can also used to set things straight when your configuration is seriously out of whack. When you restart a computer after running Sysprep, Mini-Setup Wizard configures the computer for use. It detects the computer's hardware, configures the network connections, and optionally joins the computer to a business network. Chapter 13, "Cloning Disks with Sysprep," describes Sysprep in more detail. To use Sysprep to repair a broken configuration and redetect your computer's hardware, run sysprep -activated -pnp -quiet -reseal. If you want to fully automate Mini-Setup Wizard, create the file Sysprep.inf you learn about in Chapter 13. This is a radical step—you'll lose the local Administrator user profile and a good number of per-computer settings—but it might give your configuration the refresh that it needs.
Repairing an Application's Settings
Predictability is a good thing when it comes to program settings. And most programs store their settings in the registry using the same organization. Per-user settings are in HKCU\Software\Company\Program\Version\, and per-computer settings are in the same branch of HKLM. Company is the name of application's publisher, Program is the name of the application, and Version is an optional version number. Some omit the version number, which isn't strictly by the rules but common nonetheless. Figure 3-3 shows where the TechSmith product SnagIt version 5 stores its settings. (This happens to be the killer program I use to capture screenshots.)
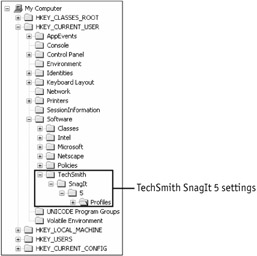
Figure 3-3: TechSmith SnagIt is the best screen capture tool, and it works well with Windows XP.
Well-designed applications re-create settings that they're missing. To reset the program's per-user settings, remove HKCU\Software\Company\Program\. You typically don't want to remove the program's per-computer settings because doing so is likely to adversely affect most applications. You can hide the program's per-computer settings to test the scenario first, just to be on the safe side.
Windows Installer-based applications are easier to reset because Windows Installer has repair functionality built right into it. Microsoft Office XP is an example of a Windows Installer-based application. To learn more about Windows Installer-based applications, see Chapter 11, "Mapping Windows Installer." For now, I will describe the three different ways you can have Windows Installer restore an application's original settings:
-
On the application's Help menu, click Detect And Repair.
-
Click Start, Control Panel, and then click Add Or Remove Programs. Click the application you want to repair, and then click Change. Follow the instructions you see on the screen to repair the application.
-
In the Run dialog box, type msiexec /f[u][m] package, where package is the path and file name of the application's package file, which has the .msi file extension. Use /fu to repair per-user settings and /fmto repair per-computer settings. IT professionals like this command because it's the best way to repair settings without visiting the user's desk.
The last repair method for Windows Installer-based applications, particularly for Office XP, is Profile Wizard. Chapter 14, "Deploying Office XP Settings," describes how to use this tool to deploy settings with Office XP. Basically, you install and configure Office XP on a sample computer, capture Office XP settings to an OPS file using Profile Wizard, and then deploy the OPS file with your Office XP customizations. IT professionals should save that OPS file for use later. Think of it as a help desk tool. After users' 15 minutes of phone time is up (we both know there's a limit to how long you want calls to last), and before you throw new disk images at their computers, reapply the OPS file to restore their settings. The command that you're running on their computers is proflwiz /r filename /q, where filename is the name of the OPS file that contains Office XP per-user settings.
Removing Programs from the Registry
As I said earlier, predictability makes troubleshooting settings in the Windows XP registry possible. It also makes removing programs' settings possible but not a breeze. Some programs don't uninstall correctly, and you're left with no choice but to manually remove their settings from the registry. For example, if an uninstall program doesn't finish properly, it might fail to remove the entry from the list of programs in Add Or Remove Programs or orphan a file association, causing you to see an error message about Windows XP not finding a program when you double-click a file.
You can invest in a third-party tool to look for and remove the program's settings, or you can do it manually. Even though it's somewhat difficult, you can remove most programs' settings successfully. Doing so is more art than science, but here are the general steps involved in the process:
-
List the EXE and DLL files in the application's folder.
You install most programs in %SYSTEMDRIVE%\Program Files\Program, where Program is the name of the program. List the EXE and DLL files in that folder and all of its subfolders.
-
Remove keys and values that contain the application's installation folder.
Search the registry for each of the application's folders and subfolders. For example, if an application installed in C:\Program Files\Example has two subfolders, \Binary and \Templates, search the registry for C:\Program Files\Example, C:\Program Files \Example\Binary, and C:\Program Files\Example\Templates. Choose the keys and values you remove carefully to avoid interfering with other programs that might require those settings.
-
Remove keys and values that contain the program's name.
Search the registry for different versions of the program's name. For example, if the application is Jerry's House of Horrors, search for Jerry's, Jerry's House, and House of Horrors. Use any combinations you think you'll find in the registry. Choose the keys and values you remove carefully so that you don't break other applications that might also use those settings.
-
Remove keys and values that contain the EXE and DLL files you recorded.
You recorded a list of EXE and DLL files in step 1. Search the registry for each of these program files. Search for the complete file name, including the extension, and remove the key or value only if the path matches the program's installation folder. Use caution here as with the other steps.
Removing Windows Installer-based applications manually is much more difficult because they knit themselves into the registry much tighter than programs packaged using other technologies. Chapter 11, "Mapping Windows Installer," is your best shot at figuring out these settings, but you still shouldn't remove them manually. Instead, Chapter 11 describes a tool called Msizap.exe that removes almost all traces of a program's Windows Installer data from the registry. This tool comes with the Windows XP Support Tools, and the command line is msizap T! package, where package is the path and file name of the package file from which you installed the application. Msicuu.exe is similar; you also learn about it in Chapter 11. After using either tool, remove any remaining settings using the instructions you read earlier in this section.
Msizap.exe has saved my hind end on more than one occasion. In one case, I was upgrading a customer's deployment servers with the latest version of Symantec Ghost Corporate Edition. The plan was to upgrade to the latest version in place.
Nothing ever goes as planned, eh? Ghost's Windows Installer data was corrupt on one particular server, and I was certain the customer wasn't going to believe me when I said, "I didn't do it." Because of the corrupt data, I couldn't upgrade to the newer version of Ghost. And my heart sank when I found out that I couldn't remove the earlier version, either.
I was close to swapping the server, but I remembered Msizap.exe and thought to give it a try. Sure enough, Msizap.exe yanked enough of Ghost's Windows Installer data out of the registry that I was able to install the new version. I credit this handy utility with saving me a lot of work and a lot of explaining. You learn more about Msizap.exe in Chapter 11, "Mapping Windows Installer." Keep it nearby.
Using Another Computer's Settings
If all else fails and you're desperate to set things straight, you can borrow settings from another computer. The only time I recommend doing this is when the settings are simple and contained within a small key. For example, restoring a file association or a small program's settings from another computer is straightforward enough, but borrowing a device's settings from another computer just isn't a good idea. There's no reason to believe that Windows XP will store the exact same settings for the exact same device on two different computers.
You can use either REG files or hive files for this technique. I prefer hive files because importing them completely replaces the key that they contain. First connect to the remote computer's registry and export the settings to a hive file. Regedit stores the hive file in a folder on your local computer so you don't have to copy it from the remote computer. Import the hive file to replace your old settings with the settings in the hive file. This is useful for IT professionals in a supporting role, too. You can borrow the key from one remote computer and then connect to another remote computer to restore the settings to the second computer's registry. For example, you can copy a file association from one remote computer to another remote computer—all without stepping down out of the ivory tower.
|
|
EAN: 2147483647
Pages: 185