Converting Images
Images you create don't have to remain in the original color mode. Photoshop makes it easy to convert to another color mode when necessary. This section walks you through a few of the more common color -mode-conversion scenarios.
Choosing CMYK
Adobe recommends that you perform most color corrections (and other edits) to an image before you convert the image to CMYK color for professional printing. (Adobe also recommends that you save a copy of the image file before converting to CMYK so that you can work with the original colors in the image, if necessary, at a later time.) You convert to CMYK when the image is ready for a print shop to create color separations ”a separate piece of film for each ink color, used for creating a plate to print each color ink. Typically, you'll convert to CMYK color from RGB color, as in the following steps:
-
Click on Layer . The Layer menu will appear.
-
Click on Flatten Image . Photoshop will merge all the separate layers onto a single layer so that you can convert the image to CMYK color. (This is another reason why you should complete your edits in RGB color before converting to CMYK.)

-
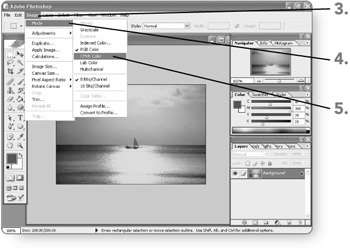
Click on Image . The Image menu will appear.
-
Point to Mode . The Mode submenu will appear.
-
Click on CMYK Color . Photoshop will convert the image to CMYK color immediately. If you display the Colors palette, you will see the new channels.
| Note | You use the Mode submenu of the Image menu to convert between all color modes. |
EAN: 2147483647
Pages: 179