The ASP.NET Security Server Controls
| A great deal of the effort of using the built-in membership and roles system in ASP.NET is the creation and configuration of the providers, the application database, and the roles and users. The good news is that, once these tasks are complete, building pages that use the membership and roles features is made a great deal easier by the range of built-in security server controls. This section of the chapter demonstrates how you can use these controls. The Available Control SetThe following controls are provided with ASP.NET for managing users, security, and logins:
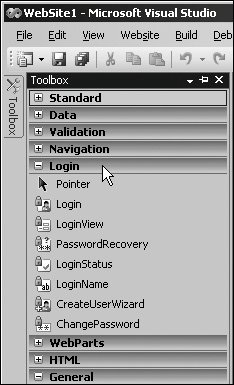
All these controls integrate automatically with the membership and role providers so that you can offer all these features without having to write any code at all. They are all highly customizable. You can change the prompts, text messages and responses, button images, validation rules, andin some casesthe individual controls they contain. You can also interact with them in your code to set most of the properties at runtime. The security server controls are all located in the Login section of the Visual Studio Toolbox, as shown in Figure 11.33, and you can drag them onto a page in both Design and Source view just like any other ASP.NET server control. Figure 11.33. The security server controls in the Visual Studio Toolbox Using the Security Server ControlsIn this section of the chapter, you will see a simple demonstration that uses all of the security server controls. It consists of four pages:
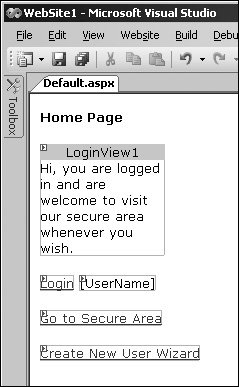
Each of these pages is examined in the following sections. The Home PageThis page, shown in Design view in Figure 11.34, contains a LoginView control that has a simple text message in each template. The screenshot shows the LoggedInTemplate, indicating that the user is logged in. The AnonymousTemplate contains a message asking the user to login. Listing 11.12 shows the code that Visual Studio generates, and the text content we entered. Figure 11.34. The Home page containing LoginView, LoginStatus, and LoginName controls Listing 11.12. The LoginView Control in the Home Page
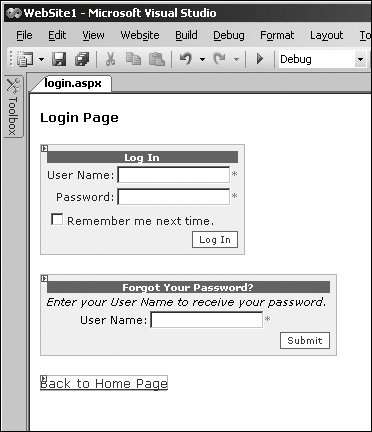
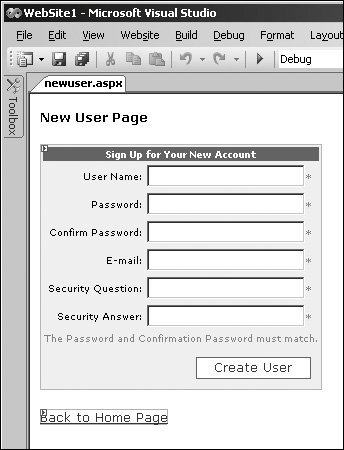
Below the LoginView control is a LoginStatus and a LoginName control, both with all their default property settings. The final two controls are normal Hyperlink controls that point to the Secure Area page and the New User page. Opening this page when you are not logged in displays the contents of the AnonymousTemplate in the LoginView control. Below that, the LoginStatus control displays the text "Login" and the LoginName control displays nothing (see Figure 11.35). If you click the Go to Secure Area link, you are immediately redirected to login.aspx, which is the page defined by default for the LoginUrl property of the Forms authentication system. Figure 11.35. Viewing the Home page when not logged in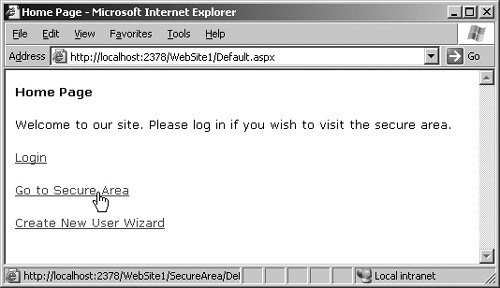 The Login PageThis page (see Figure 11.36) contains a Login control and a Password Recovery control. Both are styled in Design view, as are the security controls in the other pages you will see later, using the Auto Format option in task panes for the controls. Below them is a normal Hyperlink control that points to the Home page. There is no executable code in this page. Figure 11.36. The Login page containing a Login and PasswordRecovery control When the Login page loads in response to a user request, or following automatic redirection when the user requests a page in the secured folder, that user can enter the appropriate credentials to log in to the site (see Figure 11.37). The Login control contains, by default, a checkbox that allows the user to specify a persistent login (ASP.NET will automatically log the user in on future visits), and you can preset the value of this feature or remove it from the control if you prefer by setting the RememberMeSet and DisplayRememberMe properties. Figure 11.37. The Login page displayed when trying to access the SecureArea folder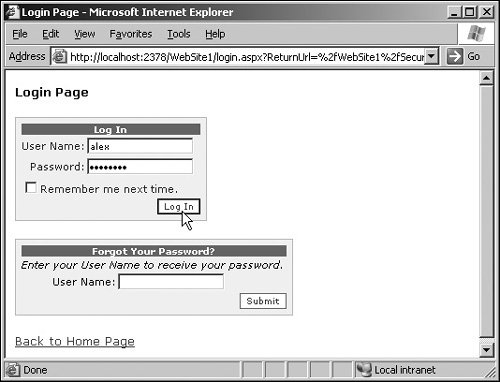 The Login control validates the contents of the User Name and Password text boxes, and displays messages and the usual red asterisk "*" next to the text box if it is empty, or if the value does not comply with the length or regular expression criteria defined in the <authentication> element of machine.config. The PasswordRecovery control provides a single text box for the user name. When a user provides the user name and clicks Submit, the control automatically displays the security question and prompts for the answer (unless you have disabled this feature in web.config). The control then creates a new random password for this user, displays confirmation that the password has been reset, and sends it to the user in an e-mail (see Figure 11.38). Figure 11.38. A password reminder e-mail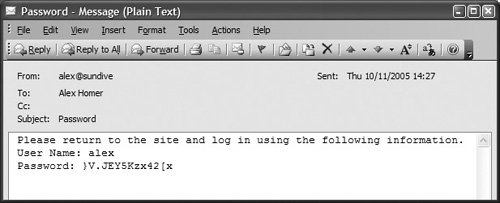 If you have changed the default value in the <authentication> element in machine.config by setting enablePasswordRetrieval ="true", ASP.NET just sends the user the current password. The Secure Area PageThis page (see Figure 11.39) contains a LoginStatus and a LoginView control, just as in the Home page, plus a ChangePassword control and a Hyperlink pointing back to the Home page. Again, you can customize the ChangePassword control extensively by setting properties that define the prompts, text, and messages it generates. Figure 11.39. The SecureArea containing LoginStatus, LoginName, and ChangePassword controls Viewing this page in the browser (see Figure 11.40), which is only possible after a successful login, you can see that the LoginStatus control now displays "Logout," and the LogonName control displays the user name ("alex"). If you enter your existing password and a new password, the ChangePassword control will change the password in the membership system and display a message indicating success or failure. Figure 11.40. Changing your password in the SecureArea page after a successful login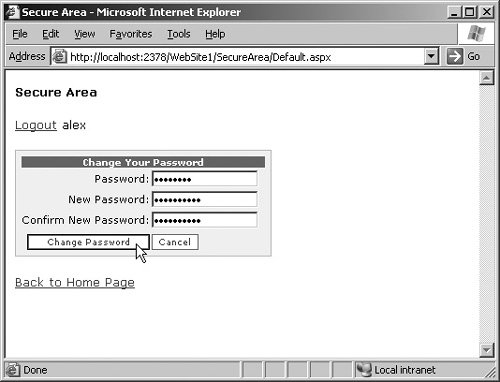 If you now go back to the Home page, as shown in Figure 11.41, you will see that the LoginStatus and LogonName controls now display "Logout" and "alex," because this user is still logged in. You can also see that the LoginView control displays the contents of its LoggedInTemplate section. Figure 11.41. The Home page when the user is logged in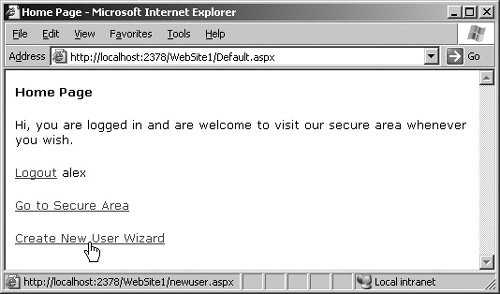 The New User PageThe fourth and final page in this example, shown in Design view in Figure 11.42, allows a user to sign up for a new account. Again, there is no code to writeyou just drag a CreateUserWizard control onto the page. It is styled using the Auto Format option in the tasks pane for the control. As with the other controls, you can change almost all the visual aspects by setting properties at design time or runtime. Figure 11.42. The New User page containing a CreateUserWizard control When you view this page using the link in the Home page, you can fill in the details required and ASP.NET automatically creates a new account within the membership system (see Figure 11.43). If the access control settings for a secured folder just deny access to anonymous users, this user will be able to log in and access that folder immediately. However, if you deny all users access to a secured folder, you must use the Security page of the Web Site Administration Tool to allocate this user to a role that does have access to the secure folder, or you can allocate access directly to this user. Figure 11.43. Signing up for an account in the New User page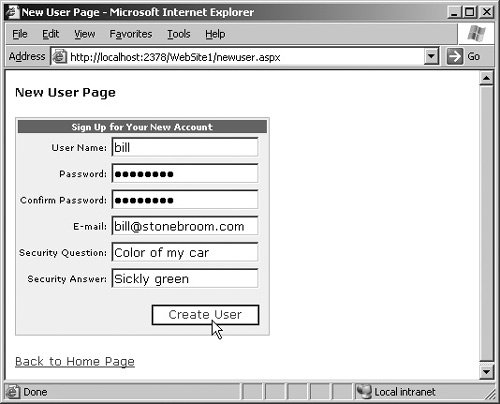
Remember that ASP.NET does not prevent access to resources other than ASP.NET pages and Web Services. Forms authentication does not protect other files, such as images, PDFs, ZIP files, and other types of documents. See the section Security and Access Control Settings in IIS and ASP.NET earlier in this chapter for more details. |

EAN: 2147483647
Pages: 147