Using Text Areas
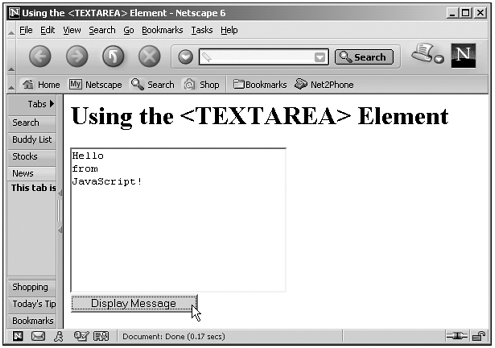
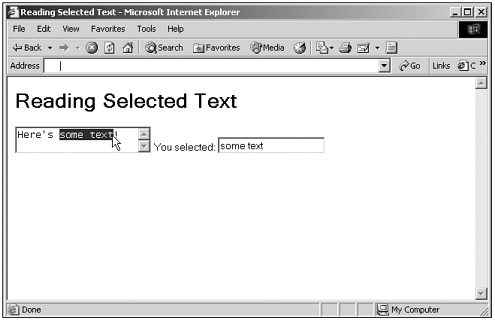
| The big difference between text areas and the text controls we've already seen in this chapter is that text areas are two-dimensional, not one-dimensional, and can display multiple lines of text. Here's an example that does exactly that when you click a button. In this case, the text displayed in the text area is Hello\nfrom\nJavaScript! , where \n is the JavaScript newline character (corresponding to ASCII/Unicode code 10), which causes the text to jump to the next line: (Listing 13-06.html on the web site)<HTML> <HEAD> <TITLE>Using the <TEXTAREA> Element</TITLE> <SCRIPT LANGUAGE="JavaScript"> <!-- function DisplayMessage() { document.form1.textarea1.value = "Hello\nfrom\nJavaScript!" } //--> </SCRIPT> </HEAD> <BODY> <H1>Using the <TEXTAREA> Element</H1> <FORM NAME="form1"> <TEXTAREA NAME="textarea1" COLS="30" ROWS="10"></TEXTAREA> <BR> <INPUT TYPE="BUTTON" Value = "Display Message" ONCLICK="DisplayMessage()"> </FORM> </BODY> </HTML> You can see the results of this code in Figure 13.7, including the multiline text. Figure 13.7. Entering multiline text into a text area. Tip The way line endings are actually handled in text areas varies by operating system, so you should prepare for different types of line endings when you read text from text areas. In UNIX, for instance, line endings are handled with a \n JavaScript character (corresponding to ASCII/Unicode code 10), in the Mac as \r (corresponding to ASCII/Unicode code 13), and in Windows as \r\n . Here's another example using text areas, this time showing how to detect selected text using the onselect event. The Internet Explorer enables you to handle this event as the user is selecting text in a text control. In this code, I'll handle the onselect event by displaying the text the user is selecting as he is selecting it (the displayed text changes interactively as the user selects text): (Listing 13-07.html on the web site)<HTML> <HEAD> <TITLE>Reading Selected Text</TITLE> <SCRIPT LANGUAGE="JavaScript"> <!-- function getSelected() { if (navigator.appName == "Microsoft Internet Explorer") { document.form1.text1.value = document.selection.createRange().text } } // --> </SCRIPT> </HEAD> <BODY> <H1>Reading Selected Text</H1> <FORM NAME="form1"> <TEXTAREA ONSELECT="getSelected()">Here's some text!</TEXTAREA> You selected: <INPUT TYPE="TEXT" NAME="text1"> </FORM> </BODY> </HTML> You can see the results of this code in Figure 13.8, where the selected text displays and is updated as the user selects text. Figure 13.8. Selecting text in a text area. That completes our look at text controls in this chapter. Now I'll turn to the select control. |