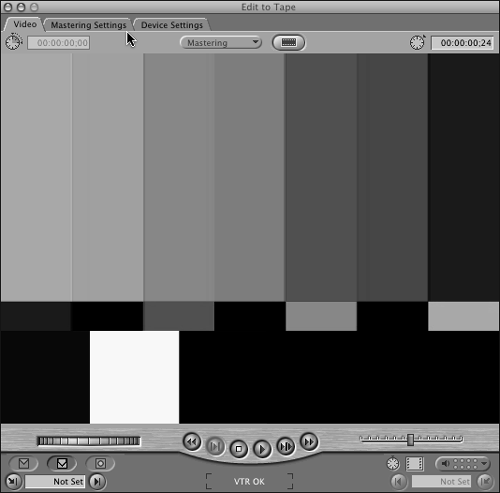
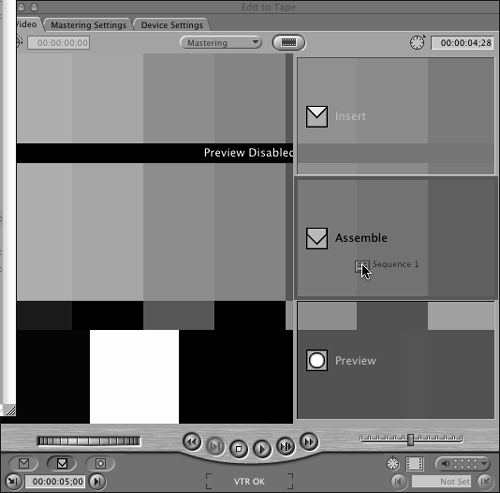
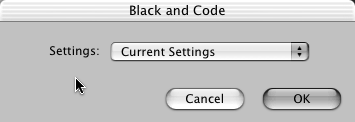
| The third and final way to output to videotape is the File, Edit to Tape command. Using this method, you have not only the Leader options that the Print to Video command adds to your output, but you also can control a qualified videotape device such as a camera or deck. If you can control and capture from your source device, you probably can use this method as well. But if you are having problems, you should consult the device qualification information from Apple (http://www.apple.com/finalcutpro/qualification.html). The Edit to Tape window looks much like the Canvas window, with some extra tabs at the top, as shown in Figures B.3 and B.4. Figure B.3. The Edit to Tape window.  Figure B.4. The Edit to Tape window showing its editing overlay.  The shuttle controls control your videotape device just as they do in the Log and Capture window. They are much like those of a VCR. To use the Edit to Tape function, which allows for precise control of where your program is put on the videotape, you must have a bit of black or other recorded video for the edit to take place. Using Final Cut Pro's Black and Code feature is the most common method of preparing a tape for an edit, but you only need some sort of prerecorded video on the target tape to use the Edit to Tape function. Using the Black and Code Button The button with the filmstrip icon on it in the top area of the Edit to Tape window blacks and codes a tape in the format you are using. Figure B.5 shows the Black and Code window and its options. Mainly, from the pop-up menu you just select the file format for the output of the black signal if you are not using an RS-422-controlled machine. After you select the proper options, click OK. A window opens, warning you that you are about to erase a tape with black video and telling you to start your recording manually. After you start recording, click OK in the Black and Code window. Figure B.5. The Black and Code window.  You need only a few seconds (10 seconds will do nicely ) of recording to then edit your program to the front of a tape in assemble edit mode. To stop the black and code, press the Escape key. Understanding Assemble and Insert Edits for Videotape Devices Assemble edits erase all tracks of video and create a new timecode track as well. Just as you needed a bit of pre-roll when you capture from tape, you need a bit of pre-roll when you edit to tape to ensure a clean In point edit. After you have created an assemble edit, the Out edit is not clean. But you can cut back into the end of the recording just as you do with a camera, create another clean edit, and go on assembling edits until the tape is full. An insert edit records only the tracks you've selected (from the track selectors in the lower right of the Edit to Tape window). An insert edit leaves the unselected tracks intact. An insert edit performs clean edits at both its In and Out points. Many professional analog videotape machines perform this sort of edit (but not all do, so check your manual for this specification), and Final Cut Pro can control them for this purpose. If your machine does not support an insert edit, the Out point selection in the Edit to Tape window is grayed out and unavailable for use, as is the Duration indicator in the upper left of the window. Most (all but the most expensive) DV cameras and decks do not perform insert edits (check your user 's manual). To perform an insert edit, you must have RS-422 control of your source machine. |
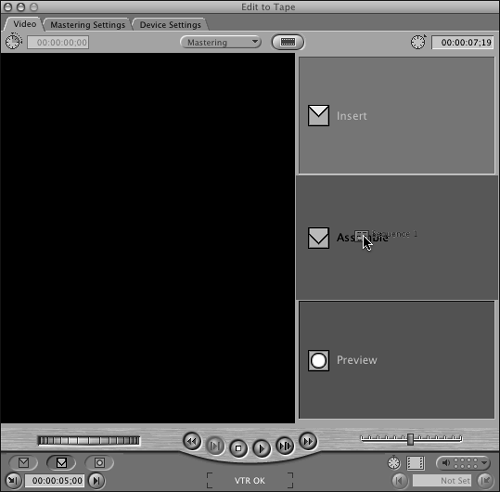
Using the Three Tabs in the Edit to Tape Window The Edit to Tape window has three tabs. The second tab, Mastering Settings, is identical to the Print to Video leader options (see the earlier section "Print to Video Leader Options"). The third tab, Device Settings, is shown in Figure B.6. Here you select your Device Control setting and your Capture/Input setting (which doubles as an output). You should use the same settings here that you used for capturing in the first place. Figure B.6. The Device Settings tab in the Edit to Tape window.  After you've set up your record tape to have a bit of black and timecode at its head in the case of a new tape, and you have set up your leader options from the Mastering Settings tab, you can press I to set an In point where the recording starts. You can also type a timecode number in the lower-left timecode box. The transport controls work with your source device just as they do in the Canvas window to locate a specific place on the record tape. If you have a videotape machine that can perform an insert edit, you can also select an Out point in the bottom right of the Edit to Tape window. The duration of this edit is displayed in the upper-left timecode box. Just above the In point selection are the familiar buttons that perform the editing functions. From the left, they are Insert, Assemble, and Preview. As explained in the sidebar, you must have a recorder that can perform an insert edit to use this first button. The Assemble button creates an assemble edit, and the Preview button creates a preview for you to check if you want to. You can view and preview the edit on an external video monitor that is connected to the output of your videotape machine or camera. Pressing the Escape key stops the preview or the actual edit during their execution. To the right and left of the In point and Out point timecode boxes are familiar controls that set points and cue the videotape machine to the respective In or Out points. In the upper left of the Edit to Tape window is a duration box. The current videotape's timecode position indication box is in the upper right. They function the same as they do in the Canvas window. One other pop-up menu appears just to the left of the Black and Code button. Here you can select whether you are mastering or editing. Selecting Mastering makes the system look at the Mastering Settings and include them in the recording process. Selecting Editing performs the edit and ignores them. Usually this is used to perform an insert edit, but it also can be used in the Assemble edit mode to start the edit without any of the leader options being used. Note that in the Mastering Settings tab, you must either select to record an In and Out point within the sequence or edit all the sequence's media to tape. After you've selected the timecode to start your recording, you simply highlight the sequence you want to record to tape and click the appropriate button. The Edit to Tape window has an edit overlay similar to that in the Canvas window, as shown in Figure B.7. You can drag your sequence from the Browser to the overlay window and start the process of recording it. Figure B.7. The Edit to Tape window overlay and a sequence icon dragged to the Assemble edit box.  |