| You can use Photoshop Elements' many textures to add special effects and virtual "frames" to your photos. For example, you might add the Sunset texture to a portion of your favorite beach photo, or add the Wood Frame texture to a photo before printing it. The Effects palette offers 14 textures that you can apply to either a selected area or your entire image. Keep in mind, however, that textures that include (layer) after their name can be applied only to an entire layer, not a selection. These include the Ink Blots, Marbled Glass, Sunset, and Wood > Pine textures. The Filters palette includes a smaller, more subdued assortment of textures. These tend to be a little less dramatic than the ones you'll find on the Effects palette. There's also an important distinction to keep in mind when choosing textures from these different palettes: textures from the Effects palette are applied to your image on a separate layer, whereas textures from the Filters palette are applied to the current layer. If you can't find the texture you're looking for, you can load a few additional textures. Photoshop Elements has a supply of textures in the Textures folder in the Adobe Photo shop Elements folder. To apply texture to an image 1. | Do one of the following:
- To apply a texture to a specific area, make a selection using one of the selection tools (Figure 7.43).
Figure 7.43. To apply a texture to just a portion of your image, make a selection using any of the selection tools. I used the Magic Selection brush to create this selection. 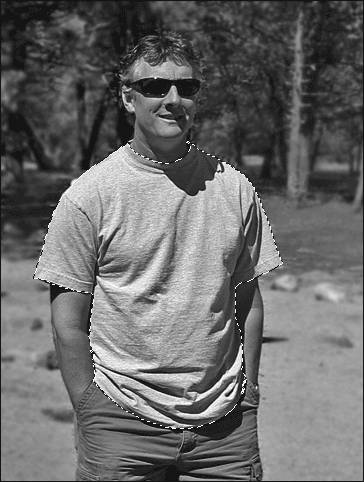
- To apply a texture to the entire image, no selection is necessary.
| 2. | With either the Effects or Filters palette lists active, select the Texture (or Textures) from the Library drop-down menu; then double-click the desired texture (Figure 7.44).
Figure 7.44. Double-click any texture to instantly apply it to your image. 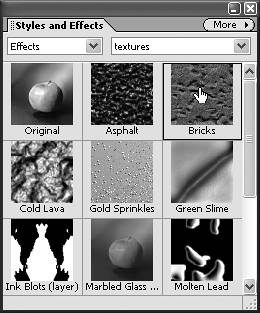
The texture is applied to either the selection or your entire image (Figure 7.45). If you've chosen a texture from the Effects palette, the texture also appears as its own unique layer on the Layers palette (Figure 7.46).
Figure 7.45. After you apply the texture, it will appear in the selected area at 100% opacity. Here, I added the Bricks texture to the t-shirt. 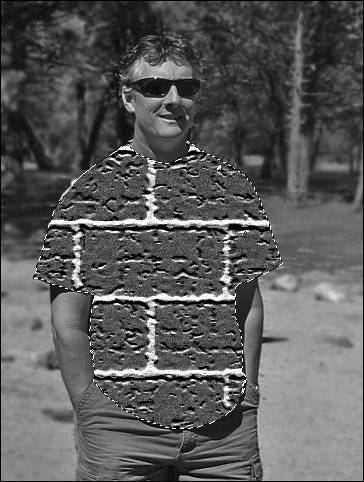
Figure 7.46. Textures selected from the Effects palette appear on their own layer on the Layers palette. 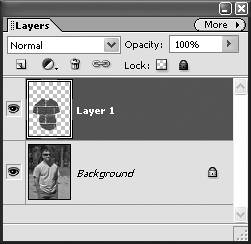
| 3. | If necessary, adjust the blending mode and opacity on the Layers palette (Figure 7.47).
Figure 7.47. In this example, the Hard Light blending mode was applied to the texture layer, and then its opacity was changed to 80 percent so that the folds and shadows of the t-shirt are still visible. 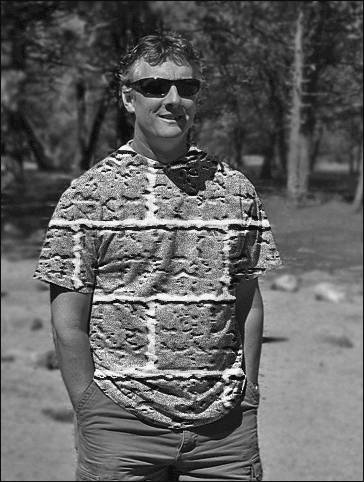
You can't adjust the blending mode or opacity of a background layer (it's locked by default), so it's a good idea to create a duplicate or adjustment layer before applying textures to your image.
|
 Tip Tip
After you've selected and applied a texture to your image, you can adjust the intensity of the texture by using the opacity control slider on the Layers palette. (Make sure you haven't applied the texture to a background layer, which is locked.) Since many Photoshop Elements textures are opaque, reducing the opacity level of the texture layer lets your original image peek through, creating a wonderfully unique effect. For example, try applying the Wood-Pine texture to an image, apply a blending mode like Screen to the texture layer, and then reduce its opacity. Your image will appear to be stained onto a piece of fine-grained wood.
To load additional textures 1. | With Filters selected in the Category drop-down menu, select All from the Library drop-down menu.
| 2. | Double-click to choose the Conté Crayon, Glass, Rough Pastels, Texturizer, or Underpainting filter from the palette list.
The Filter Options dialog box opens with a Texture drop-down menu as one of the setting options (Figure 7.48).
Figure 7.48. The Glass filter is one of many that includes a Texture drop-down menu. 
| 3. | Select from the list of available textures, or click the button next to the Texture drop-down menu and choose Load Texture (Figure 7.49).
Figure 7.49. Click the arrow button to select the Load Texture option. 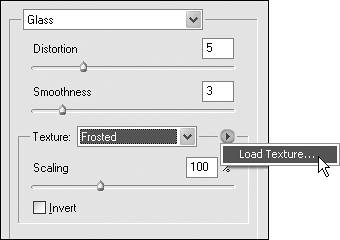
| 4. | Navigate to the Textures folderProgram Files > Adobe > Photoshop Elements 4.0 > Presets > Adobe Photoshop Elementsand double-click to open the folder.
Photoshop Elements includes a premade set of textures that you'll see in the Load Texture window.
| 5. | Select a texture, and then click Open to apply the texture and add it to the Texture drop-down menu list (Figure 7.50).
Figure 7.50. After you load a texture, the result is shown in the preview window. 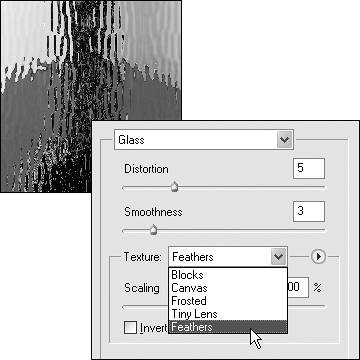
|
Tip If you have a scanner or digital camera, you can use it to create your own textures. Try scanning or photographing any object that has an unusual or patterned surface, such as a piece of cloth or gift wrap. Import the texture into your computer; then load the texture into the Presets > Textures folder in the Photoshop Elements folder on your computer's hard drive. Be sure to save your texture in the Photoshop (PSD) file format.
|