| You can also scale (resize), rotate, and distort layer images. They can be altered either numerically, by entering specific values on the options bar, or manually, by dragging their control handles in the image window. Constrain options, such as proportional scaling, are available for most transformations, and a set of keyboard shortcuts helps to simplify the process of adding distortion and perspective. To scale a layer image 1. | Click a layer in the Layers palette to make it active; then from the Image menu, choose Transform > Free Transform, or press Ctrl+T.
The options bar changes to show the scale and rotation text boxes and the reference point locator (Figure 5.42).
Figure 5.42. Precise scale and rotation values can be entered for any shape. 
| 2. | On the options bar, click to set a reference point location.
The reference point determines what point your layer image will be scaled to: toward the center, toward a corner, and so on (Figure 5.43).
Figure 5.43. These rectangles are both being reduced in size by about half. The one on the left is scaled toward its upper-left corner, and the one on the right is scaled toward its center. 
| 3. | If you want to scale your layer image proportionately, click the lock icon between the width and height text boxes.
| 4. | Enter a value in either the height or width text box.
The layer image is scaled accordingly.
| 5. | On the options bar, click the Commit Transform button (Figure 5.44), or press Enter.
Figure 5.44. The Commit Transform button scales the layer image to the size you define. 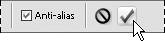
| 6. | Click the Commit Transform button a second time (or press Enter) to deselect the layer image and hide the selection border.
|
 Tips Tips
You can scale a layer image manually by selecting it with the Move tool and then dragging any one of the eight handles on the selection border. Constrain the scaling by holding down the Shift key while dragging one of the four corner handles. If you want to simply reposition a layer image in the image window, click anywhere inside the image with the Move tool and then drag the image to its new position.
To rotate a layer image 1. | Click a layer in the Layers palette to make it active; then from the Image menu, choose Rotate > Free Rotate Layer (Figure 5.45).
Figure 5.45. You can apply any of the layer rotation menu commands to a layer image. 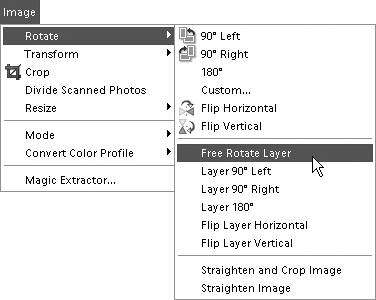
The options bar changes to show the scale and rotation text boxes and the reference point locator.
| 2. | On the options bar, click to set a reference point location.
The reference point determines the point that your layer image will be rotated around (Figure 5.46).
Figure 5.46. These rectangles are both being rotated about 20 degrees. The one on the left is rotated around its upper-left corner, and the one on the right is rotated around its center. 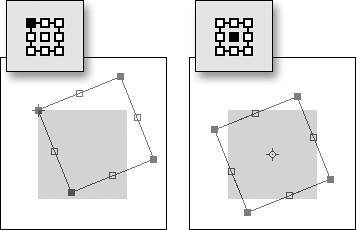
| 3. | Enter a value in the rotate text box.
The image will rotate accordingly.
| 4. | On the options bar, click the Commit Transform button, or press Enter/Return.
| 5. | Click the Commit Transform button a second time (or press Enter/Return) to deselect the layer image and hide the selection border.
|
Tips To rotate your layer image in 90-or 180-degree increments or to flip it horizontally or vertically, choose Image > Rotate; then choose from the list of five menu commands below the Free Rotate Layer command. You can rotate a layer image manually by selecting it with the Move tool and then moving the pointer outside of the selection border until it becomes a rotation cursor (Figure 5.47). Drag around the outside of the selection border to rotate the image. In addition, you can constrain the rotation to 15-degree increments by holding down the Shift key while dragging the rotation cursor. Figure 5.47. Rotate any layer image manually by dragging it around its reference point with the rotation pointer. 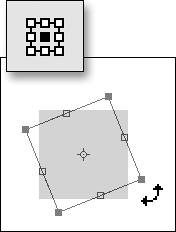
To distort a layer image 1. | Click a layer in the Layers palette to make it active. From the Image menu, choose Transform; then choose Skew, Distort, or Perspective (Figure 5.48).
Figure 5.48. Choose one of the three specific transformation commands. 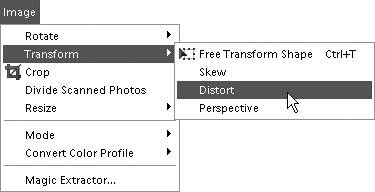
| 2. | On the options bar, check that the reference point location is set to the center.
The reference point can, of course, be set to any location, but the center seems to work best when applying any of the three distortions.
| 3. | Drag any of the layer image's control handles to distort the image.
Dragging the control handles will yield different results depending on the distort option you choose (Figure 5.49).
Figure 5.49. The same square layer image transformed using Skew (left), Distort (center), and Perspective (right). 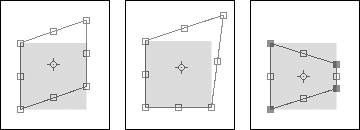
| 4. | On the options bar, click the Commit Transform button, or press Enter/Return.
| 5. | Click the Commit Transform button a second time (or press Enter/Return) to deselect the image layer and hide the selection border.
|
|