Chapter 8: Web Services with Apache Axis
|
Prerequisites for Using Apache Axis
Unlike software you purchase, open source software usually requires several installation steps before you are able to utilize the software. Apache Axis is no different, but you’ll find the setup slightly easier than Apache SOAP.
Apache Axis utilizes Tomcat and Chapter 7 discusses how to install it. The only difference with Axis is that you do not need to change the CLASSPATH settings of Tomcat’s startup script.
The other steps for the installation of Axis include installing the appropriate libraries, setting up the CLASSPATH, and then testing.
Installing Axis and Xerces
Appendix B provides the URL for downloading Axis from the Apache Group. Once you have the zip file containing the Axis distribution, extract it into C:\xmlapache just like what you did in Chapter 7. Go into the axis-1_0\webapps directory under C:\xmlapache and take the Axis directory and move it into Tomcat’s webapps directory. This will install the Axis webapp under “Tomcat.”
For Axis to handle XML, you need to put xerces.jar (the Apache group’s XML parser) in the Axis webapps lib directory. For example, if you installed everything under the recommended path c:\xmlapache, the entire path for xerces.jar would be this: c:\xmlapache\tomcat\webapps\axis\lib\xerces.jar. Note that for the examples in this chapter, Xerces Version 1.4.4 was used—which is the same version that Apache SOAP requires.
Once the Axis webapps directory is installed and the xerces.jar is placed in the appropriate directory, the next step involves setting up the CLASSPATH and other environmental variables.
Setting up the Environment
For Apache Axis to execute, you need to modify the environment so that it can find the Java executables and libraries it needs.
The first environmental variables needed are for the location of the executables needed to compile and run Java programs and the variable needed to tell Tomcat where the Java directory resides.
The following example shows a MS DOS batch file that sets up the environment. The first line set adds the location of the Java executables to the path. The second example line sets the JAVA_HOME variable for Tomcat. This simply needs the path to the Java SDK. The CLASSPATH variable tells Java where to find certain critical libraries. Each of the jar files found in c:\xmlapache\tomcat\ webapps\axis\WEB-INF\lib\ needs to be added to the CLASSPATH in order for Axis to function properly.
set PATH=%PATH%;c:\jdk1.4.0\bin;. set JAVA_HOME=c:\jdk1.4.0 set CLASSPATH= c:\xmlapache\tomcat\webapps\axis\WEB-INF\lib\axis.jar; c:\xmlapache\tomcat\webapps\axis\WEB-INF\lib\commons- logging.jar; c:\xmlapache\tomcat\webapps\axis\WEBINF\lib\jaxrpc.jar; c:\xmlapache\tomcat\webapps\axis\WEB-INF\lib\saaj.jar; c:\xmlapache\tomcat\webapps\axis\WEB-INF\lib\log4j-1.2.4.jar; c:\xmlapache\tomcat\webapps\axis\WEB-INF\lib\tt-bytecode.jar; c:\xmlapache\tomcat\webapps\axis\WEB-INF\lib\xerces.jar; c:\xmlapache\tomcat\webapps\axis\WEB-INF\lib\wsdl4j.jar; c:\xmlapache\axis-1_0\;
On the CD Executing this bat file and then starting Tomcat will allow the Axis examples to function properly. Note that this bat file can be found on the CD-ROM in the directory for this chapter.
Testing the Installation of Apache Axis
Once Tomcat is started, you should see the Axis directory load with all the other webapp directories. Figure 8.1 shows the Apache Axis home page as it appears in Internet Explorer.
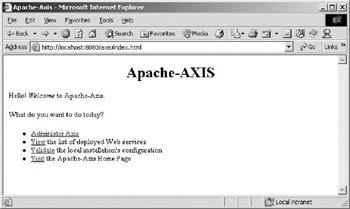
Figure 8.1: The Apache Axis home page shown in Internet Explorer.
One feature that comes with Apache Axis that didn’t appear in the SOAP library is the diagnostic tool, and this is found from the “Validate” link on the home page shown in Figure 8.1. This tells you if Axis is finding all the libraries it needs in order to operate properly. Figure 8.2 shows the results of the diagnostics.
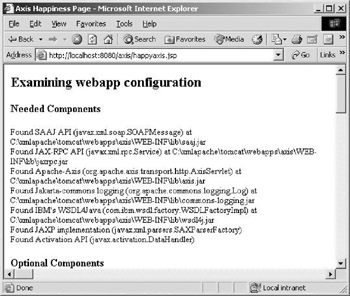
Figure 8.2: The results of the Apache Axis diagnostics.
The diagnostics should report that there are two missing optional libraries. You don’t need to worry about these yet because the examples in this chapter don’t use the missing libraries.
Axis can also list the available services on a particular system. Just follow the “View Deployed Web Services” link on the Axis home page. Figure 8.3 shows the available services on a sample installation of Axis.
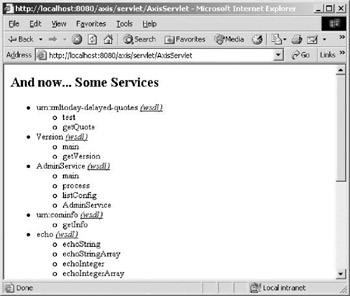
Figure 8.3: How Apache Axis lists installed Web Services.
Another quick check of the Axis installation is to execute one of the examples that come with the Axis distribution. Open a DOS prompt and change into the c:\xmlapache\axis-1_0\stock directory. Now execute testit.cmd. This executes a DOS batch program that tests Axis, installs a real stock service, tests the stock service, and then uninstalls the service. Figure 8.4 shows the output that testit.cmd generates.
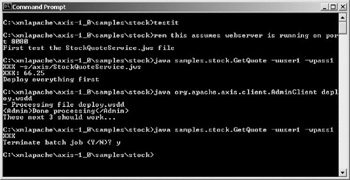
Figure 8.4: The results of running the testit.cmd file in the Apache Group’s stock example.
| Note | If a lot of Java errors appear in the DOS window when executing testit.cmd, the most likely culprit is that your CLASSPATH does not have all the correct libraries. |
Now that you have installed and tested Apache Axis, the next step is to actually create your own Web Service.
|
EAN: 2147483647
Pages: 128