The Flash MX Drawing API
In this section, we will introduce the core methods of the Flash drawing API. These methods enable you to dynamically add shapes made up of basic lines and curves to a movie clip. It also allows you to control basic properties of these shapes such as fill type, fill color, line color , and line weight. Let's get started by learning how to draw some simple shapes .
Drawing Shapes'
Like many drawing engines, the Flash drawing engine is essentially a state machine. What this means is that any operation you perform affects the current state of the underlying drawing engine. For example, when you draw a line with the drawing API, you only specify the end point of the line. The beginning point of the line is taken from the current state of the drawing engine. Usually, this will be the point you specified in a previous draw or move operation. Because the drawing engine relies on state information, the order in which you perform operations is very important.
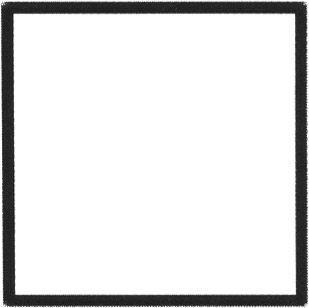
Consider the four points that make up a square. One specific sequence of the points will form a square, but the same points written in a different order may form a bow tie. It's the ordering of the points that determines which shape is drawn:

There are three important methods in the Flash drawing API that let us specify how shapes should be drawn from lines, curves, and points, and another that allows us to delete our dynamic creations.
| Drawing Method | Description |
|---|---|
| moveTo(x, y) | Sets the current drawing position to ( x, y ). |
| lineTo(x, y) | Draws a line from the previous drawing position to ( x, y ). It then sets the new drawing position to ( x, y ). |
| curveTo (control_x, control_y, x, y) | Draws a curve from the previous drawing position to ( x, y ) using the control point ( control_x, control_y ). It then sets the new drawing position to ( x, y ). |
| clear() | Clears all of the drawing paths that have been created in the movie clip. |
Before you tackle some pseudo-3D drawings, you'll do a few simple warm-up exercises to show how these methods work (if you're already up to speed with the drawing API in Flash MX, feel free to skip ahead to the section Moving from 2D to 3D ):
-
Create a new movie (CTRL/CMD+N) and then select Modify > Document . Set the window dimensions to 150x150.
-
To draw the square in the previous figure, you just need to click on frame 1 of the timeline and add this code in the Actions panel, which you open by pressing F9 (refer to drawing1.fla ):
createEmptyMovieClip("square", 1); with (square) { lineStyle(4); moveTo(25, 25); lineTo(125, 25); lineTo(125, 125); lineTo(25, 125); lineTo(25, 25); } -
Test the movie (CTRL/CMD+ENTER) and you should indeed see a square.
-
Next, to draw the bow tie that you saw earlier, you can just change the order of the lineTo methods ever so slightly ( drawing2.fla ):
createEmptyMovieClip("bowtie", 1); with (bowtie) { lineStyle(4); moveTo(25, 25); lineTo(125, 125); lineTo(125, 25); lineTo(25, 125); lineTo(25, 25); }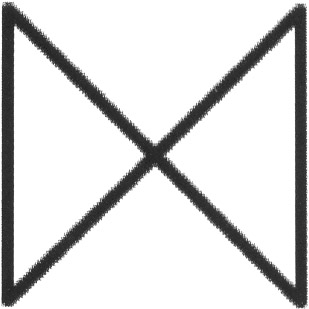
-
Additionally, you can make a rounded shape by using the curveTo method instead of the lineTo method ( drawing3.fla ):
createEmptyMovieClip("rounded", 1); with (rounded) { lineStyle(4); moveTo(25, 25); curveTo(75, 0, 125, 25); curveTo(150, 75, 125, 125); curveTo(75, 150, 25, 125); curveTo(0, 75, 25, 25); }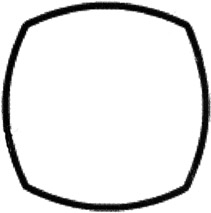
-
Try tweaking the values of the control point parameters in the moveTo methods to gain an understanding of the significance of these controls:
createEmptyMovieClip("rounded", 1); with (rounded) { lineStyle(4); moveTo(25, 25); curveTo(125, 50, 125, 25); curveTo(200, 125, 125, 125); curveTo(125, 200, 25, 125); curveTo(50, 125, 25, 25); }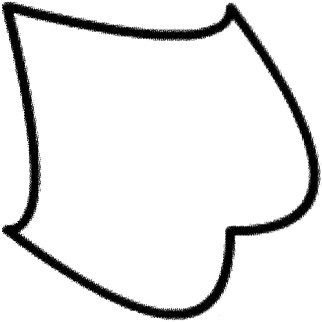
Using Fills
Flash provides three methods that are used to control the fill of shapes that you define.
| Fill Method | Description |
|---|---|
| beginFill (rgb, alpha) | Begins a filled shape with the specified rgb value provided in hexadecimal format and an integer alpha value that ranges between and 100 |
| beginGradientFill (fillType, colors, alphas, ratios, matrix) | Begins a filled shape with either a linear or radial fillType , an array of colors provided in hex format, an array of alphas that corresponds to the colors array, an array of integer color distributions named ratios that range between and 255 , and a transformation matrix represented as a nine-element array |
| endFill() | Ends a fill that was begun either with beginFill or beginGradientFill |
The beginGradientFill method is obviously much more powerful and more complex than the beginFill function. Let's look at some examples.
-
Adding a red fill to your square shape is easy (see also drawing4.fla ):
createEmptyMovieClip("square", 1); with (square) { lineStyle(4); beginFill("0xFF0000", 100); moveTo(25, 25); lineTo(125, 25); lineTo(125, 125); lineTo(25, 125); lineTo(25, 25); endFill(); }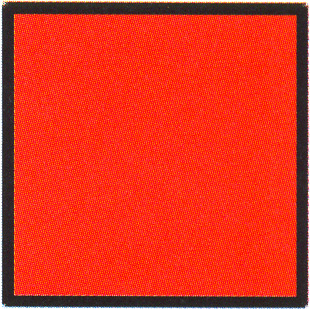
-
However, adding a red-to-white gradient is slightly more complex (refer to drawings.fla ):
createEmptyMovieClip("square", 1); with (square) { lineStyle(4); colors = [0xFFFFFF, 0xFF0000]; alphas = [100, 100]; ratios = [0, 0xFF]; matrix = {a:150, b:0, c:0, d:0, e:150, f:0, g:75, h:75, i:1 }; beginGradientFill("radial", colors, alphas,
  ratios, matrix); moveTo(25, 25); lineTo(125, 25); lineTo(125, 125); lineTo(25, 125); lineTo(25, 25); endFill(); }
Although the 3D drawing engine that we will introduce later in this chapter will employ the relatively straightforward beginFill method, it's obvious that beginGradientFill has great potential for creating the shaded surfaces of 3D objects.
Line Styles
You have already been using the last method in the Flash drawing API.
| Line Style Method | Description |
|---|---|
| lineStyle( thickness , rgb, alpha) | Sets the current line weight to thickness , the current line color to the hexadecimal value provided by rgb , and the current opacity to alpha |
So you can change your box's border to a thick blue line by changing a single line in the original script (see drawing6.fla ):
createEmptyMovieClip("square", 1); with (square) { lineStyle(12, "0x0000FF", 100); moveTo(25, 25); lineTo(125, 25); lineTo(125, 125); lineTo(25, 125); lineTo(25, 25); 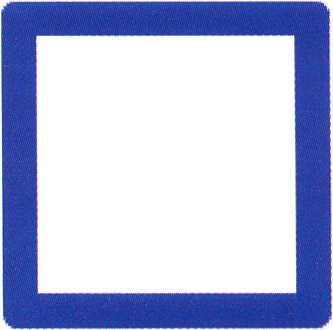
Moving From 2D to 3D
As you can see, Flash has a fairly complete 2D drawing API. If we can somehow project 3D geometry into a 2D representation that Flash can draw, we can bridge this 3D-to-2D gap. That said, the problem of transforming 3D geometries to 2D isn't specific to Flash ”all applications that render 3D graphics on a 2D format (like the computer screen) must make this transformation. Unfortunately, this can be a computationally expensive transformation. This is why modern graphic adaptors support hardware acceleration for many of these expensive 3D transformation operations.
Since Flash wasn't designed with 3D in mind, as we've been emphasizing throughout this book, we won't have the advantage of 3D hardware acceleration. This means that there will be a serious trade-off with regard to complexity versus speed when producing faux-3D in Flash. In order to keep things fast, we also need to keep them simple!
We will begin our journey from 2D to 3D by considering a simple cube:
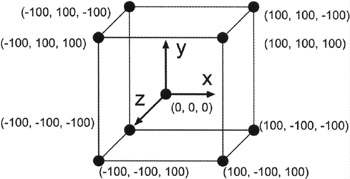
A cube is made up of eight vertices ( otherwise known as points) and six faces. We will use multidimensional arrays in ActionScript to store each vertex value and then use the Flash drawing API to draw the faces. You can work through this tutorial in detail or just take a look at drawing7.fla while you read along.
-
Create a new movie and set the window dimensions to 400x400. Select frame 1 on the timeline and add the following ActionScript. The code begins by creating an array of points with the coordinates of the cube:
points = new Array(8); points[0] = new Array (100, 100, -100); points[1] = new Array (100, -100, -100); points[2] = new Array (-100, -100, -100); points[3] = new Array (-100, 100, -100); points[4] = new Array (100, 100, 100); points[5] = new Array (100, -100, 100); points[6] = new Array (-100, -100, 100); points[7] = new Array (-100, 100, 100);
-
At each frame in the animation, you will need to know the transformed coordinates, which you will store in another array:
xpoints = new Array(); for (i=0; i<8; i++) xpoints[i] = new Array();
-
You'll also rotate or spin the points about the y-axis. We'll cover rotation and other transformations in more depth a little later in the chapter.
theta = 0; createEmptyMovieClip ("cube", 1); this.onEnterFrame = function () { theta += 0.01; if (theta > 6.28) theta -= 6.28; // transform the points for (i=0; i<8; i++) { xpoints[i][0] = points[i][2]*Math.sin(theta) + points[i][0]*Math.cos(theta); xpoints[i][1] = points[i][1]; xpoints[i][2] = points[i][2]*Math.cos(theta) -
  points[i][0]*Math.sin(theta); p = 500 / (xpoints[i][2] + 500); xpoints[i][0] *= p; xpoints[i][1] *= p; xpoints[i][0] += 200; xpoints[i][1] += 200; }
 -
Once the original cube vertices have been transformed, use the Flash drawing API to render the faces:
with (cube) { clear(); lineStyle (4); // draw face 1 moveTo (xpoints[0][0], xpoints[0][1]); lineTo (xpoints[1][0], xpoints[1][1]); lineTo (xpoints[2][0], xpoints[2][1]); lineTo (xpoints[3][0], xpoints[3][1]); lineTo (xpoints[0][0], xpoints[0][1]); // draw face 2 moveTo (xpoints[4][0], xpoints[4][1]); lineTo (xpoints[7][0], xpoints[7][1]); lineTo (xpoints[6][0], xpoints[6][1]); lineTo (xpoints[5][0], xpoints[5][1]); lineTo (xpoints[4][0], xpoints[4][1]); // draw face 3 moveTo (xpoints[0][0], xpoints[0][1]); lineTo (xpoints[4][0], xpoints[4][1]); lineTo (xpoints[5][0], xpoints[5][1]); lineTo (xpoints[1][0], xpoints[1][1]); lineTo ( xpoints[0][0 ] , xpoints[0][1]); // draw face 4 moveTo (xpoints[1][0], xpoints[1][1]); lineTo (xpoints[5][0], xpoints[5][1]); lineTo (xpoints[6][0], xpoints[6][1]); lineTo (xpoints[2][0], xpoints[2][1]); lineTo (xpoints[1][0], xpoints[1][1]); // draw face 5 moveTo (xpoints[2][0], xpoints[2][1]); lineTo (xpoints[6][0], xpoints[6][1]); lineTo (xpoints[7][0], xpoints[7][1]); lineTo (xpoints[3][0], xpoints[3][1]); lineTo (xpoints[2][0], xpoints[2][1]); // draw face 6 moveTo (xpoints[4][0], xpoints[4][1]); lineTo (xpoints[0][0],
  xpoints[0][1]); lineTo (xpoints[3][0],
  xpoints[3][1]); lineTo (xpoints[7][0],
  xpoints[7][1]); lineTo (xpoints[4][0],
  xpoints[4][1]); } };
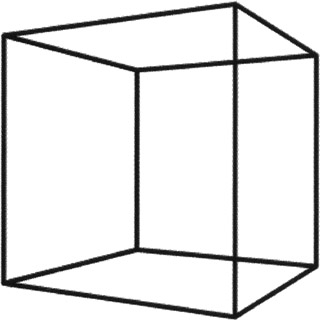
-
Test your movie by pressing CTRL/CMD+ENTER.
These first steps into the world of 3D were fairly successful, but there are a few things we haven't addressed. First, this example was a simple wire frame. If we had filled the faces of the cube, this example wouldn't have worked, because as the cube turns the same faces would always be rendered on top. Second, although the transformation we chose here worked nicely , it's a little difficult to follow ”we've got a few sine and cosine functions, and it's not immediately clear what they mean or how they are affecting the cube. And third, we haven't yet considered how lighting might affect the color of the cube.
What we need is a higher-level interface that abstracts such functionality so that we do not have to concern ourselves with the scene-rendering implementation details.