Basic 3D Scaling
Knowing that smaller objects appear farther away, we can immediately put this knowledge to use and trick our eyes into seeing depth where there actually is none. Before we can think of setting up our scene (or mise-en-scne ), we need to create some objects to place in it. For the sake of simplicity, we're going to create one of the simplest fake 3D objects you can create in Flash: a sphere, complete with lighting and shadow effects.
-
Start a new Flash movie ( File > New or CTRL/CMD+N), set the stage dimensions to 400x300 using the Document Properties dialog box ( Modify > Document... or CTRL/CMD+J, or simply click the Size button in the Property Inspector), and set the frame rate to 24 fps. Whenever you set the stage size, the main stage gets displaced with the new settings. A quick way to get back to the full stage view is to double-click on the Hand Tool.
-
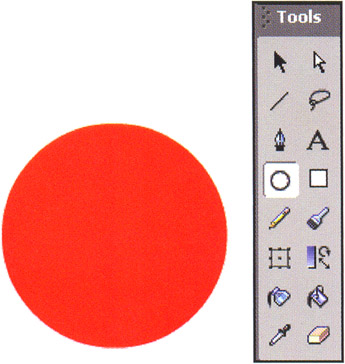
Our sphere is going to start a life as a reddish-orange circle without an outline (stroke). Disable the stroke by clicking on the stroke color and then selecting the disable button (no color ). Next , select a web-safe orange using the Fill Color selector and draw a circle using the Oval Tool (O). Make sure to hold down the SHIFT key while you're drawing to constrain your oval to a perfect circle. At this point you're probably thinking, "Now that doesn't look very three-dimensional!" Of course you'd be right, so let's jazz it up a bit, keeping in mind some of the tricks you learned in the previous chapter.
-
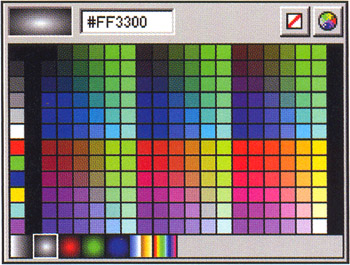
You're going to be adding depth to your otherwise two-dimensional circle using a method called chiaroscuro, a technique first developed in painting during the Italian Renaissance. You may know it more simply as "using a gradient fill." In fact, the chiaroscuro technique is a little more involved, but not by much. So let's set sail: select the default black-to-white radial gradient for the fill color in the lower-left corner of the color palette, as shown in the figure opposite .
-
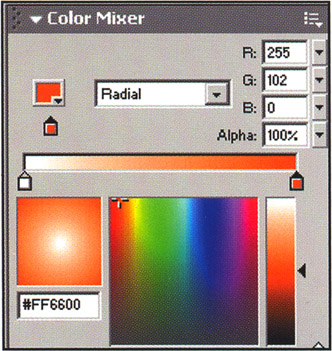
If the Color Mixer panel isn't showing, make it visible ( Window > Color Mixer or SHIFT+F9). You should be able to see the black-to-white radial gradient that you selected in the Color Mixer panel. Click on the small black color swatch at the rightmost end of the rectangular gradient strip to select it. The larger color swatch next to the Fill Style drop-down menu should turn black. Click on this swatch and select the web-safe orange with the hexadecimal color value of FF6600 . When you're done, the gradient in the Color Mixer panel should look like the one in the figure opposite.
-
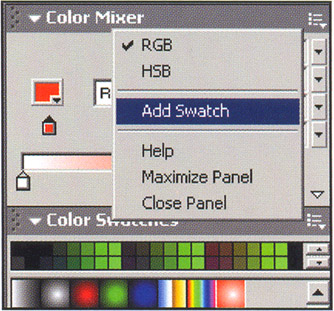
If you like, you can save this custom gradient by selecting Add Swatch from the Color Mixer panel menu (the small drop-down menu on the title bar of this panel). This will add your custom gradient to the Color Swatches panel so you can use it again in the future without having to re-create it.
-
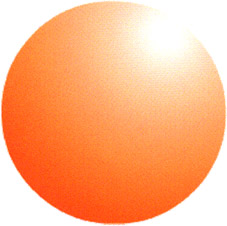
Now it's time to add the radial gradient you just created to your circle to give it the appearance of volume and thus transform it into a sphere. With your radial gradient selected, use the Paint Bucket Tool (K) and click toward the upper-right of the circle that you drew a moment ago. There's a lot you can do with gradients to simulate lighting and give objects the appearance of volume. Thanks to the gradient, your sphere looks like it is being lit from the top and slightly to the side, just as it would be if it were a real sphere being lit by the sun at around 2pm.
If you haven't done so already, it's worth looking at Chapter 2 for more neat tricks with gradients.
-
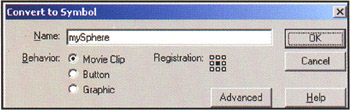
Things are looking a bit more three-dimensional now, but we can do better. On earth, objects that are illuminated tend to cast shadows. To make things look more lifelike, you're going to add a shadow to your sphere. Before you get too carried away, however, you'll convert your sphere to a movie clip so you can manipulate it easily later on. Click on the sphere to select it and choose Insert > Convert to Symbol... (F8) to transform it into a symbol. Make the symbol a movie clip and call it mySphere . This will create a movie clip symbol in your Library called mySphere and replace the sphere that was on the stage with an instance of this mySphere symbol.
-
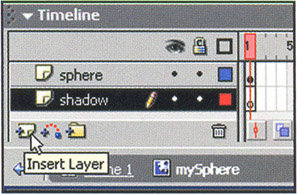
Double-click on your new mySphere movie clip instance to open up the symbol for editing. Here, create a new layer ( Insert > Layer, or click the little icon in the bottom-left corner of the timeline). Give these layers some meaningful names : rename Layer 1 as sphere and Layer 2 as shadow by double-clicking on their layer names and typing over the default names. Now drag the shadow layer underneath the sphere layer.
-
To draw the shadow, choose a dark shade of gray as your fill color, disable the stroke color, and create an oval similar to the one in the figure opposite. Position the shadow toward the bottom and to the left of the sphere. Note how you're positioning it opposite the highlight on the sphere. That's the direction the light is coming from, so the shadow has to be cast in the opposite direction. Pay attention to the light sources in your scenes. Just because they're imaginary doesn't mean that they're any less important!

-
Now that you have your faux-3D sphere symbol, you need to add a few more instances of it to the stage before you can manipulate them to trick your eyes into seeing perspective. Double-click on an empty part of your work area to exit out of editing the mySphere symbol. With the instance of your sphere symbol selected, press CTRL/CMD+D twice to create two duplicates of it.
-
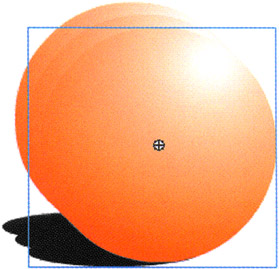
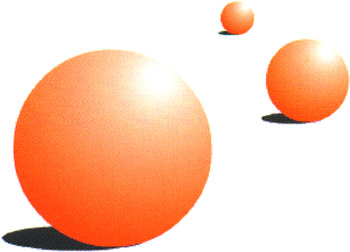
Here comes the important bit: you're going to scale the duplicated clips to give the illusion of depth. With one of the spheres selected, activate the Free Transform Tool (Q) and begin to resize the sphere using the transformation handle in the lower-left corner of the movie clip. Hold down the SHIFT key while you're doing this to ensure that you maintain the aspect ratio of the sphere. Drag outward to make the sphere larger and inward to make it smaller, using the final layout to the right as a guide. Repeat with the other spheres, positioning them as necessary to create a scene something like that shown opposite.
-
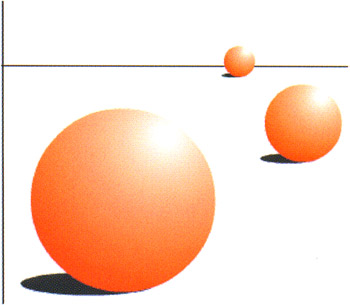
Although all you have are three differently- sized objects on a flat screen, your eyes start to try and read some perspective into the picture. You can heighten the effect greatly by adding a single horizontal line, the horizon, to give your scene a ground plane and vanishing point. By adding a horizon, using the Line Tool (N), and playing with the placement of the spheres slightly, you arrive at the final effect. The horizon line is central to any illustration that aims to depict depth, as you'll see in the next effect, where you'll tackle creating a perspective grid.
You can also take a look at sphere_layout.fla from this chapter's sample files to see this finished effect. To recap, for the preceding effect you first created a sphere using the chiaroscuro method and you then used a combination of blocking (placing objects within the scene) and framing (choosing your view of the scene) to set up your scene. If you were shooting a film, you would block a scene in exactly the way you've done here (by placing your objects, or props, within your scene). In Flash, the placement of objects also constitutes the only means of framing a scene. Unlike 3D programs, such as 3D Studio Max or Maya, you don't have a camera that you can move around to frame ”or select your view of ”the scene. So as not to waste time on the creation of new objects (you can use the chiaroscuro method for any object, not just spheres), you're going to use the sphere you created here in some of the other effects in this chapter, so it's a good idea to save your work so far. (Of course, you can always use the sphere from sphere_layout.fla, available with this book's examples download.)
Perspective Grids
In the previous effect, you saw that your sense of depth is primarily affected by the size and placement of objects within the scene. To create the effect, you eyeballed the scaling of the objects and used trial and error until you arrived at a scene that was aesthetically pleasing and believable. For a simple scene, this isn't too much of a problem, but what if you want to create an illustration of a busy downtown street with people, cars , buildings , and streets ? How can you make sure that everything fits into the perspective of the scene? Fortunately, painters started pondering the same question thousands of years before the first line of code that was eventually to become the program we now know and love as Flash was ever written. The solution they came up with, sometime around the 1500s, was to use perspective grids. There are three types of perspective grids that you can create to help you lay out your faux-3D scenes: one-point, two-point, and three-point. The points refer to the number of vanishing points in each grid.
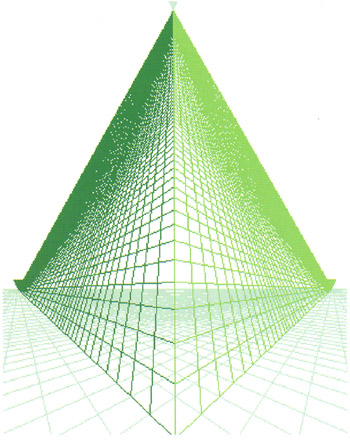
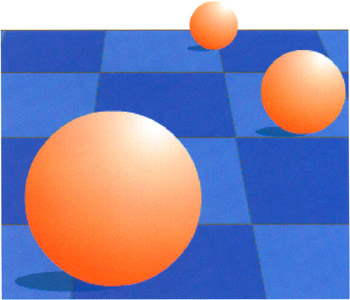
For example, here's a hand-drawn one-point perspective grid with the spheres from the previous example. It is a one-point grid since, if you were to extend the vertical lines up past the horizon, you would see that they eventually meet at a single vanishing point.
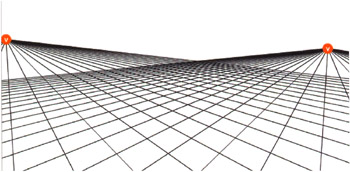
To save you the trouble of having to create these grids by hand, we've created a perspective grid tool that lets you play around with one- and two-point perspective grids. Take a look at two_point_grid.swf in this chapter's downloaded code folder. Play around with different two-point perspective grids by moving the vanishing points.
Macromedia FreeHand: The mother of all perspective grids
The perspective grids that we've discussed are essential to creating 3D scenes with accurate perspective; however, they do not go beyond being helpful static guides (or cool background images for our scenes). Wouldn't it be nice if we could somehow draw an object and have it fit into our perspective grid automatically? Although the Flash authoring environment doesn't currently have this as a built-in feature, it is entirely possible that someone will eventually come up with a layout manager component that does just this, using Live Preview from within the authoring environment. A program that does have this ability as a standard feature is FreeHand, Macromedia's vector illustration tool.
We are actually die-hard Adobe Illustrator fans, but starting with FreeHand 9, Macromedia introduced a perspective grid in FreeHand that blows illustrator away. Basically, it allows you to create an object (say a square), turn on a perspective grid, and have the object snap onto it. Once you've snapped your object onto the perspective grid, you can move it around and it will stay in correct perspective. Macromedia FreeHand 10 has one-point, two-point, and three-point (shown over the page) perspective grids that you can snap objects to.
If you don't have FreeHand, download the trial version ( www.macromedia.com/downloads/ ) and take it for a spin. Then send an email to < wishlist @macromedia.com > asking them nicely if they wouldn't mind including this killer feature in the next version of Flash to make all our lives easier!