Managing Files with Kubuntu
| Now that you have your system installed and set up the way you would like, it is time to understand how to navigate the different files and ways to access information in Kubuntu. That starts with the default file manager, Konqueror. Introduction to KonquerorKonqueror is a very powerful file manager that can do more than just browse your directories, it is also the second Web browser to pass the ACID2 test. As a file manager, Konquerer can do everything a "modern" file manager can (See Figure 7-28). Files can be browsed through either an icon view or a tree view. Copying, pasting, moving, and deleting files are all simple tasks that can be done through Konqueror. A nice feature of Konqueror is that directories automatically update. This means that if a file is created in a directory currently being viewed it is not necessary to refresh the directory to see the changes. Figure 7-28. Konqueror.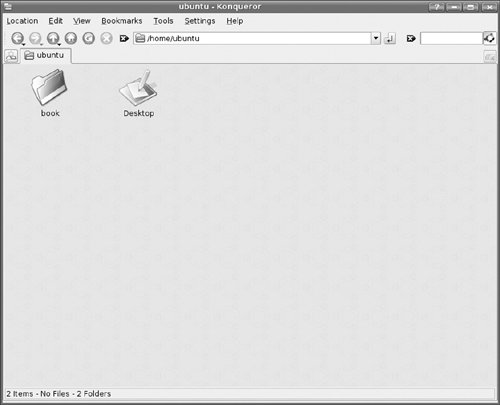 One of the great things about Konqueror is how much you can do within it. Need access to media files? Simply type media:/ and browse your media files. All other kinds of shortcuts, called kioslave, exist in Konqueror, including searching the Web with Google (gg: KEYWORD), or even browsing files via ssh through sftp://. Need help finding a file on your system? Simply use locate:/ to have Konqueror find it for you. You can visit the different system folders through system:/. There are all kinds of shortcuts and keywords like this built into Konqueror, including Google suggest in the search bar. Another feature of Kubuntu is a built-in universal viewer. Click on a file, and it will show the file contents. This works for images, postscript files, and many other file types. Any new type of file just needs to register to work in this way. Finding Files and FoldersKonqueror's built-in search capability allows you to find that file or folder you are looking for. One of the kioslaves is locate:, which will help you search for files. In the address type locate: followed by the file or folder name, and hit enter. Konqueror will then find what you are looking for. See Figure 7-29 for an example of locate: in action. Figure 7-29. Using locate: to find files in Konqueror.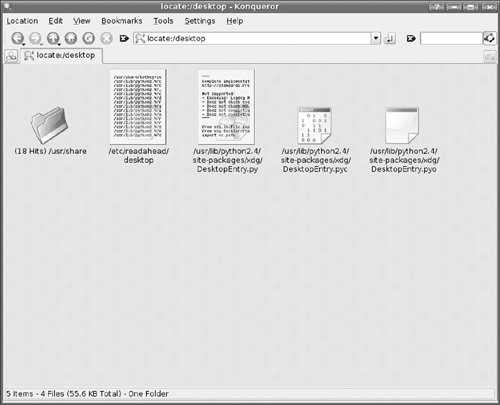 The search bar, which is located next to the address, can also help you find files and folders. This toolbar functions exactly like a search bar in a Web browser. Simply type the name of the file or folder you are looking for, hit enter, and Konqueror will then go out and find the files or folders requested. Ripping Audio CDsWhile AmaroK (discussed later in the chapter) can help you manage your music collection, Konqueror can help you add (rip) CDs into your collection so you can listen to them on your iPod or mp3 device. Simply place the CD in the CD-ROM drive, and, when prompted, open it up in a new window. There will be different folders labeled with different media formats. For example, if you are using the Ogg Vorbis format (the default format for media files in Kubuntu), open the folder and copy them to the directory where you store your collection. Another application to use to rip music is KaudioCreator, which is discussed later in the chapter. Accessing Windows PartitionsA lot of people still have Windows partitions on their hard drives and would like to access the information stored there. Kubuntu can browse these files in read-only mode. Each Windows partition needs to be mounted before it can be accessed in Konquerer. This is a very simple process. By default, Kubuntu mounts all its media in the /media directory, and your windows directory will be mounted in the same location. First, create a directory. Next, mount the partition to that directory. All of this work will be done from the command line, so open up Konsole, Kubuntu's terminal program (See Figure 7-30), and create the directory by typing sudo mkdir /media/windows. Enter your password. After the directory is created, mount the directory by typing the following sudo mount /devhda1 /media/windows -t ntfs -o nls=utf8,umask=0222. In simpler terms, this command will mount the directory in the correct folder with permissions that will allow you to access it in Konqueror. (Note: Read-only access is limited to NTFS partitions. Kubuntu can read and write to partitions formatted as FAT.) Figure 7-30. Konsole with commands.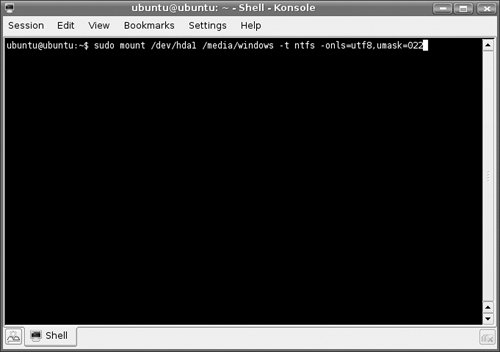 Now you can browse files that are still stored on your Windows partition. Accessing USB DrivesUSB drives are everywhere these days, and Kubuntu handles them quite easily. Simply connect your USB drive, and it will auto-mount. These drives will then be available under Konqueror through the media folder. Before removing the drive, make sure that you unmount it by right-clicking on the device and selecting Eject. The device can then be safely removed. Managing MusicKubuntu comes with a great program that can help manage all of your music files called amaroK (See Figure 7-31). Figure 7-31. amaroK.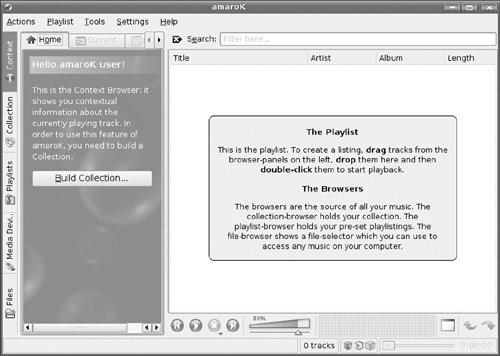 This application can serve as a full-fledged media library that can create playlists, track how often the user listens to a certain song, and even interact with your iPod. Looking for lyrics to the song that is currently playing? AmaroK can find them. Wondering what the CD cover of your favorite new album looks like? AmaroK can grab this information for the user as well. Along with media stored locally, amaroK can track podcasts and even let you listen to your favorite Internet radio station. Music is stored in a collection library that is arranged by artist, album, and song based on the tags built into the media. Each song can be rated, which can help determine the frequency of it appearing during "shuffle mode." Upon launching amaroK for the first time there is a nice wizard that helps configure the user's collection. This First-Run Wizard will set up how the program will be displayed and the location of the folders that music is stored in. (Yes, a collection can be built across many different folders and sub folders.) After setting these two options, amaroK will ask the user how the music will be stored. Since the application uses a database, this information can be stored in SQLIte, MySQL, or PostgreSQL depending on what is installed and your preferences. If at any time the user needs to make changes to how things are configured, the First-Run wizard can be rerun at anytime from the Tools menu. Figures 7-32 through 7-35 present several screenshots of the First-Run Wizard. Figure 7-32. Welcome to the First-Run Wizard.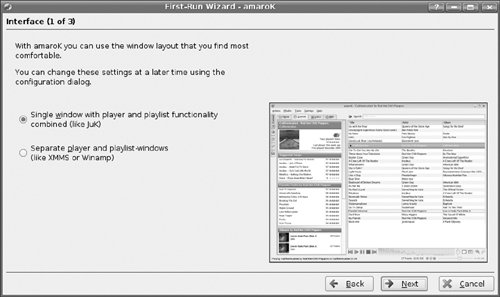 Figure 7-33. Choosing the default look of amaroK.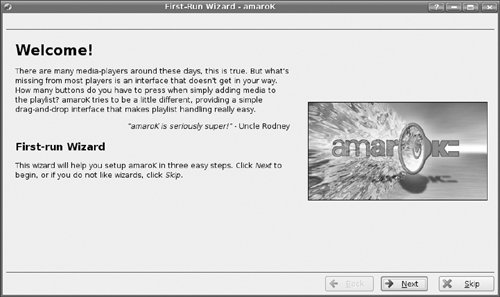 Figure 7-34. Selecting the location for your catalog.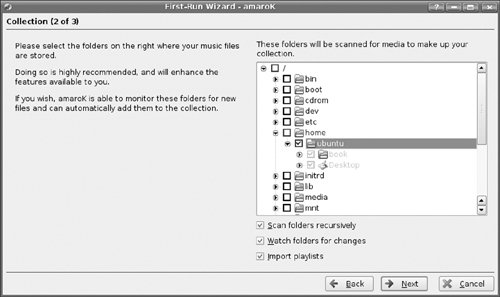 Figure 7-35. Choosing the type of database to store your collection in.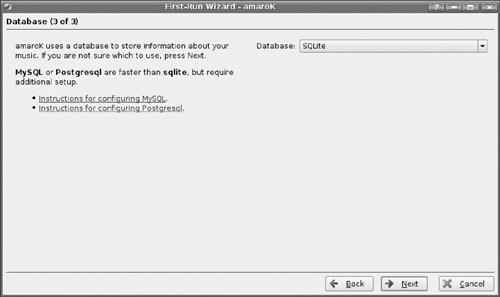 In order to listen to .mp3 files, an additional package will need to be installed from multiverse (see the section on Managing Repositories) through Adept. The package, libxine-extraodecs will also enable you to play some VI and some QuickTime videos, (S)VCDs, and most video files out there. Now that your collection is configured, it time to create your playlists. Simply select the songs you would like to listen to, and drag them over to the playlist pane. If you would like to listen to all of your music, select dynamic mode, and it will create a playlist based on past listening habits. The more you listen to a certain song, the greater chance that song will repeat or a similar song will appear in the dynamic playlist. |
EAN: 2147483647
Pages: 133