Hardware
| There are many, many different types of hardware available for computers, including Webcams, network cards, hard disks, video cards, sound cards, and more. For each of these devices to work, a driver needs to be loaded by the Linux kernel. Unlike systems such as Windows, you don't need to install a special driver that is included with the device. Instead, the driver should already be included in Ubuntu and ready to work out of the box. Of course, this is not always the case, and sometimes hardware can be something of a beast to get working. In this section we tear apart some of the hardware-related problems and attempt to resolve them. Ubuntu Has Not Detected My Old Sound CardMany older devices are not automatically detected by the current 2.6 kernel series. This is done to avoid hardware issues such as crashes. Unfortunately if you have an older sound card, it means you need to roll your sleeves up and poke around to get it running. To do this you need to know which kernel module your card needs and then load the module yourself. Loading the correct module for your device will not cause your system to crash, but loading the wrong one may well do so. You may need to experiment with different modules. Look for the model of sound card you have by referring to your computer's specifications, the name of the device in Windows (if applicable), or by opening the computer case and looking at the sound chip. You can use Google to match a chip's serial number with the chipset type. Here is a list of devices and the relevant kernel module (taken from www.icewalkers.com/linux/howto/bootprompt-howto-8.html):
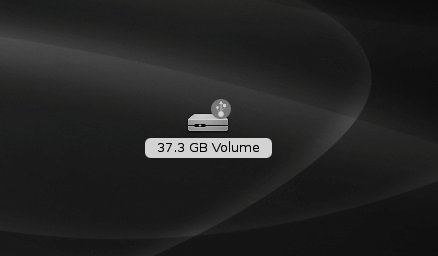
When you have found the name of the module required, try loading it into the kernel: foo@bar:~$ sudo modprobe themodule If there is no error message, it may just be the right one! Run alsamixer to see if there is a sound device for it to configure: foo@bar:~$ alsamixer If the module is the wrong one, alsamixer will not allow you to set the sound parameters. If you can, add the module name to the /etc/modules file so that it gets loaded every time you boot: foo@bar:~$ sudo gedit/etc/modules My Cardbus Adapter Is Not Being RecognizedIf you have a cardbus adapter and are having difficulty getting it work, open a terminal and run this command: foo@bar:~$ sudo gedit /boot/grub/menu.lst Find the line ## ## End Default Options ## below which you can see your kernel. As an example: title Ubuntu, kernel 2.6.12-10-686-smp root (hd0,0) kernel /boot/vmlinuz-2.6.12-10-686-smp root=/dev/sda1 ro quiet splash initrd /boot/initrd.img-2.6.12-10-686-smp Add this to the end of the third line, one space after splash: pci=assign-busses It should now look like this: title Ubuntu, kernel 2.6.12-10-686-smp root (hd0,0) kernel /boot/vmlinuz-2.6.12-10-686-smp root=/dev/sda1 ro quiet splash pci=assign-busses initrd /boot/initrd.img-2.6.12-10-686-smp Restart your computer, and your cardbus device should work. I Plug in My USB Stick and Nothing HappensWhen a USB stick is plugged in, it must be mounted before you can access it. This normally happens automatically, and you should see an icon on your desktop similar to that displayed in Figure 6-8. Figure 6-8. To use a USB storage device you just double-click the device icon that appears. Unfortunately, in some rare cases it doesn't work. To fix it, first check that your system is set to automatically mount USB sticks. Click System > Preferences > Removable Drives and Media and look in the Storage tab. The following checkboxes should be selected:
When you have selected the boxes, click Close, and try plugging your USB stick in again. If you still have no luck, plug the USB stick in and then click PlacesComputer. If there is an additional drive in the Computer window, right-click it, and select Mount Volume. If you still have no luck, you need to manually mount the disk. First, click Applications > Accessories > Terminal, and then plug in your USB stick. Now run the following command: foo@bar:~$ sudo mount -t vfat /dev/sda1 /mnt To view your files use the file manager to access the /mnt directory. Before you finish with the disk, unmount it with: foo@bar:~$ umount /dev/sda1 Tip: Drive Names On some computers you may need to use /dev/sdb1 or /dev/sdc1. Type in the following command when you have plugged in your disk to see which drives are available: foo@bar:~$ ls -l /dev/sd* I Copied Some Files to/from My USB Stick, but When I Access It Later the Files Are Not ThereWhen you plug in your USB stick, Ubuntu automatically mounts it. When you copy files to or from the stick, the files are copied over in bursts. Due to the way the kernel in Ubuntu works, sometimes there can be a slight delay before your files copy. If you remove the USB stick before they have finished copying, some or all of the files may not have copied over successfully. To ensure that everything you do with the USB stick is complete before you remove it, you should unmount it. To do this right-click the Drive icon on your desktop or in Places > Computer, and select Unmount. Give it a few seconds. and when the light on the USB has stopped flashing, you can safely remove it from your computer. My CD-ROM/DVD Is Not WorkingIf you are having problems accessing your CD-ROM/DVD drive, it is most likely because it is not mounted. Click Places > Computer and look at the CD-ROM/DVD drive icon in the window. If the drive is not mounted, the icon looks like a drive; otherwise it looks like a disk. If the drive isn't mounted, right-click it, and click Mount Volume. My CD-ROM/DVD Drive Won't EjectIf you press the eject button on your CD-ROM drive and it won't eject, click Places > Computer, right-click the CD-ROM/DVD drive, and select Eject. If this doesn't work, load up a terminal by clicking Applications > Accessories > Terminal, and type: foo@bar:~$ eject I Bought a Device, but It Doesn't Work in UbuntuWhen you buy a hardware device such as a graphics card, sound card, DVD drive, or webcam the device needs to have a driver installed for it to work. In the Windows world this driver is included with the device, and you simply install it after you have plugged the device in. In the Linux world things work a little differently. Your Ubuntu system includes an important piece of software called the kernel that manages how devices are used. The kernel includes a number of drivers that cover a huge range of hardware out of the box. The philosophy in the Linux world is that you should not even need to install a driverjust install the hardware, and the kernel will pick it up. Although the kernel includes huge support for devices, there are occasions when a driver is not included. At this point you should find out if the device is actually supported in Ubuntu. To do this, search the Ubuntu forums wiki and do a general search on the Internet for your device and the keyword Linux. After a bit of hunting around you will probably find a driver that is available but obviously was not included with Ubuntu. Your first job should be to submit a bug report to say that the driver is not included in Ubuntu (see It Was Suggested I File a Bug Report but I Don't Know How later in this chapter). Include in your bug report the address of the Web site with the driver. My Computer Says It Is Out of MemoryIf you get memory errors and have a reasonable amount of memory (256MB or more) and a swap partition, your memory may be faulty. To check if your memory is working, restart your computer and when you see GRUB loading, press Escape to display the boot menu. Select the Memtest option, and a small tool will check your memory for errors. The memtest utility tries its best to find problems with your memory, but there may be cases where memtest passes but the memory still has problems. To test against this, try swapping the memory with some that is known to work and see if the problems go away. If they do, the memory is certainly faulty. How Can I Copy Photos from My Mobile Phone to My Ubuntu Computer with Bluetooth?Ubuntu has built-in Bluetooth support, but you need to install the GNOME-Bluetooth package. Inside this package is a small tool called GNOME-obex-server. This application allows you to transfer files from your mobile to your computer. When you have installed the package, hit Alt+F2, and enter GNOME-obex-server. A small blue icon appears in the notification area, and you can now send a file from your phone via Bluetooth. I Can Read My USB Storage Device, but I Can't Write to ItIf you are having trouble writing to a USB key or external USB hard drive, there are a number of possible causes of the problem. The first and most simple to diagnose is that you may not have permission to write to the device. When you plug in the drive, right-click the icon that appears on your desktop, and select Properties. In the window that appears, click the Permissions tab and ensure that the Others line has the Write checkbox selected. If this is not selected, you don't have permission to access the drive. Quick Tip If you do have sufficient permissions but still can't write to the drive, jump to the Filesystem Fun section below. To change these permissions, fire up a terminal, and move to the /media folder: foo@bar:~$ cd /media Now take a look at which drives are in there: foo@bar:~$ ls -al In the output that appears you should see "usbdisk" as one of the entries. Now change the permissions so everyone can access it: foo@bar:~$ sudo chmod a+w usbdisk You should now be able to access the disk. Filesystem FunIf you have permissions to access the drive but still can't write to it, the problem is likely to be a filesystem issue. On a storage device such as a floppy disk, USB key, or hard drive, a specific type of filesystem is used to manage how the files are written to the physical disk. Ordinarily, you don't need to worry about this. But when things go wrong, it's time to figure out the details. There are a number of different filesystems. The default Linux filesystem is ext3. In the Windows world, a few other filesystems are available such as FAT16, FAT32, and the NTFS system used by Windows NT. Although FAT16 and FAT32 are fully supported in Ubuntu, an NTFS filesystem cannot yet be written to on a Linux computer. However, recent new code has gone in the Linux kernel to write to NTFS with FUSE or a kernel module. This code is still rather experimental and not included in a stock Ubuntu system, so be careful when playing with it. To find out which filesystem the device uses, run the following command: foo@bar:~$ sudo mount In the output, look for the /dev/sda1 or /dev/sdb1 line. USB devices are usually located at either of these locations. You can see the filesystem next to where is says type. As an example, see the following: /dev/sda1 on /media/usbdisk type ext3 (rw,noexec,nosuid,nodev) In this example, the filesystem is ext3. You can also add the umask=0000 option if you want to allow any user to read the disk. If the file system is supported (ext3, VFAT, FAT16, FAT32) but you still can't access the disk, the filesystem may be corrupted. In cases such as this it makes sense to format the disk with a new filesystem. Before you format your disk, make absolutely sure that you are happy to remove the entire contents of the disk. If you need the files on the disk, have a look around the Internet and post to the Ubuntu forums to see if anyone else can help you before you format the disk. Formatting really is the last option you have available! How Do I Format a Disk?When most people think of formatting a disk, they think it is the process of deleting everything on the disk. Formatting a disk actually involves a little bit more, and it completely replaces the filesystem on the disk. A side benefit to formatting a disk is making the disk work on different computers. Only certain types of filesystems are supported by each OS, and formatting a disk with a common filesystem can ensure that it works with these different OS. As an example, if you format a USB key with the ext3 filesystem, it won't work in Windows. If you use the VFAT filesystem, it will work in both Windows and Linux. Formatting is fairly simple, and you just need to know the location of the device. USB storage devices (such as USB key rings and key fobs) tend to be located at /dev/sda1 or /dev/sdb1. Make sure that you have the right device, and then use one of the many mkfs commands to create the relevant filesystem. As an example, to create an ext3 filesystem, use the following command: foo@bar:~$ sudo mkfs.ext3 /dev/sda1 There are a range of other mkfs commands that can be used to create other filesystems:
Each of these commands is used in the same way. The Keys on My Keyboard Spit Out the Wrong Letters/SymbolsEvery keyboard on a computer has a particular keyboard layout and locale attached to it. The keyboard layout specifies how many keyboard keys you have, in what order, and the locale specifies what each key does. The locale is particularly important as letters and symbols vary dramatically in different locales. Aside from different types of letters, common symbols are often placed in different areas. As an example, on some keyboards the double quote (") is on the key above the right shift key. On some keyboards it is Shift+2. Having the wrong keyboard settings can be incredibly frustrating, and if the symbols printed on your keys don't match up to the symbol that spits out when you press it, your keyboard settings are incorrect. To fix this click System > Preferences > Keyboard. Click the Layouts tab, and next to the Keyboard model box click the... button to select your keyboard model if you know it. If you don't know it, use the default setting. Now click the Add button, and resize the window so you can see the keyboard layout diagram more easily. Choose a different locale that matches your keyboard, and then click OK. Now click on the Keyboard tab, and use the Type to Test Settings box to test if your keyboard settings are correct. My Serial Mouse Is Not WorkingTo get a non-USB serial mouse working, first run this command: foo@bar:~$ sudo dpkg-reconfigure xserver-xorg When asked for the mouse device, select /dev/ttys0 for COM1 or /dev/ttys1 for COM2. My Mouse Scroll Wheel Does Not WorkTo enable your scroll wheel, you need to run the X configuration program: foo@bar:~$ sudo dpkg-reconfigure xserver-xorg One of the questions asks if you would like to enable the scroll wheel. Enable this, and then restart your desktop. Your lovely little scroll wheel should work now. My Remote Control Doesn't WorkIf you want to use a remote control with your Ubuntu computer, you need to install the Linux Infra Red Control (LIRC) package in Synaptic. LIRC is the library, and it supports a wide range of remote-control units. The first step is to determine which LIRC driver is required for your particular remote control. Take a look at the list of remotes on the LIRC site at www.lirc.org/ or use your favorite search engine if it is not listed on the site. LIRC includes a number of built-in drivers, and you can see which ones are included by running the following command: foo@bar:~$ lircd driver=help When you know which driver is required and you know your installed LIRC supports, you can edit the hardware.conf file in the /etc/lirc file to configure which one is used. Simply set the DRIVER line to the driver you selected. With this complete, restart LIRC: foo@bar:~$ /etc/init.d/lirc restart With LIRC ready and running, you can test it by running the following command: foo@bar:~$ /etc/init.d/lirc restart When you press the buttons on your remote control, a code should appear. This code can be mapped to a button on your remote by editing the lircd.conf file in /etc/lirc. For specific configuration details, see the LIRC Web site. How Do I Find Out Which Hardware Works in Ubuntu before I Purchase It?Currently, there is no centralized device database to search for hardware that works with Ubuntu, although work is going on to support this in a future version of Ubuntu. A good place to start is to look at https://wiki.ubuntu.com/hardware support. You should then search the discussion forums and use Google to find out if anyone else has used it. Although not an ideal way of digging out the information, the forums and Google are likely to give you the information you need until the full device database is complete. |
EAN: 2147483647
Pages: 133