Multimedia
| Multimedia is playing an increasingly important role in modern desktops, and most people like to listen music, watch movies, and watch videos on their desktop. Unfortunately, multimedia has had something of a checkered history in the Linux world due to the licensing problems with the all important codecs that are required to view and hear your media. This section explores some of common problems faced with multimedia and your Ubuntu desktop. Tip: Restricted Formats You can get further help and guidance on restricted media formats that don't ship with Ubuntu by visiting https://wiki.Ubuntu.com/RestrictedFormats. I Downloaded a Particular Media File, and It Won't PlayIncluded with Ubuntu are Open Source codecs such as Ogg Vorbis and Ogg Theora, but the vast majority of media on the Internet uses restrictively licensed codecs such as MP3, Windows Media, QuickTime, and others. Ubuntu does not ship these Codecs for legal and philosophical reasons. Not only would shipping the Codecs possibly breach the original license, but Ubuntu is fundamentally oriented around a totally free and Open Source desktop. There are methods for playing these media formats, and if you want to install them, refer to the Ubuntu Forums for more details. My DVD Won't PlayAs with the previous problem, DVD playback is also a somewhat restricted process that requires special software to be installed. The software is available if needed. Again, refer to the Ubuntu Forums for more details. DVD Playback Is Jittery and JumpyWhen you watch DVD movies on your computer, you may find that they are jittery and unstable. In most cases the problem is that direct memory access (DMA) mode in your DVD drive is not enabled. By enabling this mode, your problems should disappear. Check if DMA mode is enabled by running this command: foo@bar:~$ sudo /sbin/hdparm /dev/hdc | grep dma Most DVD drives are /dev/hdc, but change the letter if yours is different. If DMA mode is not enabled, you will see this: using_dma = 1 (on) To turn on DMA mode, run this command: foo@bar:~$ sudo /sbin/hdparm -d1 /dev/hdc Now try to play your DVD. If this solves your problems, you should edit /etc/hdparm.conf and add the following block: /dev/hdc { dma = on } When I Start Some Applications, Ubuntu Says I Don't Have Access to /dev/dspThere are literally hundreds of thousands of applications for the Linux system, and many of them have different requirements and dependencies. One area in which this can be a problem is audio software. Each audio application relies on one of many sound servers: pieces of software that manage communication with the sound card. These sound servers come in many forms, including esd, gstreamer, arts, and jack. In Ubuntu, esd is the default sound server. Although the multimedia applications included with your desktop work fine, some other applications (such as Audacity shown in Figure 6-5) may complain when you start them that something else has access to /dev/dsp. To solve this click Applications > System Tools > System Monitor. In the list of processes click on esd, and click the End Process button. By stopping esd you can now use the application. Figure 6-5. Audacity is a typical application that requires this recipe.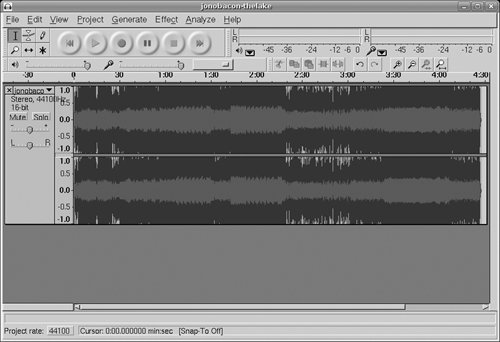 Tip: But Remember... Of course, by killing esd, those applications that require esd will not run. To use those applications (such as the default multimedia application included in Ubuntu) start esd by pressing Alt+F2 and typing esd into the textbox. You will hear some beeps to indicate esd is now running. My Microphone Doesn't WorkAlthough it seems like an obvious first point to check, ensure that you have plugged your microphone into the right socket. Many computers include a number of audio inputs/outputs, and they can be easily confused. In recent years a number of hardware manufacturers seem to have gone out of their way to poorly mark these sockets, so don't worry if you get them mixed up. If in doubt, consult your manual. With the microphone properly plugged in, load up the recording level monitor by clicking Applications > Sound and Video > Recording Level Monitor, and speak into your microphone. If you see nothing appearing on the scale, you need to turn on and adjust the volume of your microphone. To do this, right-click the volume icon in the notification area, and select Open Volume Control. Inside the dialog that pops up, click the Capture tab, make sure the microphone sliders are near the top and that the small microphone icon does not have a red cross on it. This icon mutes the devices, and clicking it toggles it. Now speak into the microphone, and you should see the recording level monitor flash. To record your voice click Applications > Accessories > Sound Recorder. How Do I Change the Visual Theme?To change the way your Ubuntu desktop looks, click System > Preferences > Theme, and you will see Figure 6-6. Figure 6-6. Changing themes is simpleclick it, and it changes!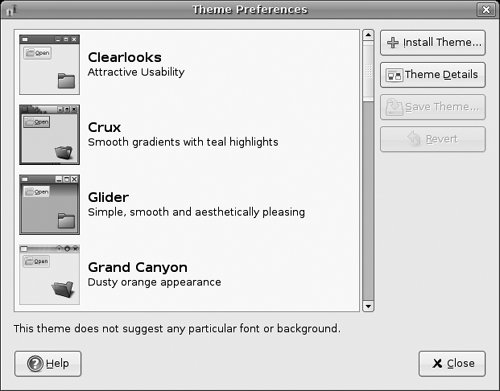 From there, you can select predefined themes or click details to create a custom theme. Changes are applied immediately. If you click Details, you get a dialog box with three tabs. All themes are separated into three parts: the elements (buttons, text fields, etc.), the window frame (the title bar), and icons. If you have downloaded new themes, drag them into the theme details window, and click Install. When you are done, click Close. How Do I Find and Install New Desktop Themes and Backgrounds?We all love tweaking our desktops so they look individual to our own tastes and preferences. Luckily the desktop is very flexible in how it can be visually configured. To make this as simple as possible, the GNOME Art Web site was created to host a huge array of wallpapers and themes. You can use the site to spruce up your desktop. Tip: Art Web Sites There are a number of sites that help make your desktop look pretty. See http://art.ubuntu.com, http://art.gnome.org or http://gnome-look.org. To make this even easier, there is a tool called art manager that can be used to find new themes and backgrounds, but it is not installed by default. To install it, use Synaptic to install GNOME-art. After it is installed, click System > Preferences > Art Manager to load it. To find desktop backgrounds click Art > Backgrounds > All. If you don't want to see GNOME backgrounds, click Art > Backgrounds > Other. Alternatively, if you only want GNOME backgrounds, click Art > Backgrounds > GNOME. The art manager downloads thumbnails and descriptions of all available backgrounds. The latest backgrounds are at the bottom of the list. Select one from the list. To show the background in detail, click Preview. To install it, click Install. The change background window then shows the installed background. From there you can optionally change its style. When you're done, click Finish to get back to the art manager. To find desktop theme elements click Art > Desktop themes > Application. The latest are at the bottom. To see a sample window displaying the selected theme, click Preview. To install the theme, click Install. Then from the Theme preferences window, click Theme-details, and select the new elements from the list. Click both Close buttons to go back to the art manager. Finding new window borders and icon themes works similarly. You can also install splash screens and login screens, but the former are not used by default in Ubuntu (though they can be enabled in the session manager), and the latter cannot be installed directly. GTK+ engines are seldom used. None of the applications that are installed by default use it. How Do I Turn My Ubuntu Computer into a MythTV Box?MythTV is a collection of applications that can convert a computer into a full-fledged media center with the capability to pause live TV, record shows, play music, play videos, play DVDs, access weather information, and more. More details about MythTV are available at www.mythtv.org/. MythTV also goes to great lengths to look like a normal TV device and not like a computer plugged into a TV (see Figure 6-7 for an example). Figure 6-7. MythTV makes TV so much more fun!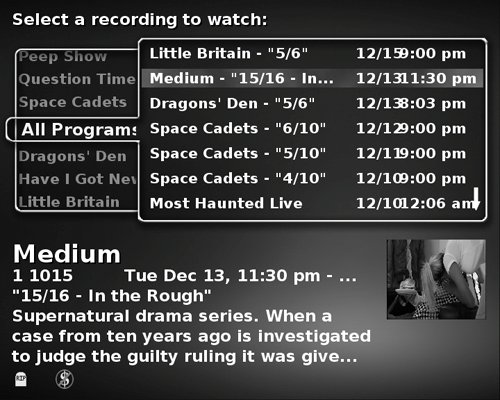 To install a full MythTV system, install each of the mythtv packages that are available in Synaptic. You also need to install a few other packages:
MythTV comes in two major parts: the front end and the back end. The back-end is used to perform the grunt work such as recording and processing shows, and the front-end provides an attractive user interface. With this architecture you could run the back end on a bulky, noisy machine elsewhere in the house and run the front end on a fanless, attractive little machine in your living room. Unfortunately, we don't have the space to cover the configuration of MythTV. Instead refer to the Ubuntu Forums. |
EAN: 2147483647
Pages: 133